Uploading a local data source and plan file
When you choose to upload both the data source and the plan file, the system automatically generates a plan file that includes the content objects derived from the column headers of the specified data source.
In the automatic plan file, all content objects default to text content objects. You can modify the content object type as well as add and remove content objects by manually modifying or replacing the plan file. For details on how to modify, add and remove content objects, see the uPlan and uCreate documentation.
The XMPieRecipientKey is the recipient's unique identifier and is used to identify the recipients for various uses. For example, it can be used in links in a printed postcard or email that refer the recipient to a website. It is also used to identify the recipient in analytics, and when exporting data out of the system.
To upload the local data source and plan file:
-
Open the library.
-
In the left pane, click Data Source.
The Data Source details pane is displayed.
-
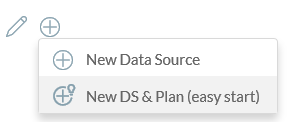
In the Data Source details pane, click the Add
 icon.
icon. -
Select New DS and Plan (easy start) from the menu.
The New Data Source dialog box is displayed.
-
From the Data Source Type dropdown list, select the data source.
-
Click Choose File, navigate to the file and click Open.
-
Click Save.
The Get Started: Identify Recipients dialog box prompts you to identify the recipients.
-
From the Recipient Table dropdown list, select the table that contains the records of the recipients you want to target.
-
To define the XMPieRecipientKey Logic, select one of the following:
-
Use an auto-generated secure ID (PersonalEffect 9.3 or above): selecting this option generates a unique, non-guessable and secure Recipient ID (for example, 5adcf67b419a4ad796da4458d25a038e).
-
Select 1 Field: select the column header that uniquely represents the recipient. For example, an email address or a membership number uniquely represents each recipient.
-
Select 2 Fields: select the column headers that represent the recipient, for example FirstName and LastName.
The system checks that the XMPieRecipientKey uniquely identifies the recipient. If the XMPieRecipientKey is identical to more than one recipient, the system appends digits to the value to ensure it is unique. For example, if there is more than one Joe Smith, the second Joe Smith appears, for example, as Joe.Smith001.
-
-
Click Next.
The system automatically creates the plan file based on your selected recipient table and XMPieRecipientKey and replaces both the data source and the plan file.
Exporting the data source from the library
You can export a copy of the current local data source. Only a local data source can be exported.
To export the data source:
-
Open the library.
-
In the left pane, click Data Source.
The Data Source details pane is displayed.
-
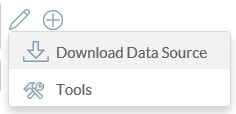
Click the Edit
 icon.
icon. -
Select Download Data Source from the menu.
-
In the Export Local Data Source dialog box, select the file type you want to export and click Export.
-
Navigate to where you want to save the file and click Save.