Working with mockups
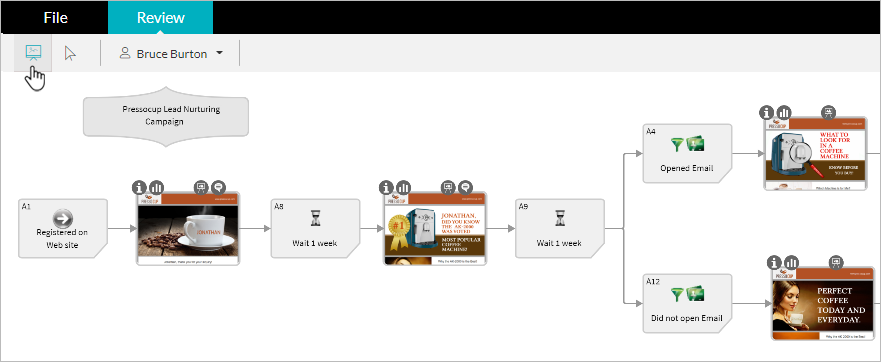
Mockups are scaled or full-sized images of a design used for design evaluation, promotion or to acquire feedback from other users. You can enhance your project flow by adding mockups to its nodes. You can then switch between viewing the flow with the icons representing the touchpoint type or with the mockups representing the visuals. Mockups are static images and do not vary according to recipient.
Note: Reviewers can view and magnify mockups. They cannot add, delete or save them.
Add mockups to nodes
-
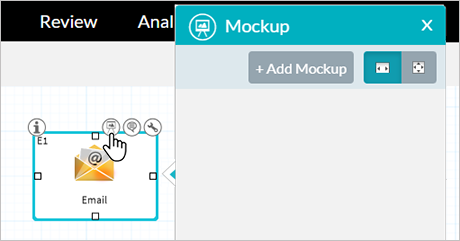
Select the node and click the Mockup icon
 .
.The Mockup popup window is displayed.
-
Click Add Mockupand navigate to the file(s) you want to add.
-
Select one or more mockup files.
The supported file extensions for mockups are: .gif, .jpeg, .jpg, .png.
-
Click Open.
The images are uploaded to Circle and displayed in the Mockup window.
The mockup icon on the touchpoint is now highlighted
 .
When the Mockup window is closed, you can click the mockup icon to open
it.
.
When the Mockup window is closed, you can click the mockup icon to open
it.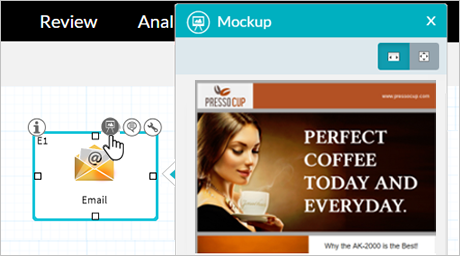
Resize mockups
If the mockup you have uploaded does not fit the mockup frame, you can choose to resize it either by fitting its width within the frame or by fitting the entire image within the frame.
Fitting Width
-
To fit the mockup’s width within the frame, click the Fit Width button
 until
the image width fits the frame.
until
the image width fits the frame.
When you choose to fit the image width, you may not be able to see the entire image since it may be truncated at the bottom.
Fitting Image
-
To fit the entire mockup within the frame, click the Fit Image button
 . The
image is scaled down while preserving its aspect ratio.
. The
image is scaled down while preserving its aspect ratio.
Review the diagram with mockups
After you've added mockups, you can review the diagram with the mockups.
On the toolbar, click the Show
Mockups icon  to display
the diagram.
to display
the diagram.