Working with nodes
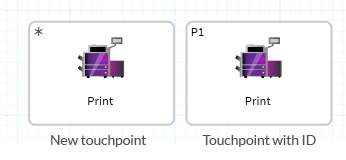
You can design the flow by dragging nodes from the toolbox and dropping them onto the canvas. A new node is marked with an asterisk (*) which indicates that this is a newly-added node that has not yet been saved. Once the diagram is saved, the node gets assigned a node ID according to its relative position in the diagram (for example, P1 for the first print touchpoint or E2 for the second email touchpoint).
Add titles to nodes
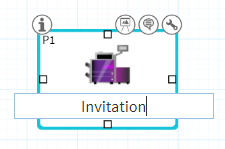
Although some nodes and connectors are self-explanatory, it is often helpful and sometimes necessary to add a title. Additional information can be added to any node by clicking the Information icon. If scheduling is defined for a node, the node title becomes the touchpoint name.
-
Select the node and click the Title text box.
-
Type the node title.
-
When you finish typing, click outside the node.
Modify the node image
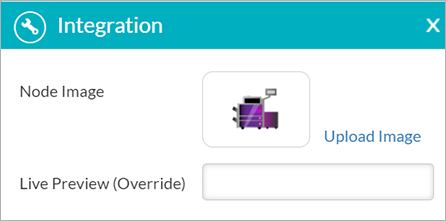
Each node in Circle has a default icon that appears on that node. It is possible to replace the default image with a custom one.
-
Select the node and click the Integration icon
 .
.The Integration popup window is displayed.
-
In the Node Image field, click Upload Image to upload a new image.
Group nodes
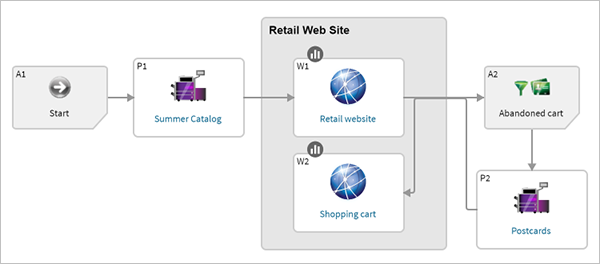
Sometimes, there is a need to group nodes together. For example, several webpages might be grouped together into a website.
-
From the Orientation tools group, drag the group node
 to the canvas.
 -
Edit the name of the group node name.
-
Drag the nodes you want to include in the group inside the group node.
The nodes are automatically locked inside the group and the group node size automatically adjusts to include all the grouped nodes.
Add information to the node
Planners, Builders and Account Administrators can add information to nodes.
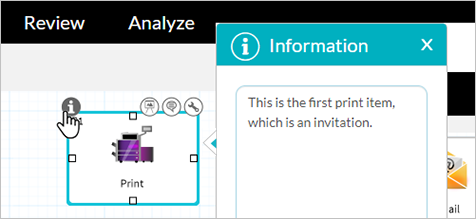
Although some nodes are self-explanatory, it is often helpful to add more descriptive information. Additional information can be added to any node by clicking the Information icon and typing in a textual description or vital information, such as planned launch date and key performance indicators.
-
Select the node and click the Information icon
 .
.The Information popup window is displayed.
-
Enter the text description.
-
When you finish typing, click outside the popup window to close it. The information icon color will change from white to black to indicate that information exists.
Node icons
Hovering over touchpoints, enhancers, actions and orientation nodes in the diagram displays a number of icons that allow you to do any of the following:
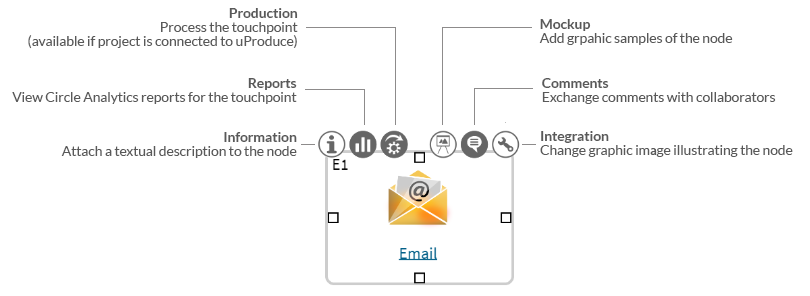
Highlighted icons indicate that they have content. Your user role determines which icons are available to you.
Connect nodes
After you have a few nodes, connect them by dragging a handle from one node to another.
By adding connectors between the nodes, you can show the relationship between them and the sequence of steps in the workflow.
There are two types of connectors:
-
Arrow: Connects touchpoints or touchpoints and the recipient nodes. This type of connector illustrates the sequence of events for a single recipient. The direction you drag determines the direction of the arrow.
Example:

-
Dotted line: Connects a node - usually a touchpoint - with an enhancer describing a creativity effect. This connector shows that the two nodes are associated. For example, a postcard connected to a QR Code implies that the QR code appears on this postcard. An association between uImage and email implies that a personalized image is included in the email message. An association between a map and a webpage touchpoint implies that the map appears on that webpage.
Example:

All connectors can include text to clarify the process being depicted. Simply select the connector and type a description in the text box.
When you connect two nodes, the connector type is automatically determined based on the start and end nodes.
Add comments to nodes
Adding comments to a node is an efficient way to give feedback on various project components and to initiate discussions with other project collaborators.
Reviewers as well as all other users can add comments to diagram nodes. Adding comments can be done at any stage of the project life cycle: planning, building and reviewing.
The comments are visible to all users who have access permissions to the account and project in which the comment was added.
To add comments:
-
Hover over the node and click Comments
 .
.The Comments popup window is displayed.
-
Add your comment and click Post.
Your comment is displayed in the thread. You can see the author name, the text of the comment and the date and time of the comment creation. The grey circle indicates that you have already read this comment.
When you close the Comments
popup window, the Comments icon
turns grey  .
.
Receive email notifications
As soon as a comment is created, users who have access permissions to the given account and project receive an email notification.
The email notification contains the name of the comment creator, the names of the project and node to which the comment was added and the comment text.
If the comment contains a number of replies, only the last two appear in the email in addition to the initial comment. To see the entire thread, you need to open the Comments popup window.
To see the comment, click the View Comment in Circle link inside the email. Clicking this link opens the relevant project. Based on the information appearing in the email, find the node to which the comment was attached and click the Comments icon.
By default, users who have permissions to a specific account or project automatically receive email notifications each time a comment is added. Users who do not want to receive email notifications of comments can disable this option in the My Profile dialog box.
To stop receiving email notifications:
-
Click your username in the upper right corner of the Circle window and selectMy Profile.
-
In the My Profile window, deselect Send me an email notification when a Comment is added.
-
Click OK.
Your settings are saved.
Reply to comments
Users can hold discussions using the Comments option. As soon as an initial comment is created, other users can respond to it. The entire discussion thread appears in the Comments pop-up. The replies are indented under the initial comment. Each comment is marked with a status circle:
-
Red circle: Unread comments
-
Grey circle: Read comments
As soon as you have read a comment, click the red circle to mark the comment as read.
To reply to a comment:
-
Open the project.
If you received an email notification, click the View Comment in Circle link to open the project directly from an email. Click the Comments icon
on the node in which the initial comment was created. -
In the Add a reply text box, type your reply and click Post.
As soon as you add a reply, an email notification is sent to all the users who have permissions to this project and account and who opted to receive email notifications. The email message contains the initial comment and the last two replies.