Managed websites
Each project can support one managed website only. Before you can create a managed website, you need to first upload the plan file and data source to the system. The plan file’s logic and data source content objects can then be used to personalize your web pages.
In a managed website, Circle manages the site directories, which include all the files associated with a website, including HTML files and images.
Creating the site generates the following folders to the XMPL server:
-
Test: For testing purposes
-
Live: For the public domain
You can create, design and personalize your website pages using any web design tool, and add XMPL tags using the Cheat Sheet for web.
In a managed website, Circle generates a site directory containing the following two files:
-
Sample HTML file, named default .htm
-
Configuration file, named xmpcfg.js, which contains the following:
-
XMPL server URL
-
Token: Confidential code that is exclusive to your current project and enables your website to securely access data.
-
Create a managed website
Before creating a managed website, you need to first connect your project to uProduce and upload a plan file and data source to the system.
Note: If you want to create a custom website that resides on your local network, see Working with a custom website.
To create a managed website:
-
Open the library.
-
In the left pane, click Website.
The Websitepane is displayed.
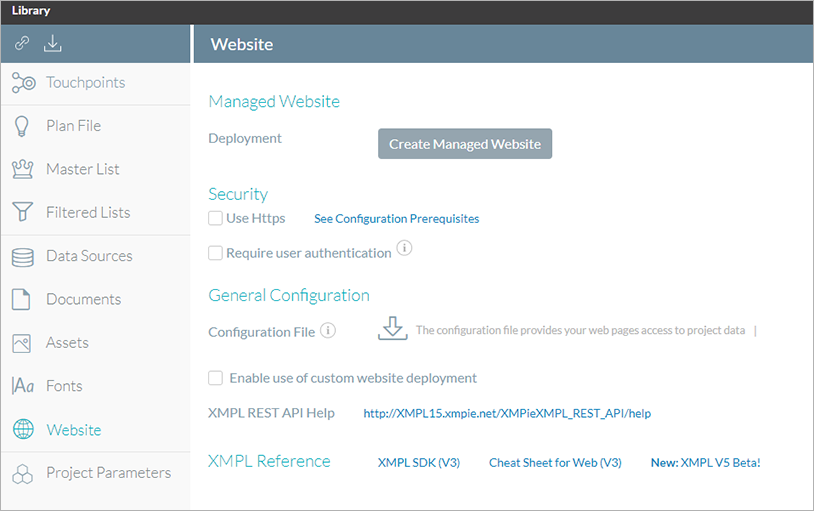
-
In the Managed Website area, click Create Managed Website.
The website name is displayed. By default, the website name is the same as your project, without spaces.
You can rename the website by typing a new name into the Website Name text box, if required. This is your only opportunity to change the website name.
-
Click Create Managed Website again.
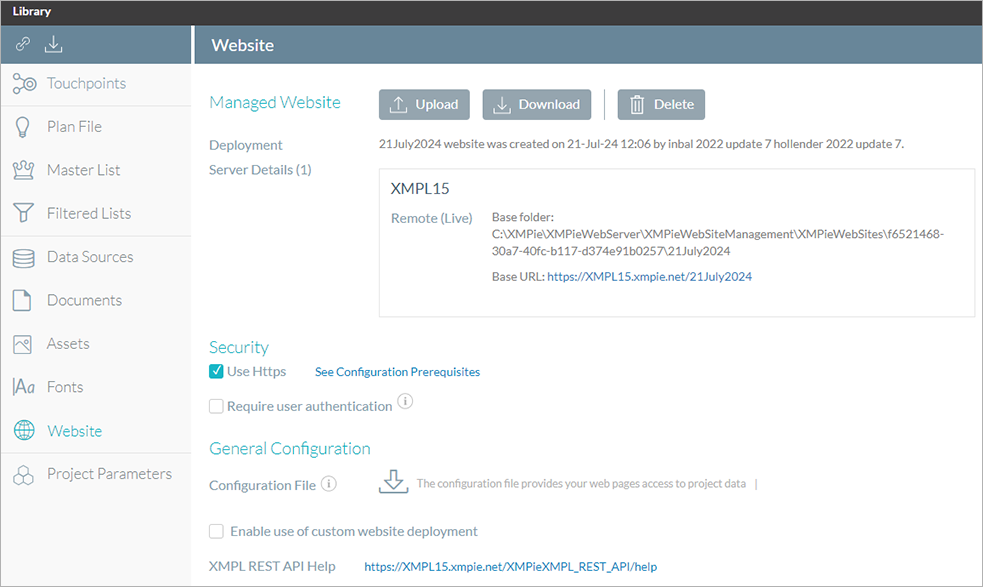
The system begins the process of creating the website. When successfully completed, the Server Details pane is displayed.
-
Click the Base URL link under the Testing folder to display a sample landing page.
Scrolling down the pane displays the Base URL link under the Remote (Live) folder.
Circle generates a site directory containing a sample HTML file named default.htm.
-
If you're using XMPL 3.5 and lower, in the General Configuration area, click the
 icon to download the generated configuration file (xmpcfg.js) and
place it in the site root folder.
icon to download the generated configuration file (xmpcfg.js) and
place it in the site root folder.If you're using XMPL 5.0, your configuration file (xmpcfg.js) will be uploaded automatically to the site root folder.
-
Click Upload to upload your HTML files to your website. You can download these files to update them, and then upload them again.
Note that for every additional website upload, a backup of the website content will be created (up to 10 backups).
Watch a video
Define the XMPieRURL content object value
When uploading a data source to the system, you are asked to create a recipient ID. Creating a recipient ID allows you to adapt the data source to the web. Adapting the data source to the web allows you to create a friendly and unique personalized URL. The friendly URL can then be used as the auto-created XMPieRURL content object value to represent the full URL path to the site’s targeted page. The friendly URL includes the domain name and the recipient key.
You now need to apply a value to the content object. The value is the friendly URL (FURL) you configured for the associated touchpoint.
FURLs are defined from the webpage touchpoint. Only touchpoints with a defined FURL appear in the dropdown list. The first touchpoint that includes a FURL is the default value in this field.
To define an XMPieRURL content object value:
-
Select a touchpoint that includes the FURL you want from the dropdown list.
The FURL belonging to the touchpoint you select is the value applied to the XMPieRURL content object.
The configuration file
The configuration file is generated by the system when you create a managed website. It contains the following information:
-
XMPL server URL: The URL you use to access the XMPL server.
-
Token: Confidential code for the current project to allow your website to securely access the content objects and their values for each recipient.
Note: The same configuration file can be used with multiple custom sites within the same project. If you are working with a custom website, you need to create the configuration file manually.
Revoke the token
Circle creates a configuration file, which is exclusive to each project.
The configuration file includes a confidential code that allows access to your project data.
To prevent unauthorized personnel from accessing your project data, you can revoke the token. Revoking the token disables the current token and generates a new configuration file containing a different token for future use.
After revoking the token, you need to replace the existing configuration file with the one containing the newly created token as follows:
-
Managed site: Redeploy the site to replace the existing configuration file on the XMPL server. To preview the website in a local environment, you need to first download and replace the existing configuration file manually in order to accept recipient data.
-
Custom site: Download the configuration file and save it in your site Test and Live folders.
To revoke the token:
-
Open the library.
-
In the left pane, click Website.
-
The Website details pane is displayed.
-
In the Configuration file area, click the Revoke Token link.
A message is displayed, warning you that revoking the token disables the website and asking you to confirm this request.
-
Click Yes.
Your site can no longer be accessed using the configuration file with the revoked token.
A new token is available in the regenerated configuration file. To enable access to your project data, you need to redeploy the configuration file.
Redeploy a managed site
The system generates a configuration file with a new token following the revoking of the token that allows access to project data.
When you are working with a managed website, you need to redeploy the website.
Note: If you are working with a custom website, you need to download the regenerated configuration file and replacing the existing one.
To redeploy your website:
-
Open the library.
-
In the left pane, click Website.
In the Managed Website area, click Redeploy.
The system begins the process of recreating the website. When successfully completed, the Server Details pane is displayed, showing the name of the server and the respective paths to the Testing (Test) folder and to the Remote (Live) folder.