Configuring initial settings after uStore installation
Summary: This article describes the first settings required after installing uStore.
Audience: customers who have purchased XMPie uStore, and specifically those users who are responsible for creating new online stores. Channel partners and support staff who are involved with installation, will also find this document a useful reference.
Overview
After installing uStore, there are a number of settings that you need to adjust to get the server ready for use in your infrastructure, and to localize things for your region. This document serves as a checklist of the items that you need to change to get your site ready for use quickly.
The settings discussed in this article, would generally need to be set only once after uStore installation to prepare the server for use in your region, and for your network environment.
Unless otherwise specified, you access all the settings discussed by logging in to your uStore server's administration website, also refer to as the Back Office: http://<server name or IP address>/uStoreAdmin.
Email settings
uStore is able to send order confirmation emails at different stages of the order and production process. To set up the email, you need to configure the following:
SMTP server settings
-
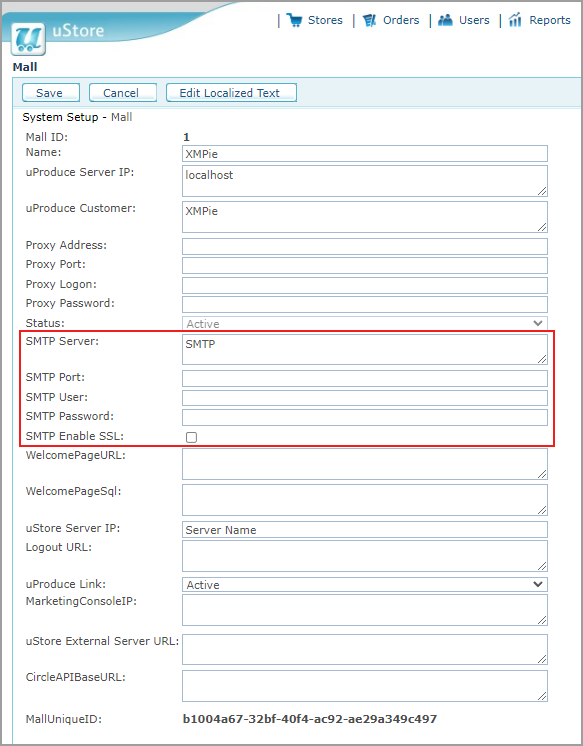
Go to Presets > System Setup > Mall.
-
Click the Edit icon.
-
On the Mall page, enter your SMTP Server name or IP address.
-
If your SMTP server uses a non standard port, enter the required SMTP Port.
-
If your SMTP server requires authentication, enter the SMTP User and SMTP Password.
-
Click Save.
Email message sender
In many cases, SMTP servers will only send messages from known email users. Also, for email messages sent to customers, you want to have the email sent from a real email user or preferably an email group so that if the customer replies to the email, someone in your organization will receive the email and manage the customer's request.
-
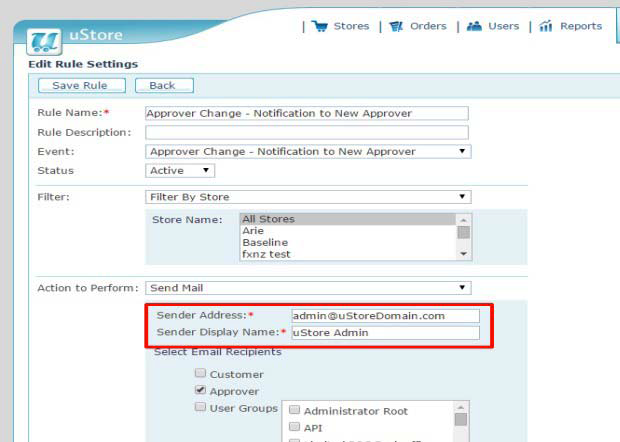
Go to Presets > Trigger Setup.
-
Click the name of an email trigger (triggers which send emails are identified by an email icon).
-
Enter a real email address as the Sender Address.
-
If desired, you can change the Sender Display Name.
-
Click the Save button.
-
Repeat steps 2‐5 for each of the remaining message templates.
Localization settings
By default, uStore includes US English, French, German, Japanese, Spanish, Dutch and Portuguese language localizations. If you need to add an additional language for your uStore customers, you do the following:
-
Go to Presets > Localization.
-
Click New.
-
Select the Culture (language and country) that your new localization is intended for.
-
Click Save.
A list of links is displayed. These links enable you to edit different pieces of text in the application. However, there are a lot, and it is generally easier to edit the required texts on an exported list and then import it back to uStore.
-
To export the list of texts for localization, click Back.
-
Click the Export button.
-
In the Source Culture list, select the culture that you will use to translate from.
-
In the Target Culture list, select the culture of the localization that you have just created.
-
Click the Download Entire Translation button.

-
Save the XML file to your desktop.
-
In the spreadsheet, replace all the [no localization] fields with the required translation.
-
When the translation is complete, return to the Presets >Localization page and import the file back to uStore.
Available countries
Billing and shipping addresses in uStore include a country selector. By default, uStore is installed with only Unites States enabled. To enable billing or shipping addresses to other countries you need to enable them.
-
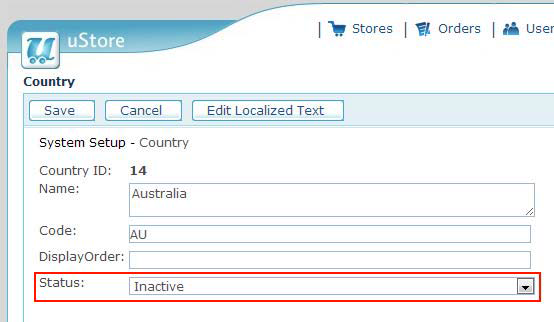
Go to Presets > System Setup > Country.
-
Locate the country that you want to enable.
You may need to click the numbers at the bottom of the screen to advance to other pages in the list. -
Click the Edit icon next to the country that you want to enable.
-
In the Status list, select Active.
-
Click Save.
-
Repeat steps 2‐4 to enable additional countries if required.
-
You can also change the status of United States to Inactive if it is not relevant to your region.
Available States/provinces
Billing and shipping addresses in uStore include a selector for the state/province. By default, uStore is installed with states and provinces for some countries only.
If you enabled an additional country in the previous step (Available countries), and it is not one of the countries with predefined states and provinces, you will need to add the states/provinces.
-
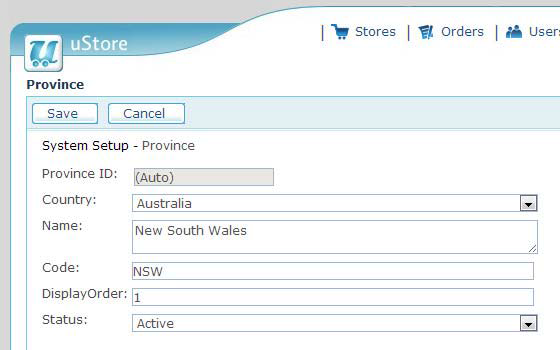
Go to Presets > System Setup > Province.
-
Click Add New.
-
Select the Country, and enter the details of the new province.
-
Display Order is optional. You must set the Status to Active.
-
Click Save.
-
After saving, locate your new province in the list.
It will be added to the end of the provinces list.
-
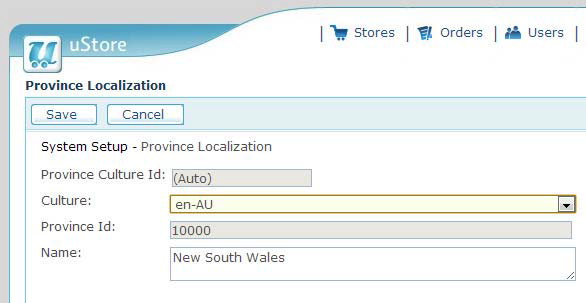
Click the Edit icon next to the new province.
-
Click the Edit Localized Text button.
-
Click Add New.
-
In the Culture list, select the required culture.
-
In the Name box, enter the name of the new province as it is written in the language of that culture.
-
Click Save.
-
Repeat steps 7‐11 for all the cultures used in your stores' billing and shipping addresses.
-
Repeat steps 2‐12 for all the states or provinces in the country.
Currency setup
By default, uStore includes US Dollar, Euro and British Pound currencies. If you create stores that offer products in other currencies, you need to set up the currency so it can be selected when creating the online store.
-
Go to Presets > Currency Setup > Add New.
-
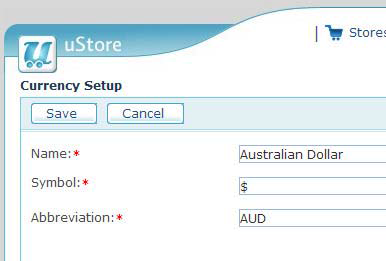
Enter the Name, Symbol and Abbreviation for the new currency.
-
Click Save.
Exchange rates
If your online stores will sell products in more than one currency, you need to define the exchange rates to convert between the currencies.
-
Go to Presets > Currency Setup.
-
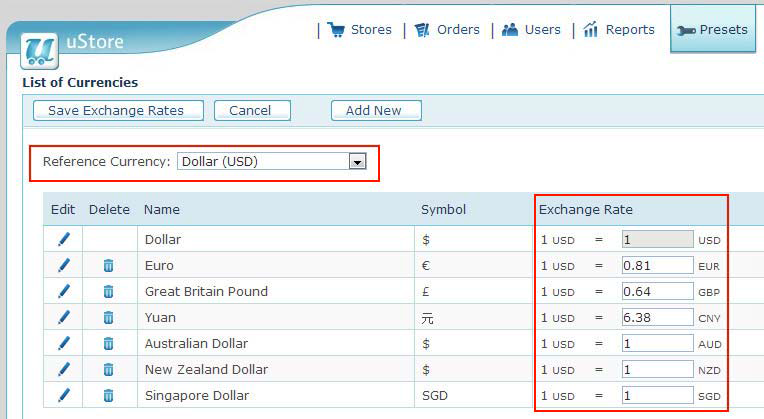
Select the Reference Currency to be used as the base for the conversion.
-
In the Exchange Rate column, enter the exchange rate for all currencies that you have set up. (Note that the exchange rates are static, and therefore you may have to adjust these manually over time.)
-
Click Save Exchange Rates.
Tax Setup
If you need to add tax to the price of products in your online stores, you can add new tax settings for different countries as required.
-
Go to Presets > Tax Setup.
-
Click New Tax.
-
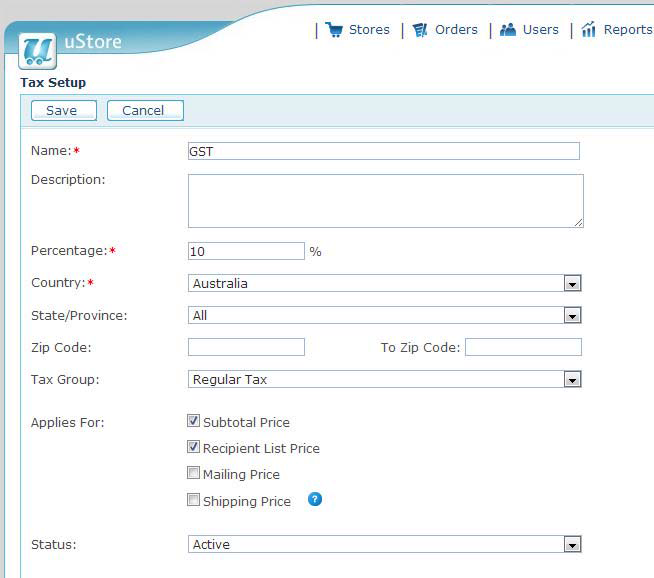
Enter a Name for the tax and set the Percentage.
-
Select the Country and State/Province that the tax applies to. (State/Province will only appear if the selected country has states or provinces setup.)
-
Select which prices the tax Applies for.
-
Click Save.
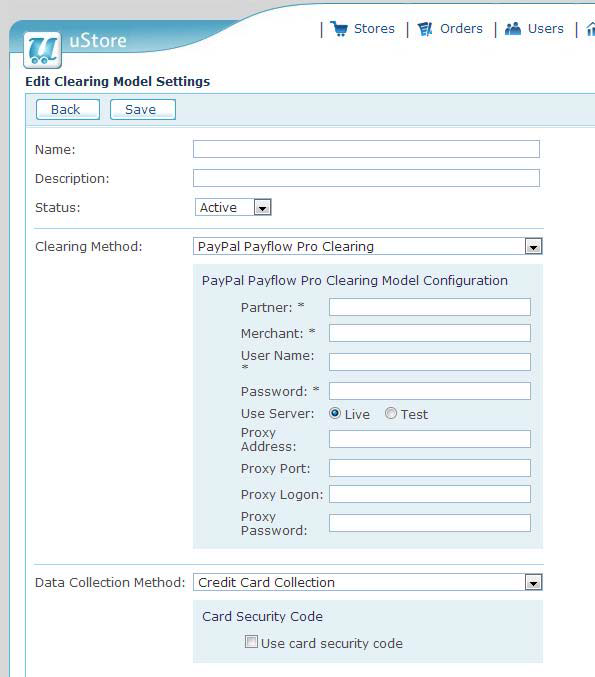
Clearing model setup
If you use an online credit card clearing service, you need to set it up before you can select it in your store.
-
Go to Presets > Clearing Model Setup.
-
Click New.
-
Enter a Name for the new clearing method.
-
In the Clearing Method list, select a clearing method and enter the required account information.
-
Click Save.
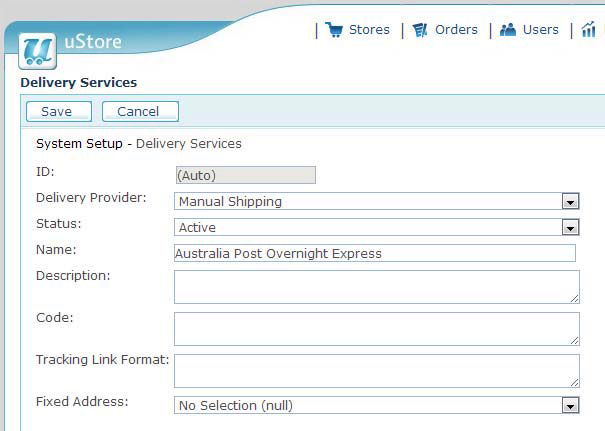
Delivery Services
uStore includes automated delivery price calculations for FedEx and UPS. This is very useful for the American market, but these services are often not available or too expensive in other countries. So, uStore enables the setup of manual shipping and manual mailing delivery services.
Note that you can also create a delivery service where there is no actual delivery – for example, "Store pickup".
-
Go to Presets > System Setup > Delivery Services.
-
Click Add New.
-
Select the delivery provider.
-
Manual means that the pricing will be entered manually.
-
Shipping is used where all the products in the order will be packaged and shipped together to a single address.
-
Mailing is used where the product will be mailed individually to each recipient in the order – for example, each postcard or greeting card could be mailed to the recipient instead of all being packed together and shipped to one address.
-
Void – means that no delivery service will be applied.
-
-
Set the Status to Active.
-
Enter a Name for the delivery service.
-
Click Save.
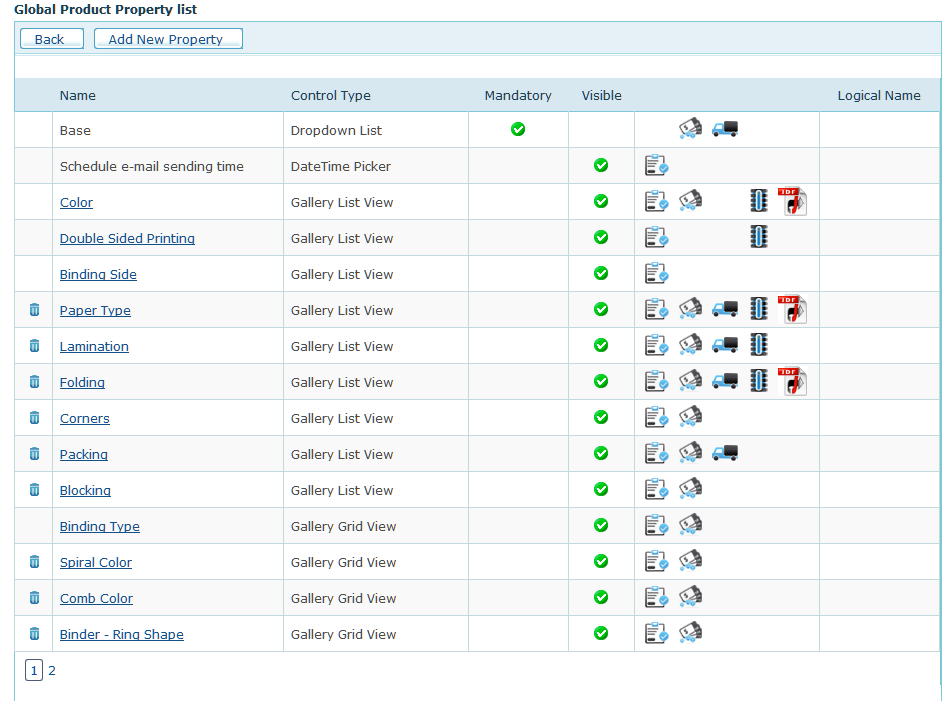
Global Product Properties
uStore comes preconfigured with a number of product properties for different finishing options. If you will offer specific paper types, you can edit the Default Paper Types. Also, you can set up new product properties for different finishing options that you want to make available for products in the online stores.
-
Go to Presets > Global Product Properties Setup.
-
Do one of the following:
-
To edit an existing property, click its link.
-
To add a new property, click the Add button.
-
-
Click Save.
Global Addresses
To enable users to select a delivery or pickup addresses from a list, you can set these addresses in the Global Addresses page.
-
Go to Presets > System Setup > General Pickup Address.
-
Click Add New.
-
Add the required address.
-
Click Save.
Manufacturers Setup
If you will have some products created at a different location, you can setup different manufacturers to specify the pickup location of those products. This can also be used to affect shipping price.
-
Go to Presets > Manufacturer Setup.
-
Click New Manufacturer.
-
Enter a name to be displayed for the manufacturer.
-
Enter the required address fields.
-
Click Save.
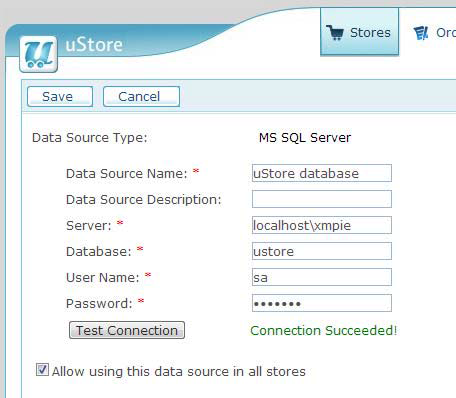
Data Sources Setup
uStore has a feature that enables you to set ADORs or Variables in dynamic documents to a value looked up from a database. One of the most useful reasons for this is to pre‐populate customization fields based on the login of the user – for example to put the person's first name in the field without the user having to enter it. To use this feature, you first need to create a database link to the uStore users' database.
-
Go to Presets >Data Sources Setup.
-
Click Add new Data Source.
-
Enter a name for the data source.
-
Enter the SQL Server name or IP address and instance name. (You may need to get this information from your System Administrator.)
-
The uStore Database is called ustore.
-
Enter a SQL Server User Name and Password to access the database.
-
To enable the data source to be used in all stores, select the option Allow using this data source in all stores.
-
To ensure that your settings are correct, click the Test Connection button.
-
Click Save.
Prepress workflow provider
When processing products, uStore is able to pass JDF information about the job to prepress workflow applications. By default, new installations of uStore will also include Xerox FreeFlow which is one such prepress workflow application.
If you also have FreeFlow Process manager or HP SmartStream in your print production room, you can also tell uStore how to pass jobs to prepress workflows that you create in these applications.
-
Go to Presets > System Setup > Prepress Workflow Provider.
-
Click Add new.
-
In the Name field, enter a name for the provider.
-
In the Provider Type list, select the relevant option for your workflow server.
-
In the Gateway URL, enter the required port as follows:
-
To connect to a Xerox Process Manager, type:
http://[ServerName] or [IP_Address]:7779
-
To connect to Xerox FreeFlow Connect, type:
http://[ServerName] or [IP_Address]:7751
-
To connect to an HP SmartStream system, type:
http://[IP_Address]:8080/dpp/jmf/dfe
-
-
(Optional) In the Logo File Name box, you can enter the path to the logo of the workflow provider. The logo image file should be placed here:
\\[ServerName]\XMPie\uStore\App\AdminApp\Images\Prepress\[LogoFileName].
If you do not provide the path to a file, uStore displays the name of the provider instead.
-
If the prepress provider has a web application for creating and editing workflows, you can add a link to the application directly from the Presets menu. In the Admin URL box, enter its path.
-
If the prepress workflow provider is installed on the same server as uStore, enter its relative path. For example, type: /[workflow_provider_url].
-
If the prepress workflow provider is installed on a remote server, enter its full path. For example, type: http://[ServerName] or [IP_Address]/[workflow_provider_url].
-
-
Click Save.

Created by: Steve Couch, last updated by Mohammad Mansour: 01.03.2022