Using JDF to Pass Media and Finishing Options to Printers with uStore and FreeFlow Core
Summary: This article describes how to configure uStore's JDF nodes to pass media and finishing attributes to Xerox printers when using FreeFlow Core.
Audience: uStore administrator who wishes to set up custom JDF nodes and parameters.
Prerequisites: Knowledge of uStore Back Office, your Xerox printer/RIP setup, and a basic understanding of JDF is required.
Overview
Web-to-Print is all about saving time and automating your print workflow so that smaller jobs can be handled more efficiently and, therefore, more profitably. StoreFlow provides a powerful combination of software products for eCommerce (uStore) and prepress workflow (FreeFlow Core).
It is possible to automate the handling of orders so that they require minimal or even no manual handling. In doing this, one of the things which may need to be done is to set the media or stock type and finishing options needed to print the product.
This article looks at creating custom JDF nodes and attributes to pass the required media type from uStore through FreeFlow Core to the printer/RIP.
Settings on the Xerox Print Server
-
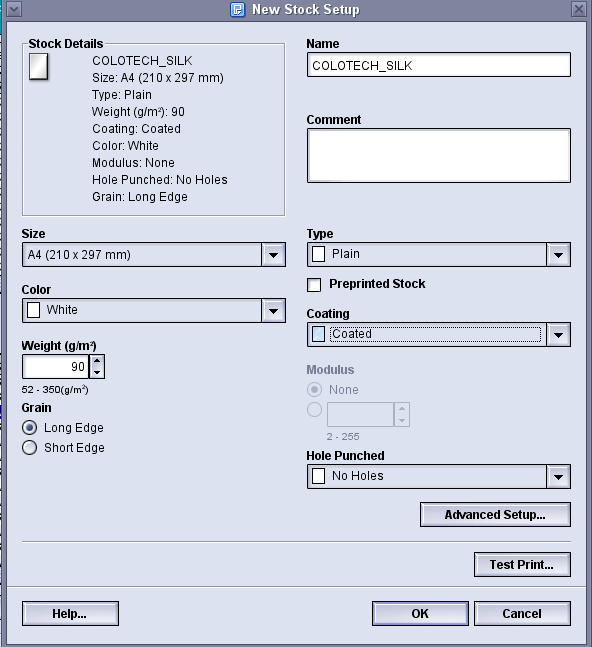
Open the Stock library and create a new entry for the required media type. See the example below - New Stock Setup on Xerox Versant 2100).
-
Note down the Name of the stock to use later in uStore.
Settings in FreeFlow Core
-
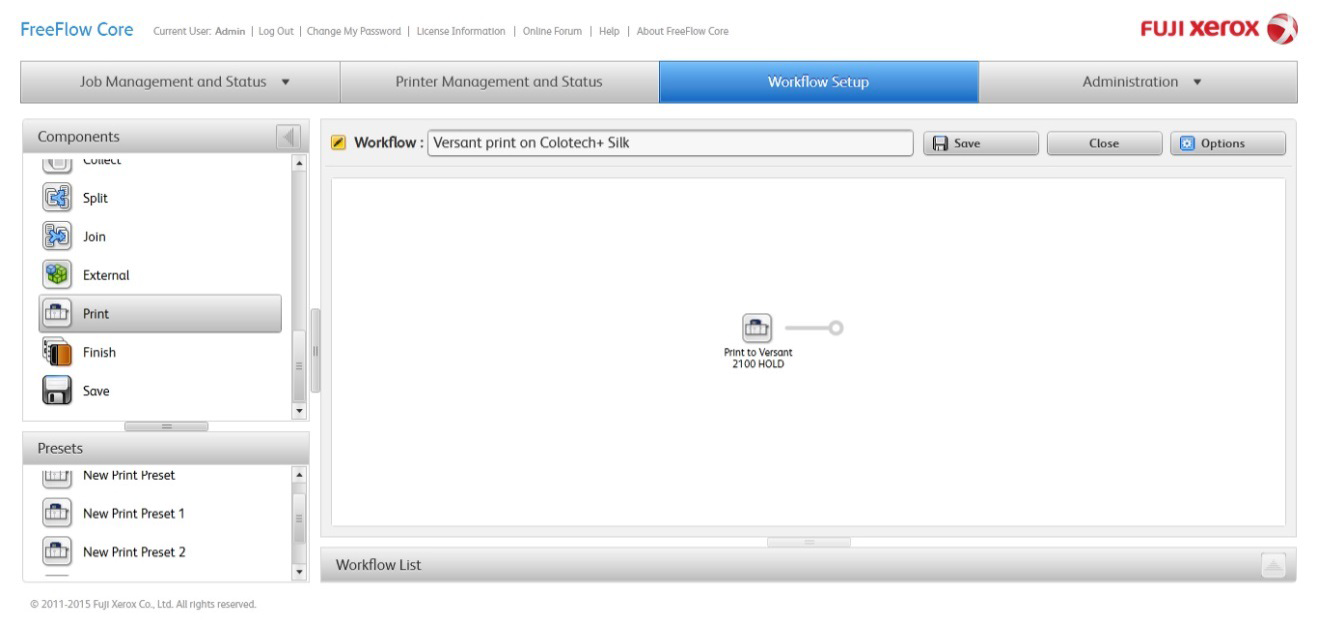
Create a new workflow in FreeFlow Core, or edit an existing workflow.
-
Add a Print node to the workflow to send the print output to your Xerox Printer:
Settings in uStore Back Office
Creating a JDF Node Set
-
Log in to uStore Back Office, and click the Presets button.
-
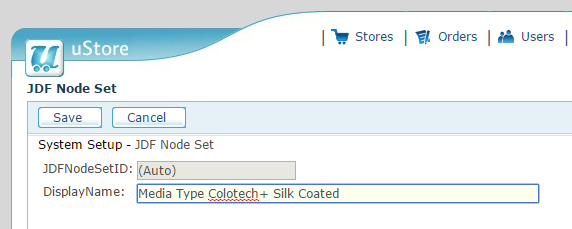
Click System Setup and go to the JDF Node Set table.
-
Click the Add New button.
-
Enter the display name for the new stock type.
-
Click Save.
-
Click the Back to List button to return to the System Setup screen.
Creating a JDF Node
-
Click the JDF Node link.
-
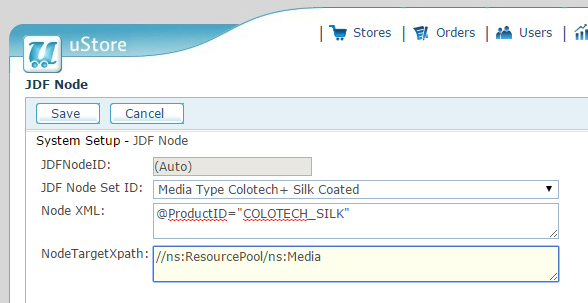
Click the Add new button.
-
Select the JDF Node Set you created in the previous step.
-
Enter the Node XML: @ProductID=
-
Enter the Node Target Xpath: //ns:
-
Click Save.
-
Click the Back to List button to return to the System Setup screen.
-
Creating a Product Property
You can now choose to make this media type available only on a specific product by adding the media type to the paper type property on an individual product. Or, you can make the media type available globally, so that it is there every time you add paper type property to a product.
-
To make the addition globally, click Presets.
-
Click Global Product Properties Setup.
-
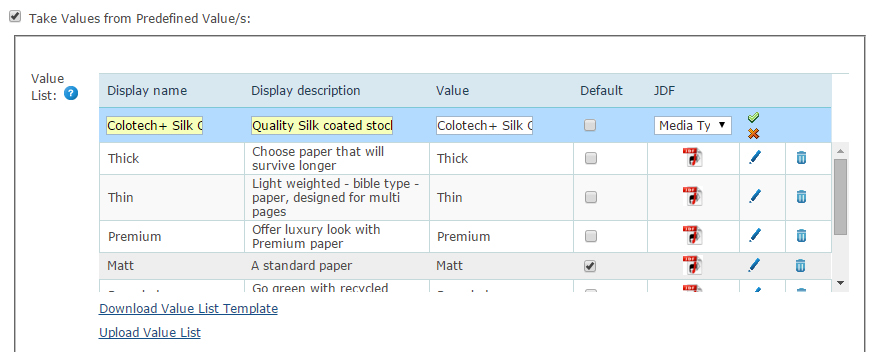
Click Paper Type and scroll down to the section Take values from predefined value(s).
-
Click Add new value.
-
Enter a display name for the customer to select this new media type.
-
Enter a description.
-
The value is entered automatically, but can be changed if desired. (The value is not important. The value from the JDF Node will be used.)
-
Select the JDF Node Set that you created in step Creating JDF Node Set.
-
Setting the Product or Product Profile to Use the Workflow
The last step is to set the product or product profile to use the workflow.
If you have set up your products and linked them to a product profile:
-
Go to Product Profiles.
-
Click the profile name.
-
Click the Prepress Setup button.
If you are not using product profiles:
-
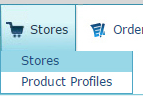
Click the Stores button.
-
Click the name of the store.
-
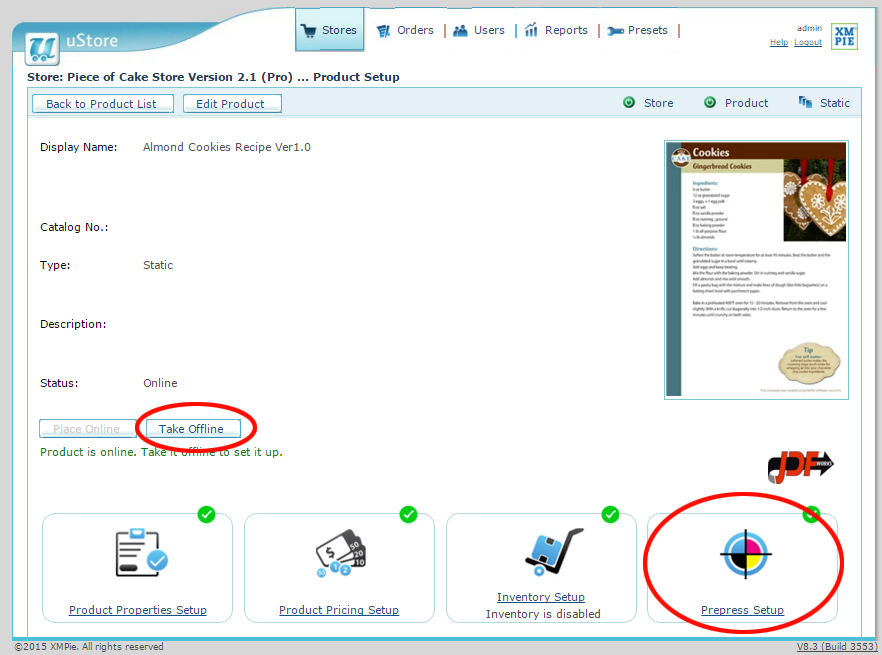
Locate the product.
-
Click the name of the product.
-
Click Take offline.
-
Click the Prepress Setup button.
-
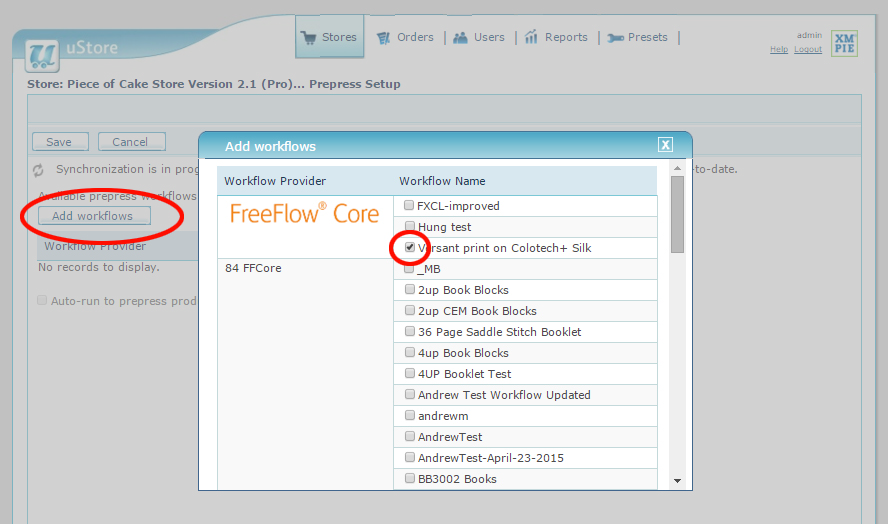
Click the Add workflow button.
-
Select the workflow that you created earlier. Scroll to the bottom and click OK.
-
If desired, you can set the workflow to be default and to auto-run.
-
Click Save.
-
Click Place online.
-
Testing and Debugging
You can now test ordering the product, processing the order and check the printer to see if the media type is defined correctly.
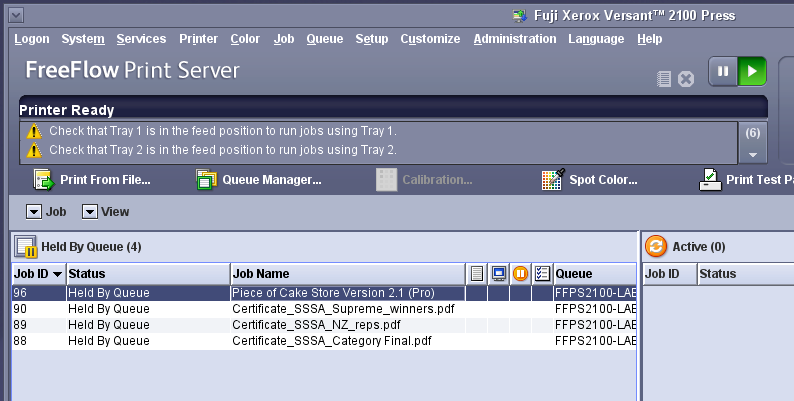
Piece of Cake store product arrives at the FreeFlow Print Server:
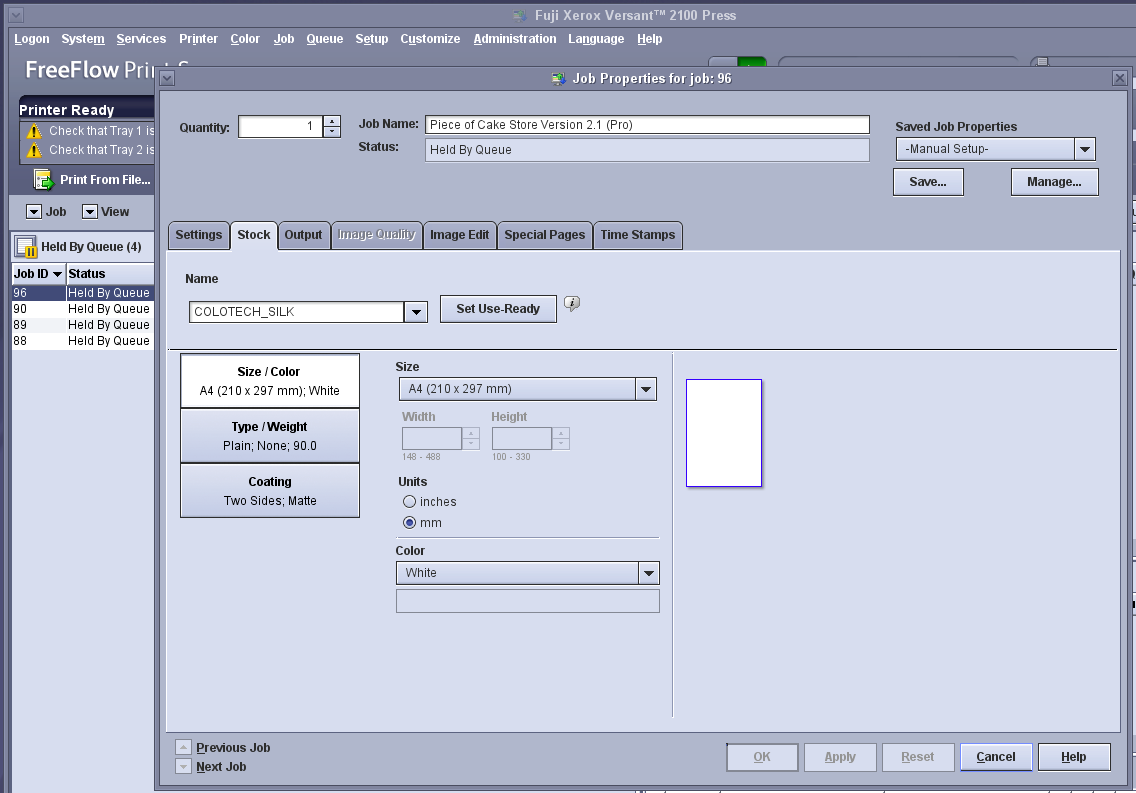
Job Properties>Stock tab shows the correct stock name was applied to the job:
If you need to view the JDF that was sent to FreeFlow Core as part of debugging any problems, you can connect to your uStore server via SMB (windows file sharing) \\
A copy of the JDF file is saved to this folder when the job is in the Prepress in progress queue.
Further Reading
JDF:
Xerox printer support:
http://www.office.xerox.com/service-and-support/
Xerox FreeFlow Core:
http://www.xerox.com/digital-printing/workflow/
XMPie uStore:
http://help.xmpie.com/uStore/index.htm
http://help.xmpie.com/uStore/uStore_Help_Page.htm
Created by: Steve Couch, last updated: November 15, 2015