Designers
There are two ways to start working with Personalia and InDesign. You can download an existing template from Personalia which is similar to what you want to create, import it into InDesign and modify it to suit your needs. Or, you can add dynamic fields into an InDesign document you have already created or licensed from Adobe Marketplace. The following sections outline the steps for both options.
Download and editing a Personalia template
Add dynamic fields to a static InDesign file
Download and editing a Personalia template
-
If you have not already done so, run the uCreate installer to add the plugin to your Adobe InDesign. A video showing the installation process is available here.
-
Login to Personalia and select a template which is similar to what you want to create.
-
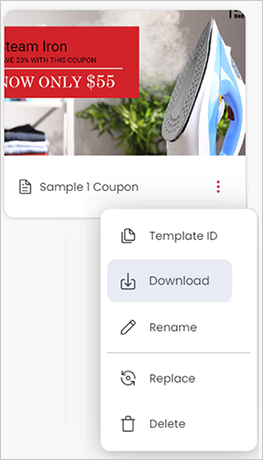
From the template menu, select Download.
-
Save the template package to your computer.
-
Open Adobe InDesign.
-
From the Dynamic Content menu, select Import Package, and browse to the file you downloaded from Personalia. Click Import when prompted.
-
If the Dynamic Content panel is not visible, open it from the Dynamic Content menu > Show Window > Dynamic Content.
-
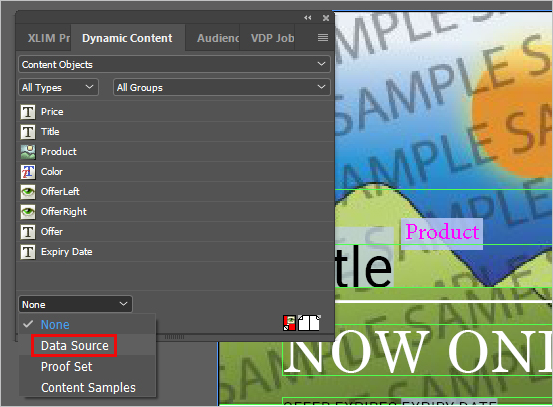
At the bottom of the Dynamic Content panel, set the dropdown to Data Source.
-
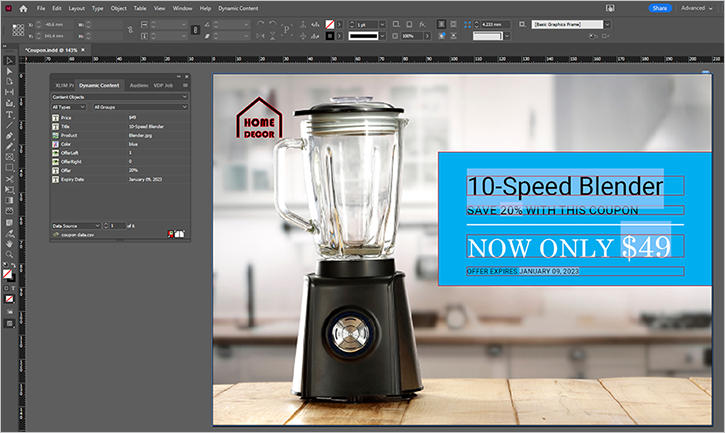
The document preview should now appear with test values from the data source appearing in the design.
-
Make your design changes, and when ready, save your completed document.
-
After saving, from the Dynamic Content menu select Export package. Select Campaign Package Files (CPKG) as the file type and save the package to your computer.
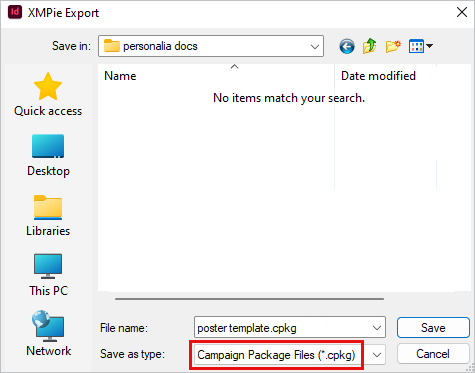
Click OK to agree to copying fonts.
-
Browse to Personalia and log in.
-
Select the workspace where you want the new template to appear.
-
Click New Template, select the package you just created, and click Open.
-
After a few moments, the template will be uploaded. Click the template to enter the preview page and test your changes.
Add dynamic fields to a static InDesign file
-
If you have not already done so, run the uCreate installer to add the plugin to your Adobe InDesign. A video showing the installation process is available here.
-
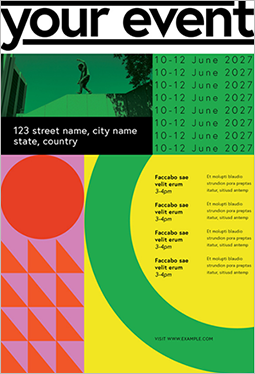
Open your InDesign document, or license and download a suitable InDesign document from Adobe Marketplace. For this example, I will use this Adobe Marketplace template.
-
From the Dynamic Content menu, select Set Input Data.
-
Select Manual Definition and click Next.
-
Click OK to close the confirmation dialog.
-
If the Dynamic Content panel is not visible, open it from the Dynamic Content menu > Show Window > Dynamic Content.
Additional information
At this point, it is helpful to understand the Dynamic Content panel and the types of objects it is used to control.
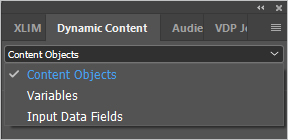
At the top of the panel is a dropdown which allows you to swap between different object types.
-
Content objects: The default list is content objects. These are objects that can be placed into the document design and can change the text, image, character, object style or the visibility of elements or pages in your InDesign document.
-
Variables: Variables are used behind the scenes to calculate or hold values. Variables are most helpful when you use the same logic or calculation in several content objects because you can define the logic once in the variable, and simply reference the variable in your content objects. For example, you could calculate the number of years since a date entered in Personalia and use that age value in several text and graphic content objects.
-
Input data fields: Input data fields are the form fields that are shown in the Personalia preview screen and the JSON that your developers will use to integrate Personalia with your other systems.
Input data fields can be string, number, date or boolean. This determines the type of data that is expected in the field, and what type of control is displayed in the Personalia preview.
A string input data field named Product will appear like this:

A boolean input data field named Switch Sides will appear like this:

A number input data field named price will appear like this:

A date input data field named Expiry Date will appear like this:

Input data fields cannot be placed directly into the InDesign document but are used in content objects and variables. For example, if a text content object contains only the input data field, then when the content object is placed into the InDesign document, the text in InDesign will display exactly the text string entered in Personalia. Content objects can also format, edit or change the value from the input data field before displaying it in InDesign.
-
The Manual Definition process automatically creates the Firstname and Lastname content objects that you can place into your design. If your design needs first and last name fields, you can use these. But, for this example, they are not required and can be deleted by right-clicking on the content object name in the Dynamic Content panel and selecting Delete.
-
Switch the Dynamic Content panel to display Input Data Fields.
-
Delete the id, fname and lname fields by right-clicking and selecting Delete.
-
Right-click the panel, or use the panel menu to select New Content Object.
-
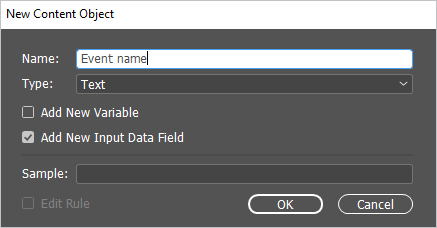
Enter the name of the new content object, set the type, and select the Add New Input Data Field checkbox. For this example, I will create a field to add the event name to the poster:
-
Click OK and repeat for any additional fields. Remember to select the Add New Input Data Field box. For this example, I will create these content objects:
-
Event name (text)
-
Event date (text)
-
Event location (text)
-
Event URL (text)
-
Event Graphic (graphic)
-
-
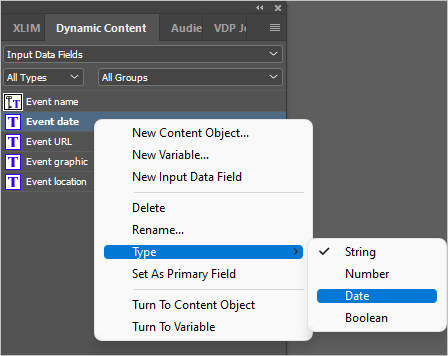
Switch the Dynamic Content panel to display input data fields. You should see all five input data fields. Right-click on the Event date input data field and change the type from string to date.
-
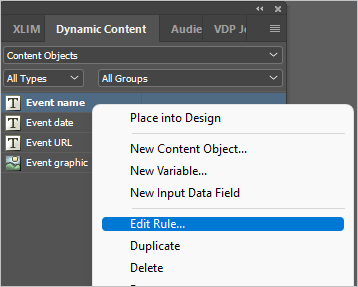
Switch the Dynamic Content panel to display content objects. We will now do some formatting to ensure design consistency. Regardless of what the user enters in Personalia, we want the event name to always be lower case. Right-click on the Event name content object and select Edit rule.
-
From the second dropdown (which says [T] Event name) scroll up and select lowercase. Your rule should now look like this:
-
Click OK to save your change.
-
Right-click the Event date content object and select Edit Rule. From the second dropdown, select FormatDate. From the next dropdown, select [D] Event date. In the text box after the String dropdown, type in dd MMMM yyyy. Your rule should now look like this:

-
Click OK to save your change.
-
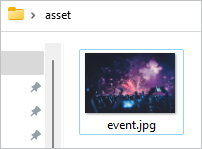
For the Event graphic content object, Personalia can work with either asset images that you set up to be available for selection, or with a graphic URL which can be totally custom. To help with setting up the InDesign document, it is recommended to have at least one asset image. For this example, I will download this image from Pixabay. It is recommended to save asset images in a separate folder. If you have several asset images to select from, save them in the same folder, with only the asset images for this document. For the best performance, it is also recommended to scale and crop your asset images to be the right size and resolution for your document. I have named my image event.jpg and saved it in a folder called "asset".
-
From the Dynamic Content menu, select Assets. Browse to and select the folder that contains your asset images.
-
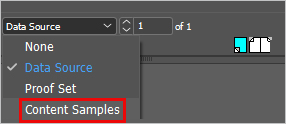
The next step is to place the content objects into the InDesign document. But before we can do that, it will be easier for us to see what we are doing in InDesign if we create a few content samples. At the bottom of the Dynamic Content panel, swap to view Content Samples.
-
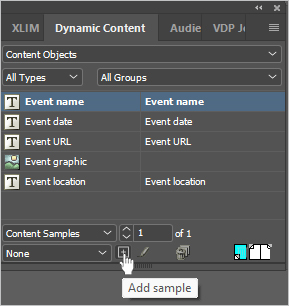
Click to select the Event name content object. At the bottom of the panel, click to Add sample for this content object.
-
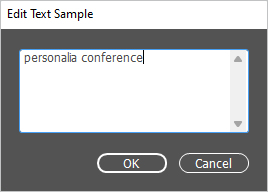
Enter a sample event name, and click OK. If you wish, you can enter several sample event names by clicking OK & New instead of OK. Note that content samples will not use our content object rule, so enter your samples as lower case.
-
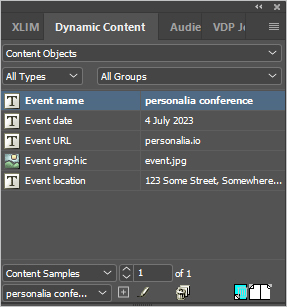
Repeat the process to select other content objects and create at least one content sample for each. When creating the graphic sample, browse to and select your sample graphic. When creating your date sample, enter a full date in text format since the content object rule to format the date will not be used. When done, your panel should be showing the values you entered:
-
Use the InDesign type tool to select the text at the top of the poster where the event name should appear. With the text highlighted, in the Dynamic Content panel, double-click the Event name content object.
-
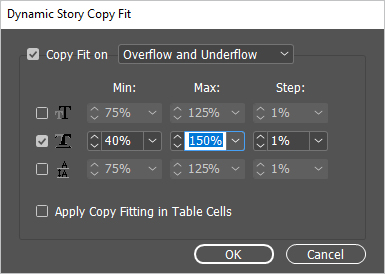
If your sample event name is long, you will see the text box overflows. Use the InDesign selection tool to select the text frame, right-click and from the Dynamic Content group, select Copy Fit:

-
For this example, I want the text to remain the same height and to always fill the width of the text frame, so I will select Overflow and Underflow and select the box to use horizontal scaling. Set the Minimum to 40%, and the Maximum to 150%. Click OK.
-
Repeat the process to select text and double-click to place in the event location, URL and date (the date is placed multiple times). For my sample, I also centered the date text using the standard InDesign tools.
-
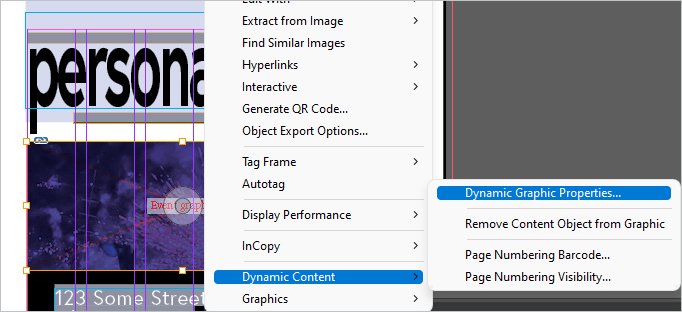
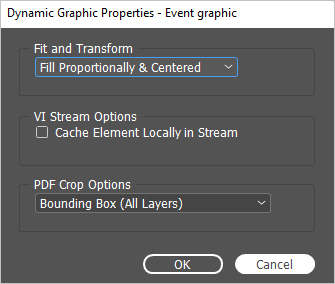
Use the selection tool to select the graphic frame above the address. Double-click the Event graphic content object.
-
Select to Fill proportionally and center and click OK.
-
Make any other design changes required in your design, and when ready, save your completed document.
-
After saving, from the Dynamic Content menu, select Export package. Select Campaign Package (CPKG) as the file type, and save the package to your computer.

Click OK to agree to copying fonts.
-
Browse to Personalia and login.
-
Select the workspace where you want the new template to appear.
-
Click New Template, select the package you just created, and click Open.
-
After a few moments, the template will be uploaded. Click the template to enter the preview.
-
Enter an event name and confirm that the preview updates correctly. Note that the date selector is showing because of the date input data field type being set on the input field in InDesign. Also, note that for the event graphic, you need to enter the name of a graphic that was in the assets folder, or use the fetch: keyword and follow it with the URL of a graphic to insert into the document design.
