Design
The design phase consists of connecting to a data source and attaching tags to project elements, such as text, graphic or shape. Graphic elements can be either image, video or audio files. This process of associating project elements with tags creates dynamic objects in your project. For example, creating a static image and tagging it with a graphic tag results in a dynamic image.
This phase takes place in the uMerge Video plugin in After Effects.
The design phase consists of several steps:
Setting the location of the assets folder
Note: To each layer that is tagged, a marker (#XVS#) is added, denoting that it is a dynamic layer. Do not touch these markers.
Link to a data source
-
In After Effects, open your project.
-
From the Window menu, select Extensions > uMerge Video to open the uMerge Video panel.
-
From the Options
 menu, select Link
to Data Source.
menu, select Link
to Data Source.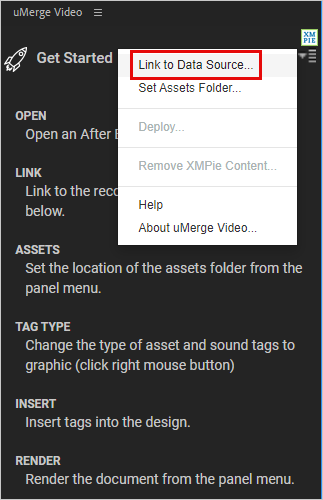
-
Select a CSV file and click Open.
The following are the requirements for a valid data source:
-
The data source must be comma separated (CSV) and in UTF-8 format.
-
All graphic assets in a single column should be of the same format. For example:
ID
Pic1
Pic2
Video1
Video2
E87362B
Mary.png
New York.jpg
Mary.mp4
Mary.mov
27F458F
Dan.png
Boston.jpg
Dan.mp4
Dan.mov
302D12D
David.png
Miami.jpg
David.mp4
David.mov
2D07012
Susan.png
New York.jpg
Susan.mp4
Susan.mov
-
In order to comply with GDPR regulations, it is recommended to add to your CSV a GUID (Globally Unique Identifier) column with a unique identifier per record, which will be later used as the record Id in the final URL of the video.
-
You cannot use any of the following characters in the tag values that will be used in the record Id:
% * / # [ ] \ & ? +For example, if the record Id is {RID}_{Plan}, the values in these columns should not include these characters.
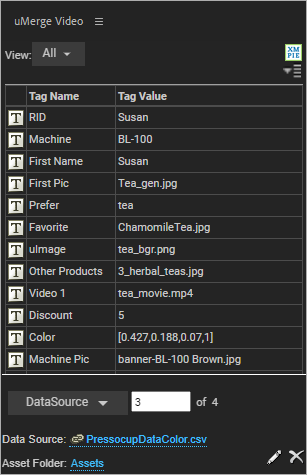
Once you link your project to data, tags are automatically created from the linked data fields and displayed in the uMerge Video panel. By default, all tags are of the Text type. Each tag should be changed to its appropriate type.
-
Set the location of assets
Note: Set the location of assets only if you have graphic tags in your project.
The assets folder contains all dynamic files in your project (image, video or audio files).
XVS searches for the assets listed in your data source file, and uses their values to replace tags during proofing and rendering. You should specify the location of all your assets.
Check After Effects documentation for the supported asset types.
-
From the Options
menu, select
Set Assets Folder. -
Select the assets folder and click Open.
Change the tag type
-
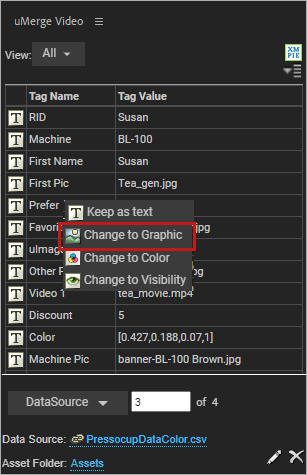
Right-click a tag, and change its type to the required type as in the following example:
Tag project elements
Graphic tag
If you wish to tag a graphic element (image, video or audio), perform the following:
-
In your project, select the image, video or audio layer (footage or audio layer) to which you wish to apply variability, and then click the graphic tag in the panel.
You can also click the Edit tag
 icon
in the uMerge Video panel and select the required graphic tag.
icon
in the uMerge Video panel and select the required graphic tag.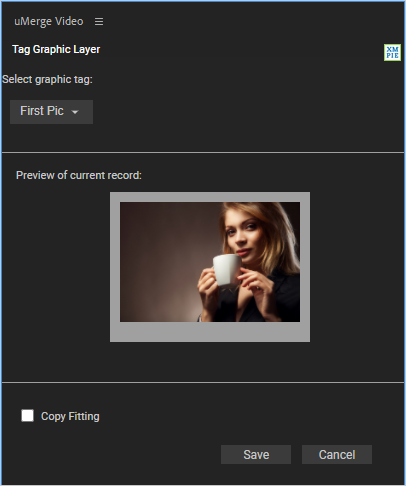
If you wish to apply copy fitting, display the record that represents the size you wish to maintain for all other records, and then select Copy Fitting. All records will maintain the same rectangle size.
Important: All values of a specific graphic tag should always have the same extension.
Text tag
The Text tag values can be used in text, shape and footage layers.
Note: If you plan on using the password protection option, do not use the password tag in the design.
To create dynamic text:
-
In your project, select the text layer to which you wish to apply variability.
-
On the uMerge Video panel, click the Edit tag
icon.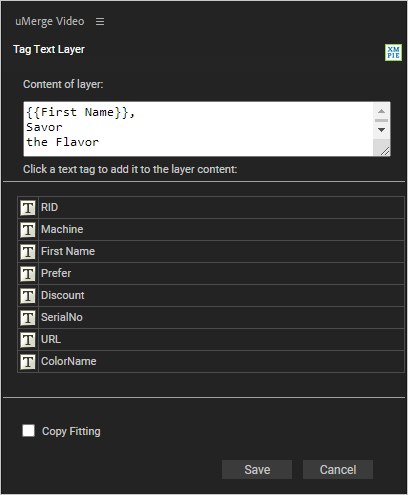
-
Click the desired text tag to add it to the Content of layer area.
-
If you wish to apply copy fitting, display the record that represents the maximum width you wish to maintain for all other records (e.g. a six-letter name), and then select the Copy Fitting checkbox.
Wider values will be reduced to the maximum width, but no more than 50% of the original text size. Smaller values will maintain their original size.Begin by displaying the record that defines the maximum width you desire, then activate the Copy Fitting option.
-
Click Save.
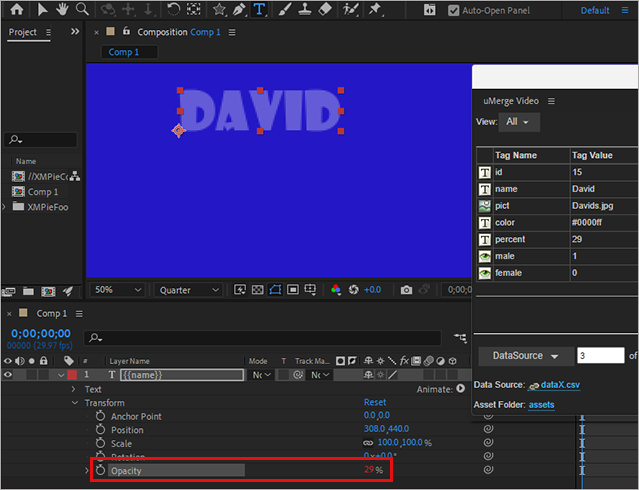
To set dynamic object properties:
-
In your project, select the text, shape or footage layer to which you wish to apply variability.
-
Select the property that you wish to tag, and click the desired text tag.
In the following example, the text layer's opacity property has been tagged.
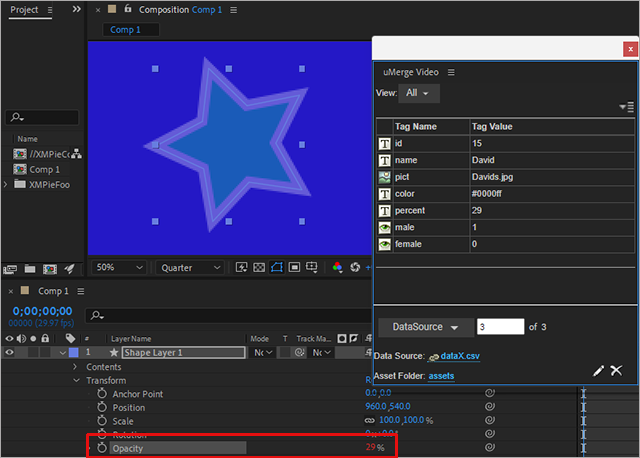
In the following example, the shape layer's opacity property has been tagged.
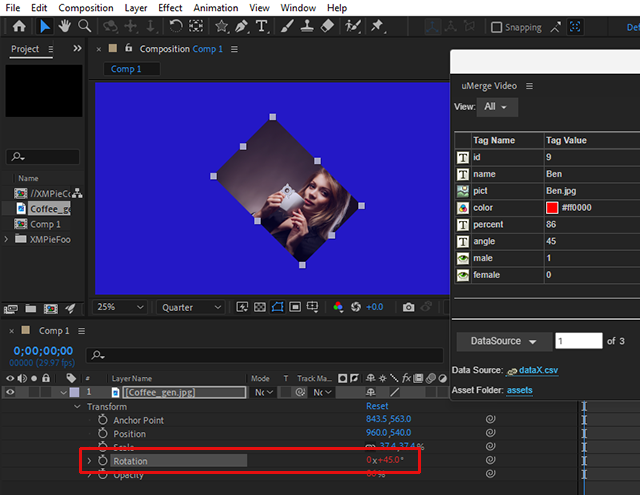
In the following example, the footage layer's rotation property has been tagged.
Color tag
The Color tag controls an object's color properties, such as text, shapes and effects. For example, you can tag a shape's stroke and fill colors, or tag an object using the "Change to Color" effect.
To set dynamic color:
-
In case of a text or shape layer, select the layer to which you wish to apply variability, and click the Color tag.
To set an object's color properties:
-
Select any object color property and tag it.
The color varies according to the data taken from the Color field.
Note that the tag value can appear either in a hex format or as an array of values.
A hex color is expressed as a six-digit combination of numbers and letters defined by its mix of red, green and blue (RGB). The hex format is #RRGGBB. Example: #F17471.
The format for an array of values is [R,G,B, A], where R, G, B and A (alpha) are numbers between 0-1 that represent the mix of red, green, blue and alpha. Example: [0.6,0.3,0,0].
Visibility tag
The Visibility tag controls the visibility of the objects to which the tag is assigned.
When you assign a visibility tag to an object in your design, you can control whether the object will be visible or hidden. For example, if you have a personal message that is appropriate only for male recipients, you can create a visibility tag called "ismale". You can then select the object that includes the message and assign the "ismale" tag to this object.
The values of the Visibility tag in the data source can be either 1 or True (visible), 0 or False (hidden).
To set the visibility of an object:
-
In your project, select the layer to which you wish to apply visibility, and then click the visibility tag in the panel.
Using property pick whip
You can use the After Affects' properties pick whip to link a specific property of a text, shape or footage layer, to a property of a layer of a different type.
In the following example, the Control layer is a "null" layer. Pick whip is used to set the fill color of the "Shape Layer 1" layer to the same color as the color property of the "Control" layer. Once set, you can tag the color property of the Control layer.

Important: Parent pick whip is not supported, so if a parent layer contains dynamic content in any of its transform properties, the dynamic values may not be correctly applied to the child layers on the XVS service production.