Embedding text-to-speech in your project
Text-to-speech (TTS) is the generation of synthesized speech from text, imitative of the human voice.
The technology behind text-to-speech has evolved over the last few decades. Using deep learning, it is now possible to produce very natural-sounding speech that includes changes to pitch, rate, pronunciation, and inflection.
Using TTS, it is possible to automatically convert dynamic text, composed from the record tag values, into dynamic audio assets, and embed these assets in the personalized videos. There is no need to manually record each dynamic audio file.
The Text-to-Speech audio files are assets which are created on-the-fly before the rendering process. During rendering, these assets are used to generate the personalized video.
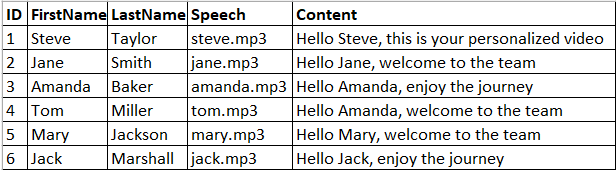
An example of dynamic text that can be converted into an audio file: Hello {{FirstName}} {{LastName}}, this is your personalized video.
If you wish to create different content for each record, in your CSV file create a special tag which contains the content to be converted into speech, for example the Content tag:

TTS can be used in a variety of languages and dialects, and in both male and female voices.
Since the TTS audio file is created only during rendering, you will need to create a temporary audio file. This file is needed for tagging during the design stage.
To embed audio files in your project:
-
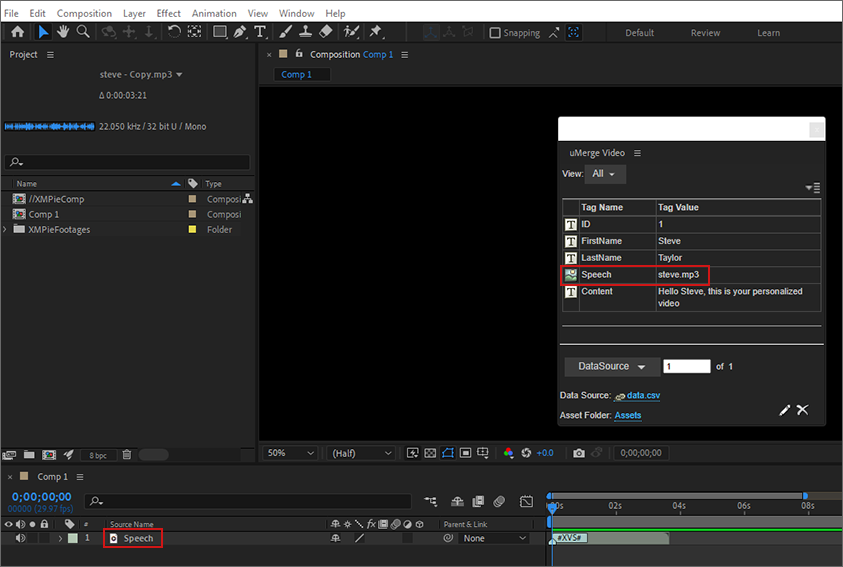
Record a single temporary mp3 audio file. For example, steve.mp3
The length of this temporary file should be greater than the longest spoken sentence.
This file will be later replaced in XVS during rendering. -
In your CSV file, add a column containing the name of the mp3 file (in this example it is called "Speech").

-
Create a voice layer in your After Effects project, and tag it with the voice tag.
-
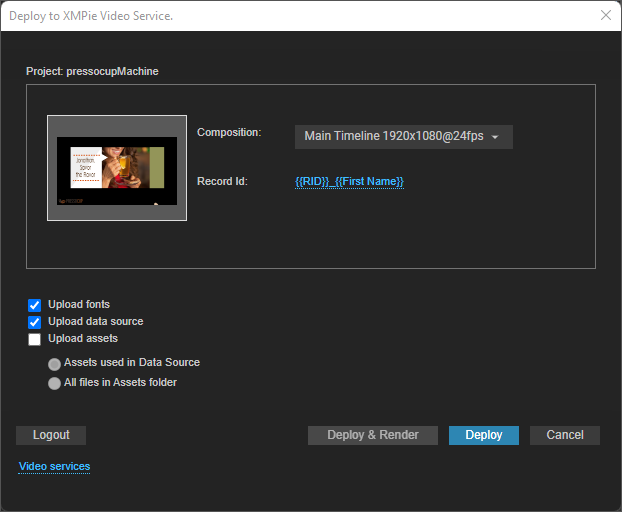
Deploy the project. Do not upload the assets.
-
Once deployed, open the project in the dashboard.
-
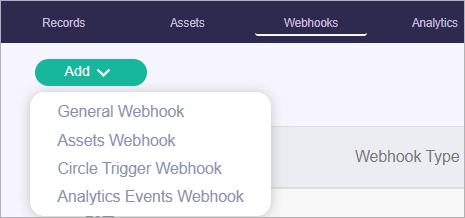
Click the Webhooks tab > Add > Asset Webhook.
-
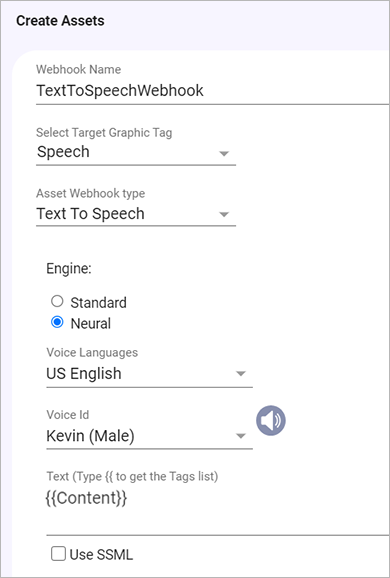
Give the webhook a name.
-
From the Select Target Graphic Tag dropdown, select the graphic tag whose values will be used as the asset names of the generated files.
Important Make sure that the extension of the graphic tag value matches in format the asset created by the webhook.
-
From the Asset Webhook Type dropdown, select the Text To Speech webhook.
-
Specify the following fields:
-
Engine:
-
Standard: Standard TTS voices use concatenative synthesis. This method strings together (concatenates) the phonemes of recorded speech, producing very natural-sounding synthesized speech.
-
Neural: A system that can produce higher quality voices than standard TTS voices. The NTTS system produces the most natural and human-like text-to-speech voices possible.
-
-
Voice Languages: Select the language of the speaker.
-
Voice ID: Select the preferred voice of the speaker.
-
Text: The text which will be converted into speech. This can include tags. In the above example, the text is taken from the Content tag.
-
Use SSML: Select to use Speech Synthesis Markup Language (SSML) in your Text-to-Speech request to allow for more customization in your audio assets. Examples include pauses, pronunciation of acronyms, abbreviations, dates, times, whispering, and more. See Supported SSML Tags.
-
-
Click the Assets tab to upload all assets excluding the temporary audio files.

-
You can upload more CSV files to create additional videos with Text-to-Speech.
-
Click the Records tab, and select Render All.

Guidelines when working with Text-to-Speech
Try to avoid creating one long audio file for the entire project, since the entire video will have to be rendered for each record, resulting in a long rendering time. Instead, split the text into reusable and unique elements, so that the reusable elements will be rendered only once, whereas the unique ones will be rendered per record.
In the following example, we see two parts of each sentence. The first part, which includes Hello {{FirstName}}, is unique for each record, whereas the second part is repeated across several records.
We divided the text into two separate audio files. In the following example, the "welcome to the team text" in the Content 2 column will be created and rendered only once.
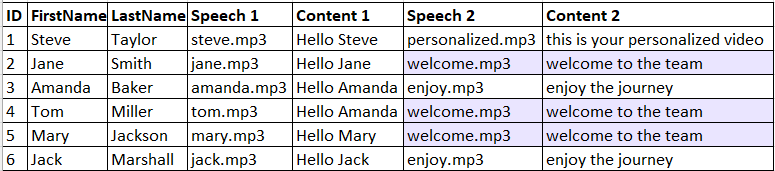
In this case we will create two different webhooks, one for the text in Content 1, and one for the text in Content 2.