Examples of Content Object Rules
Several examples that demonstrate how to define content objects using the rule editor are provided.
Define a text content object
In this example, our data source includes an "Age" field. Our purpose is to associate the "Age" numerical data with appropriate descriptive text (for example, "child", "teen", "adult", etc.).
To do so, we will define a rule that determines the value of a text content object that describes the recipient’s age. A person whose "Age" value is less than 13 will be noted as a "child". If they are younger than 20, but older than 13, they will be considered a "teen". All other recipients, whose "Age" value does not fit into one of the above categories, will be considered "adult".
If] [Age] [<] [Number] {13} [ ]
Then value = [String] {Child} [ ]
Else if] [Age] [<] [Number] {20} [ ]
Then value = [String] {Teen} [ ]
Else value=] [String] {Adult} [ ]
Define a text content object
In this example, our data source includes fields such as "first name", "last name", "age", "gender", "number of purchases", and so forth. Our purpose is to design a short note that will be printed out and handed to shoppers when they pay for their groceries. For shoppers who are above the age of 20 and have shopped at the store more than 10 times, the note will offer a 25% discount the next time they shop at the store. Shoppers who do not fit this profile will get a message wishing them a nice day.
To accomplish this, we need to create a text content object called Discount. The value of this text object will be either the discount coupon or the message "Have a nice day".
[If] [Age] [>] [Number] {20}
[AND] [#Purchases] [>] {10}
Then value = [First Name] [&] [String] {Save 25% next time}
[Else value =] [String] {Have a nice day}

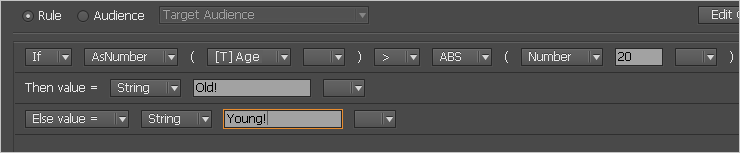
Define a text content object (data type conversions)
In this example, we would like to show how to use data conversion functions. These functions can convert data of a certain type to a different type. For example, you can use such functions to convert string to number. This may be required in the cases in which the type of one of the fields from your data source does not match the type you would like to compare it to. For example, if your data source contains a string field for a person's "Age" but you would like to compare this field to a number, you can use a conversion function to convert it to a number and then compare it to a certain age limit:
[If] AsNumber([Age]) [>] [Number] {20} [ ]
Then value = [String] {Old} [ ]
Else value=] [String] {Young} [ ]
The AsNumber function used in this expression converts that string value that is coming from the "Age" field to a number that is comparable to 20. This allows the expression to determine the value.
Note that for data sources that allow you to define a type for a column, you can simply set the right type in the data source. Some data sources (Excel, CSV and Plain Text) do not allow you to provide type. In these cases, it may be necessary to use conversion functions.
Define a text file content object
In this example, our data source includes an "Age" field. Our purpose is to define a rule that determines the value of a text file object that uses different text files, depending on the age of the recipient. The file child.txt will be used for recipients whose age is less than 13. The file teen.txt will be used for recipients who are younger than 20, but older than 13. The file adult.txt will be used for all other recipients, whose Age value does not fit into one of the above categories.
[If] [Age] [<]
 [Number] {13} [ ]
Then value = [String]
 {Child.txt} [ ]
[Else if] [Age]
 [<] [Number] {20} [ ]
Then value = [String]
 {Teen.txt} [ ]
[Else value=] [String]
 {Adult.txt} [ ]
Define a visibility content object
This example defines a rule for a visibility object that is used only under the condition that the recipient is a teen.
[Is visible if:]
[Age] [>=] [Number] {13}
[AND] [Age] [<=]
 [Number] {19} [ ]
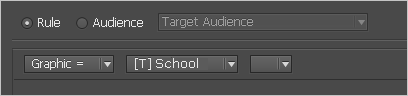
Define a graphic content object
The value of a graphic content object is the name of an asset: a dynamic graphic file that changes per-recipient (as opposed to a resource: a static graphic file that is common to all recipients). A simple graphic content object rule may define the asset name as the value of a data source field.
The following shows an example document, personalized for two recipients: Jane and Jerry. Each recipient has a different school asset.


In this case, the graphic content object that points to the school asset is based on the following:
-
A data source column named "School", which defines the school name of each recipient (for example, Engineering, Medicine, Law etc.).
-
An assets folder containing an image named after each school (for example, “Engineering.jpg”, “Medicine.jpg”, “Law.jpg” etc.).
uCreate Print automatically recognizes the graphic file's format. As long as the graphic name is the same as the data source value (for example, “Law”), the value does not have to include the file extension (for example “.jpg”).
In this case, to define the graphic content object, simply set its rule to the value of the []School column.
Note: Instead of pointing to a regular asset, the graphic content object may point to a personalized image (for example, an image that embeds the recipient’s first name). Such personalized images are generated using uImage.
Define a link content object
A link content object can be used when you want to refer the reader to a URL address. The URL can be to a specific URL address, or to a personal URL.
The link content object can be applied to text or to an object. In order for this link to be active, you must produce the document in the interactive PDF format. This option is available only when working in connectivity mode.
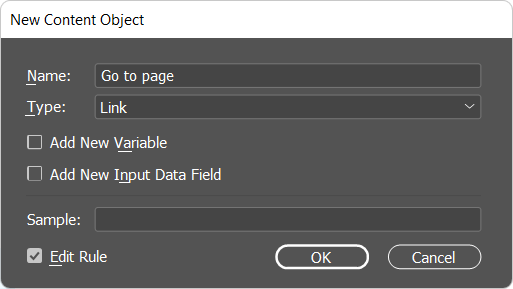
To add a new link content object to text or object in your design:
-
Right-click anywhere in the Dynamic Content panel and select New Content Object.
-
In the New Content Object dialog, name the content object, select Link from the Type dropdown list, and then select the Edit Rule checkbox to open the rule editor.
-
In the rule editor, define the URL. The URL can be to a specific URL address, or it can be a personal URL. See Creating a Personalized URL with an XMPieRecipientKey Automatic Content Object.
-
Tag the link content object to text or to an object in your design.
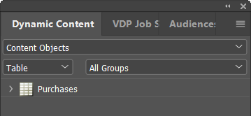
Define a table content object
Table content objects address the need to include recipient information from multiple data sources in a single document.
Each table content object is used to extract data from a newly specified data source, in addition to the data source to which your document is currently linked.
To create a table content object, the new data source and the linked data source must share at least one unique key, that is: a table column header that uniquely identifies each recipient, such as a social security number; passport number; driver’s license number; email, etc.
You can then use the rule editor to choose the desired data source and map one of its column headers to the corresponding column header in your linked data source.
In the following example, the document is linked to a data source named "Owners.txt", containing the recipients’ personal details. Our goal is to associate this document with an additional data source "Purchases.txt", which contains each recipient’s stock purchases.
Both data sources share a column header named "Owner ID". This common key allows us to define a table content object rule, which points to the Purchases.txt data source and maps its Owner ID field to the matching Owner ID field of the Owners.txt data source.
Based on this mapping, the new rule can calculate the table content object’s value for each recipient, resulting in a table where each row specifies a particular stock purchase made by the given recipient.
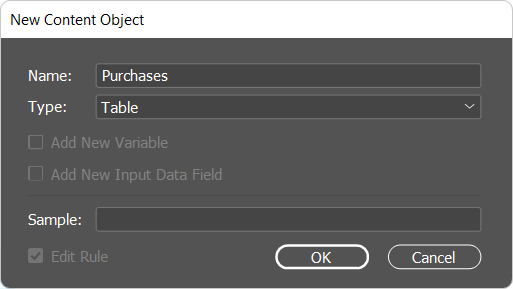
To add a new table content object (for example, the “Purchases” table content object):
-
Right-click anywhere in the Dynamic Content panel and select New Content Object.
-
In the New Content Object dialog, give the content object a name, select Table from the Type dropdown list, and then click OK.
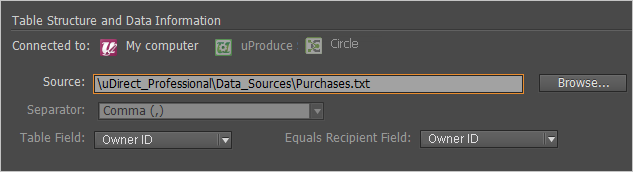
-
In the Table Structure and Data Information section of the Edit Content Object dialog, go to the Source field and browse to the data source you wish to add (for example, Purchases.txt), select it, and click Open.
-
The Source field displays the path to the selected data source.
-
The Separator list displays the types of characters you can use to separate the selected data source’s fields: Tab (\t), Comma (,) orSemicolon (;).
-
The Table Field list displays the column headers of the selected data source (for example, Purchases.txt).
-
The Equals Recipient Field list displays the column headers of your linked data source (for example, Owners.txt).
-
-
Map a unique key in the new data source to a corresponding key in the linked data source:
-
Select a column header from the Table Field list (for example, Owner ID).
-
Select the column you wish to associate it with from the Equals Recipient Field list (for example, Owner ID).
-
-
Click OK.
The dialog closes, and the new Purchases table content object is added to the Dynamic Content panel.