Working with Lock Options
uStore administrator can control editing permissions by locking editing capabilities for text or graphic boxes. Lock options can be set at the document level or set separately for a specific text or graphic object. These settings are defined in the uEdit Setup page of the uStore back office.
For example, you may want to prevent customers from moving an object, but enable them to position an image within this object. This is done by locking the object’s Location property, but leaving the content’s Location property unlocked.
The ability to set separate Lock Options for objects and their content is useful for applications that ask users to upload images and then place them inside an existing frame.
You can lock object properties globally by applying locking on a document level. To further constrain editing capabilities for specific objects, you can apply locking at an object level.
To specify which editing options are to be locked:
-
Choose the area for which you wish to set Lock Options:
-
To set document-level options, click anywhere on the gray area around the document, to make sure no particular text box or graphic box is selected.
-
To set object-level options, select the desired object (a text box, a graphic box or a line).
-
-
Click the Lock Options button
 in the bottom toolbar.
The relevant Lock Options dialog box - document, text box, graphic box or line - is displayed, with its type indicated in the dialog box title.
-
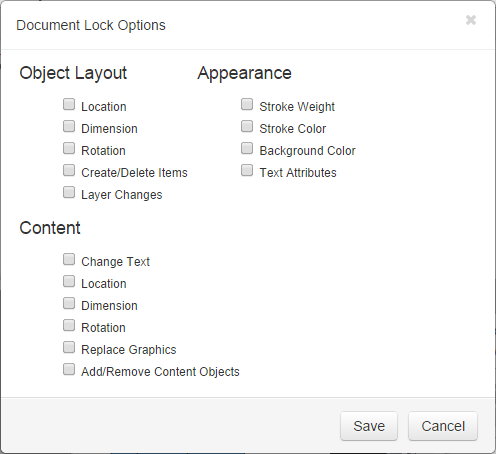
Select the editing options that you want to lock and click Save to apply your changes.
The following table describes the available lock options. Most options are common to the document and to its various objects: text boxes, graphic boxes and lines. Any document-specific or object-specific options are indicated in parenthesis.
|
Layout |
|
|
Appearance |
|
|
Content |
|
Note: Lock Options for XLIM documents can also be set up in uCreate Print before the document is edited with uEdit.