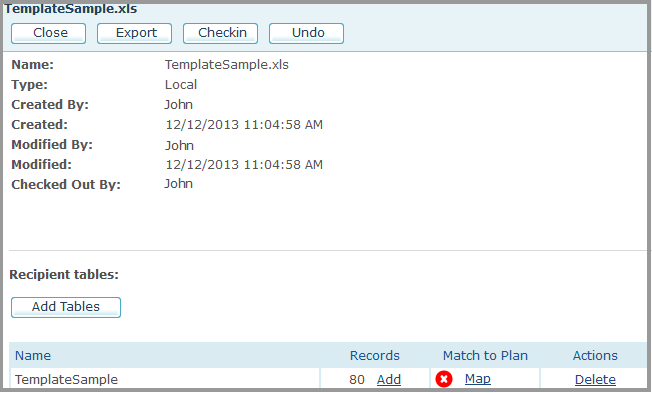
It is possible to update the Recipient Table of the Local data source by adding new recipients. This allows for more flexibility when wishing to add more recipients while the Campaign is already live.
To add recipients to the Local data source:
1. In the Recipients Table section of the data source page, click the Add link next to the Recipient Table that you wish to update.

Once you click the link, the Add Recipients dialog is displayed and the data source you wish to update becomes checked out.
2. In
the Add Recipients window, click Select to select the Recipient List file
you prepared in advance. The file can be in Excel, Access or CSV formats.
If you have not prepared the file in advance, you can click the Download
the <Table Name> table with field names only (*.csv) link
to download a CSV template of a Recipient Table and then, fill it in with
the recipients you wish to add to your data source.
3. If you uploaded a CSV file, select the Delimiter: Comma, Semicolon, Tab, Space, or Other.
4. Click Next to start uploading the Recipient List file.
Once the file is uploaded, the Add Recipients window displays the selected table. If you uploaded an Excel file with several table sheets, you have the option to select the table that contains the list of recipients you wish to add to the data source.
5. In the Select Add Method section, choose one of the following options:
– Add all records: all the recipients in the uploaded file will be added to the data source. Note that if duplicate records exist in the uploaded table, they will be added to the original Recipient Table.
– Add only new records (existing records will not be added): only the recipients that do not already exist in the data source will be added. If you select this option, you need to specify the Primary Key field according to which the system will identify duplications between the original and the uploaded table records.
6. To perform a preflight before actually adding the new recipients, check the Run Preflight before execution checkbox.
7. Click Next.
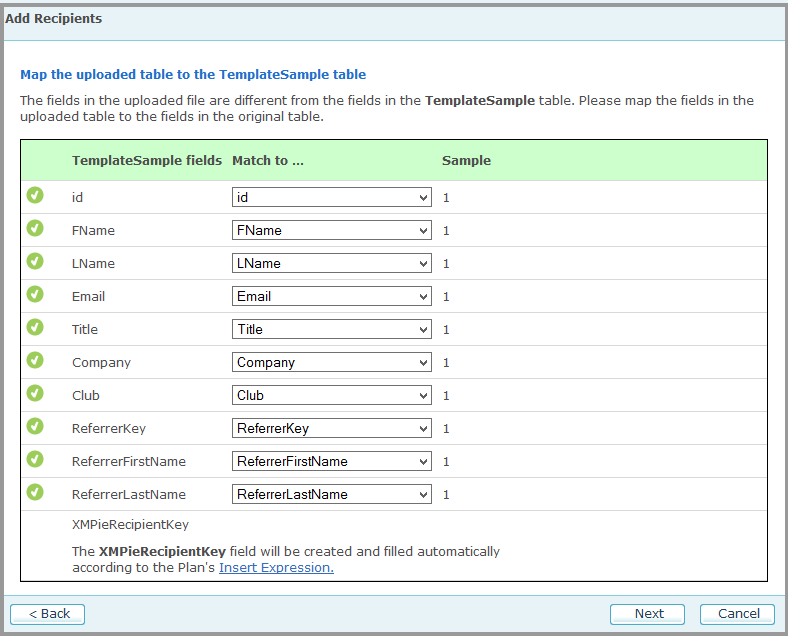
8. If the uploaded table does not match the Recipient Table in the data source, you are prompted to perform mapping.

Map the fields of the uploaded table to the fields of the Recipient Table and click Next.
If the uploaded table contains a Recipient Key, it will be mapped automatically to XMPieRecipientKey in the Recipient Table. If the uploaded table does not contain a Recipient Key, the XMPieRecipientKey field will be created and filled in automatically according to the plan’s Insert Expression. To see the Insert Expression, click the Insert Expression link.
9. If you selected the Preflight option, the Add Recipients window displays the preflight results. If there are duplicate recipients that have not been added to the data source, you can click the Download list link to download them as a CSV file.
10. Click Finish to add recipients to the data source.
11. Once the process is completed, a summary is displayed.
If there are duplicate recipients that have not been added to the data source, you can click the Download list link to download them as a CSV file. The file displays the recipient information and the failure reason.
12. Click OK to close the window.