Creating a Stripe Clearing Model
Note: If you're a StoreFlow Cloud customer, the Stripe clearing method is included in your subscription. Otherwise, contact Support to purchase this plugin.
In order to use the Stripe clearing model, you must first set up an account in Stripe, and then configure Stripe in uStore.
Configure Stripe payment in uStore
-
On the menu bar, click Presets and then select Clearing Model Setup.
The Clearing Model list opens. -
Click New to create a new clearing method (or edit an existing one).
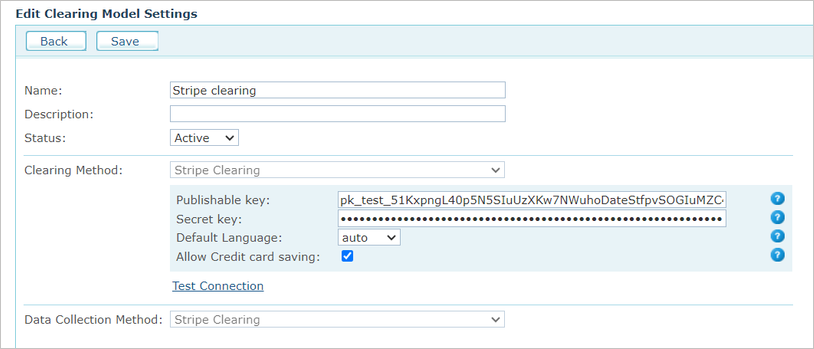
The Edit Clearing Model Settings page is displayed. The fields displayed in this page vary according to the selected clearing method.
-
Enter the required information:
-
Name, Description: Enter a name and a description for the clearing model.
-
Status: Select Active to make the clearing model available for the stores or Inactive to hide it.
-
Clearing Method: Select Stripe. You will be prompted to fill in information which is exclusive to Stripe clearing configuration.
-
Publishable key, Secret key: These are provided by your Stripe account.
-
-
Click Test Connection and then save this new clearing method.
-
To apply the clearing method to a store, go to the store's setup page (Store Settings > Set Up Store), and in the Clearing tab select the Stripe payment method.
