Setting Up Prepress Workflow Providers
Note: These options are not available for StoreFlow Cloud customers.
uStore enables you to set up the following types of workflow providers:
-
Xerox FreeFlow: Provides seamless integration with the Xerox FreeFlow Core application and the Xerox FreeFlow Process Manager. The Xerox FreeFlow workflow providers enable you to associate workflows defined in the Xerox FreeFlow Core or Process Manager with uStore products or product profiles.
-
Enfocus Switch: Enables automated prepress processing by routing jobs and job ticket data from uStore to Enfocus Switch flows.
-
HP SmartStream: Smoothly integrates with the HP SmartStream application. The SmartStream workflow providers enable you to associate workflows defined in SmartStream with uStore products or product profiles.
-
Manual: Enables you to export your JDF files to hot folders.
Links to these providers can be added to the Presets menu for easy access.

Set up Xerox FreeFlow Core from within uStore
Xerox FreeFlow Core can be configured as a prepress workflow provider in uStore, allowing orders to be automatically sent to FreeFlow Core flows for processing.
To add a Xerox FreeFlow workflow provider:
-
On the toolbar click Presets, and then select System Setup.
-
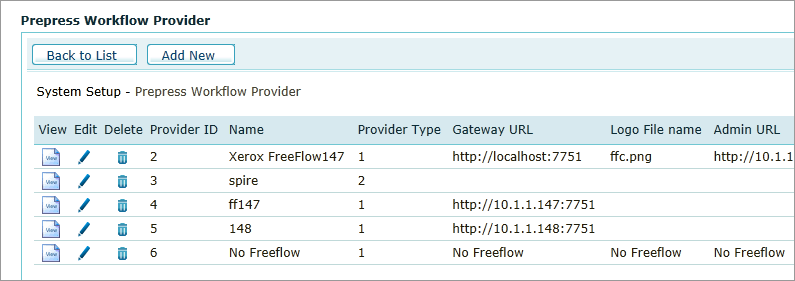
In the System Setup list, click Prepress Workflow Provider.
-
On the Prepress Workflow Provider page, click Add New.
-
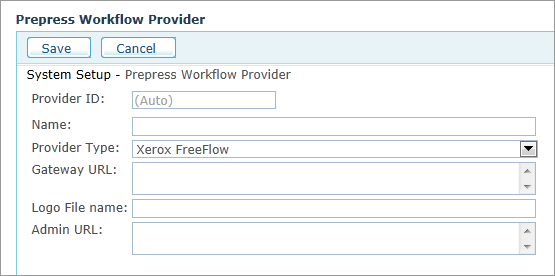
In the Name field, enter a name for the provider.
-
In the Provider Type list, select Xerox FreeFlow.
-
In the Gateway URL, enter the required port as follows:
-
To connect to Xerox FreeFlow Core, type
http://[ServerName]or[IP_Address]:7751.If HTTPS is needed, type
https://[domain name]:7759Note that to enable HTTPS support in FreeFlow Core, a certificate (.pfx) and additional setup in FreeFlow Core is required.
-
To enable HTTPS communication for JMF commands:
-
To add a certificate to the Java keystore, in the Xerox FreeFlow Core installation directory, use the
installJMFCertificate.batutility. -
Restart the Xerox FreeFlow Core JMF Server service.
See "JMF Commands and Printer Status Signals" in Xerox FreeFlow Core Security Guide.
-
Note: Make sure that there is no firewall between the Xerox FreeFlow provider and uStore.
-
-
In the Logo File name field, enter the path to the logo of the workflow provider. If you do not provide the path to a file, uStore uses the name of the provider instead (optional).
The file should be placed at:
\\[ServerName]\XMPie\uStore\App\AdminApp\Images\Prepress -
To create a link to the workflow provider in the Presets menu, in the Admin URL box, enter its path.
-
If the Xerox FreeFlow provider is installed on the same server as uStore, enter its relative path. For example, type
http://domain/freeflowcore - If the Xerox
FreeFlow provider is installed on a remote server, enter its full path.
For example, type:
//[ServerName]or[IP_Address]/freeflowcore
-
-
Click Save.
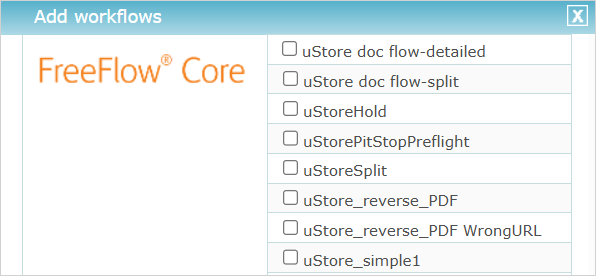
The new Xerox FreeFlow workflow provider is added to the list of prepress workflow providers and is available for all your products and product profiles.
Set up Enfocus Switch from within uStore
Enfocus Switch can be configured as a prepress workflow provider in uStore, allowing orders to be automatically sent to Switch flows for processing.
To set up Enfocus Switch:
-
On the toolbar click Presets, and then select System Setup.
-
From the System Setup list, click Prepress Workflow Provider.

-
On the Prepress Workflow Provider page, click Add New.
-
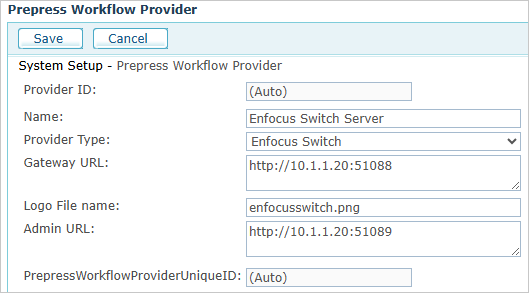
In the Name field, enter a name for the provider.
-
From the Provider type list, select Enfocus Switch.
-
In the Gateway URL field, enter the address and port (the port can be found in Switch Web Services settings). Example URL: http://10.1.1.20:51088
-
In the Logo File name field, enter the following value: enfocusswitch.png
-
To create a link to the workflow provider in the Presets menu, in the Admin URL box enter its path (optional). Example URL with the default port: http://10.1.1.20:51089
-
Click Save.
-
Go to the Global Configuration table (Presets > System Setup > Global Configurations), and edit the values of the following items:
-
EnfocusSwitchUser: The user for the Enfocus Switch workflow provider. This has to be an existing user in your Enfocus Switch installation.
-
EnfocusSwitchPassword: The password of the user of the Enfocus Switch workflow provider. Once saved, the will password will be encrypted.
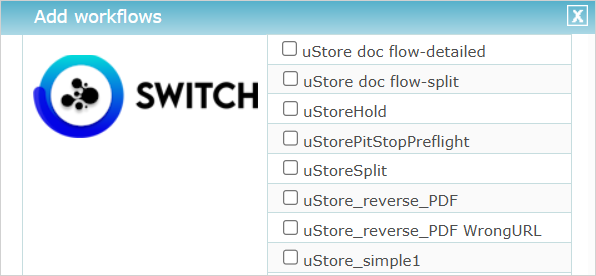
The new Enfocus Switch workflow provider is added to the list of prepress workflow providers and is available for all your products and product profiles.
The flows starting with "uStore" appear at the top of the list.
-
-
See Configuring the uStore App in Enfocus Switch to learn how to integrate uStore app in Enfocus Switch.
Set up HP SmartStream from within uStore
HP SmartStream can be configured as a prepress workflow provider in uStore, allowing orders to be automatically sent to HP SmartStream flows for processing.
To add an HP SmartStream workflow provider:
-
On the toolbar click Presets, and then select System Setup.
-
In the System Setup list, click Prepress Workflow Provider.

-
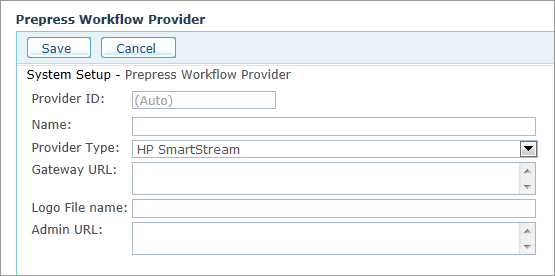
On the Prepress Workflow Provider page, click Add New.
-
In the Name field, enter a name for the provider. It is recommended to give the provider a significant name that will help you select the correct workflow provider when you associate a product or product profile to it.
-
From the Provider Type list, select HP SmartStream.
-
In the Gateway URL, enter the required port as follows:
To connect to an HP SmartStream, type
http://[ServerName]:8080/dpp/jmf/dfeor[IP_Address]:8080/dpp/jmf/dfe. To verify, contact your HP local support.Note: Make sure that there is no firewall between the HP SmartStream Provider and uStore.
-
In the Logo File Name field, enter the path to the logo of the workflow provider. If you do not provide the path to a file, uStore uses the name of the provider instead (optional).
The file should be placed at:
\\[ServerName]\XMPie\uStore\App\AdminApp\Images\Prepress -
To create a link to the workflow provider in the Presets menu , in the Admin URL box, enter the path you usually use to access your HP SmartStream dashboard.
-
Click Save.
The new HP SmartStream workflow provider is added to the list of prepress workflow providers and is available for all your products and product profiles.
Set up a manual prepress workflow provider
-
On the toolbar click Presets, and then select System Setup.
-
In the System Setup list, click Prepress Workflow Provider.
-
Click Add New.
-
In the Name field, enter a name for the provider. It is recommended to give the provider a significative name that will help you select the correct workflow provider when you associate a product or product profile to it.
-
In the Provider Type list, select Manual.
-
In the Logo File Name box, enter the path to the logo of the workflow provider. If you do not provide the path to a file, uStore uses the name of the provider instead (optional).
The file should be placed at:
\\[ServerName]\XMPie\uStore\App\AdminApp\Images\Prepress -
In the Admin URL, enter the URL to the application where the workflows are managed (optional).
-
Click Save.
The manual workflow provider is added to the list of prepress workflow providers and is available for all your products and product profiles.
Note: Leave the Gateway URL field empty.
