Setting Up the Culture List Table
The Culture List table allows you to add a new language to support your region. It is also possible to use several dialects by creating multiple instances of a language and, thus, address different segments of the population (for example, youngsters vs. seniors).
For example, you can create two stores for different dialects of the US language. In this case, you should add two instances of the en-US languages and distinguish each with a different name. Then you can localize each store with a different dialect using uStore Localization Tool (see Localize System Tables).
To create a new language or a new instance of a language:
-
On the toolbar click Presets, and then select System Setup.
-
In the System Setup list, click Culture List.
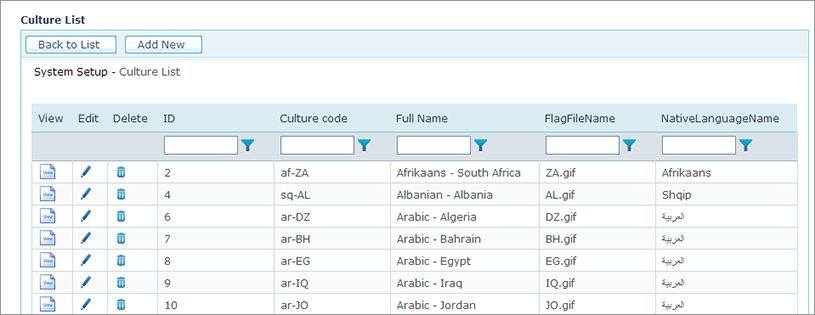
The list of all defined languages is displayed.

-
In the Culture List page, click Add New to create a new language or language instance, or edit an existing language or language instance.

-
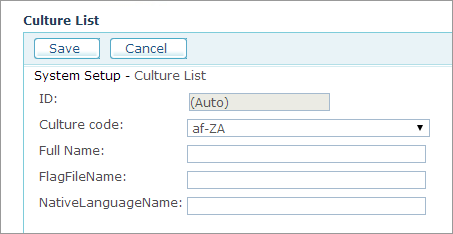
Fill in/edit the following fields:
-
Culture Code: Culture name, using the .NET conventions. For example, enter ‘en-US’ for English - United States.
For more details, see CultureInfo Class.
-
Full Name: The name of the culture that will be displayed to the store administrator.
For example, English-United States.
-
FlagFileName: Enter the flag file name you wish to assign to this culture. The flag files are located in:
...uStore\App\uStoreShared\Skins\Images\flags.
The flag file icon will be available for selection in the storefront Login page and in the top right corner of all other pages.
-
NativeLanguageName: The native name of the language.
-
-
Click Save.
The new/edited culture will be displayed in the Culture List page.
-
Click the Edit
 button
next to the newly added culture.
button
next to the newly added culture.You can override the default culture settings for a specific store by setting up the store attributes, as described in Determining the Store Appearance.
-
Click the Edit Localized Text button.
The Culture List Localization page is displayed.
-
Click the Add New button.
The Culture List Localization page is displayed.
-
Fill in the following fields:
-
CultureID: Enter the CultureID as specified in Presets > Localization > Localization Culture Listpage (see Localizing the Static Text). The Culture ID indicates the language selected for uStore localization.
-
CultureDisplayName: Enter the culture display name in the language that corresponds to the defined CultureID.
-
-
Click Save.
