Setting Up the Mall Table
Note: If you are a StoreFlow Cloud customer, you will not be able to edit this table.
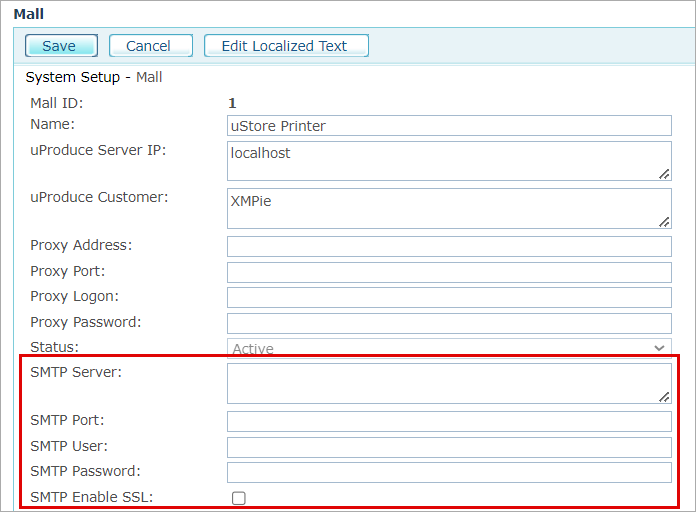
The Mall table defines your uStore connectivity parameters, including the uProduce connection and the proxy and SMTP servers details, where applicable. You can also define an alternative welcome page for your stores. The Mall page includes a single hard-coded table entry that can only be edited. Do not add a new table entry to this system table or delete this table.
The Mall table can be accessed by clicking Presets on the toolbar, and then selecting System Setup > Mall.
The Mall Table - Edit page includes the following fields:
|
Field |
Description |
|
Name |
Name of the Mall. |
|
uProduce Server IP |
An IP address or a domain name of the uProduce base server. |
|
uProduce Customer |
uProduce Customer Name, to which uStore logs in. |
|
Proxy Address Proxy Port Proxy Logon Proxy Password |
If you use a proxy server, these are the details of the proxy server, behind which uStore is located. Please note that these fields refer to the Proxy Server that acts as an intermediary between a workstation user and the Internet to ensure security, administrative control and caching service. This Proxy Server is not the same as the Helicon Proxy Server. |
|
Status |
Must be set to Active. Setting this selection to Inactive, deactivates uStore. |
|
SMTP Server SMTP Port SMTP User SMTP Password SMTP Enable SSL |
The details of the server used to send email messages from uStore:
Note: Microsoft announced the retiring of Basic Authentication starting October 1, 2022. Customers using Basic Authentication should enable SSL for their SMTP definitions by selecting the SMTP Enable SSL checkbox, and update the SMTP port to match this protocol. |
|
WelcomePageURL WelcomePageSql |
You can change the default Welcome page of uStore to any other uniquely designed Welcome page. Doing so requires you to enter the new page URL and an SQL select statement. This will be the default Welcome page for all stores in the Mall. |
|
uStore Server IP |
The IP of the uStore server. |
|
Logout URL |
The URL of a page that is displayed after logout. |
|
uProduce link |
Select Active if you wish to display a link to uProduce when clicking the Presets tab. To hide the link to uProduce, select Inactive. Note: If you are a StoreFlow Cloud customer, you will not be able to edit this link. |
|
uStore External Server URL |
Enter the URL that enables access to images used in email templates and "Merchant Info" section of receipts. Enter http(s)://[Domain name]. If this field is left blank, the entry in the "uStore Server IP" field will be used. |
Connecting uStore to a third-party SMTP provider
If you don't have your own SMTP server, you can use any third-party SMTP provider.
If you wish to use Amazon's SMTP server, follow these instructions.
-
Create Amazon account.
-
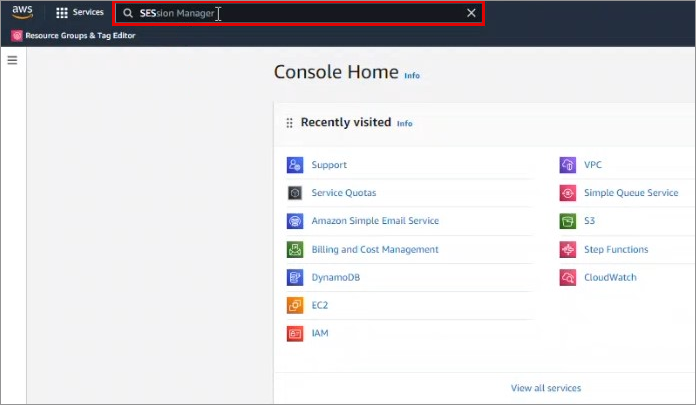
Log in to the Amazon account and type SES in the search bar.
-
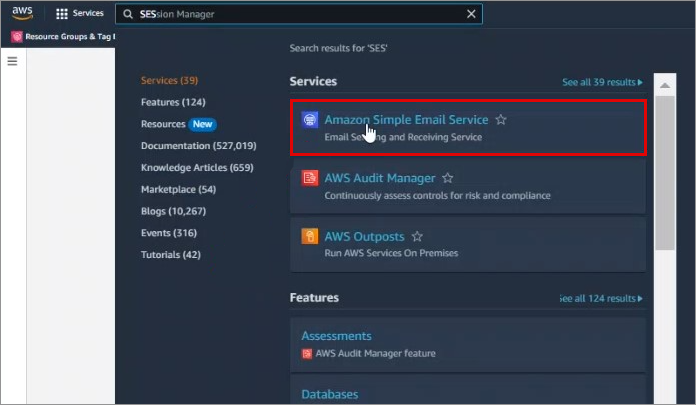
Click the Amazon Simple Email Service option.
-
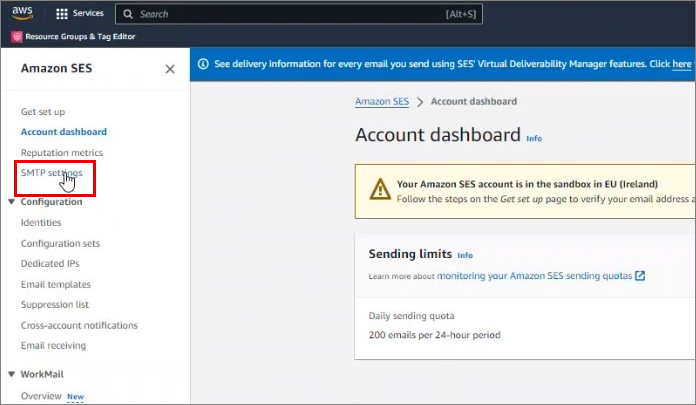
Click SMTP settings.
-
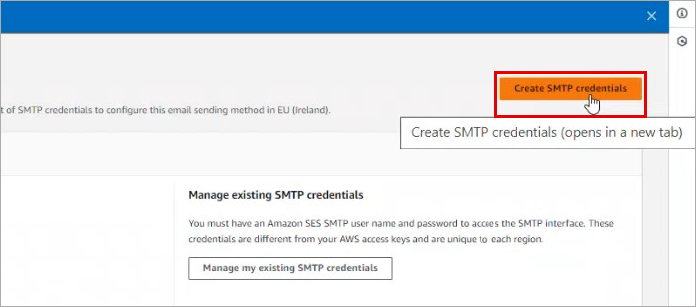
Click Create SMTP credentials.
-
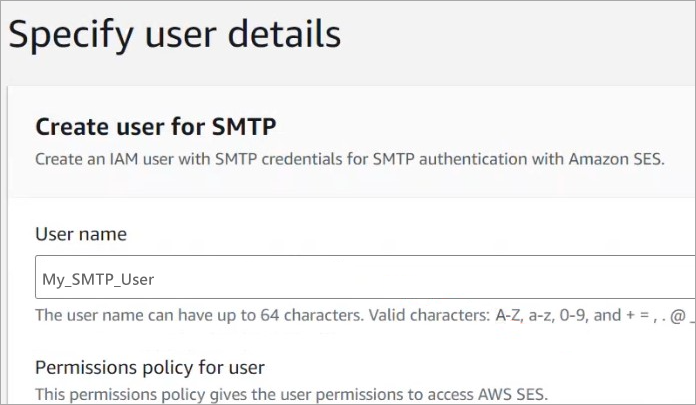
Add a user name for display purposes.
-
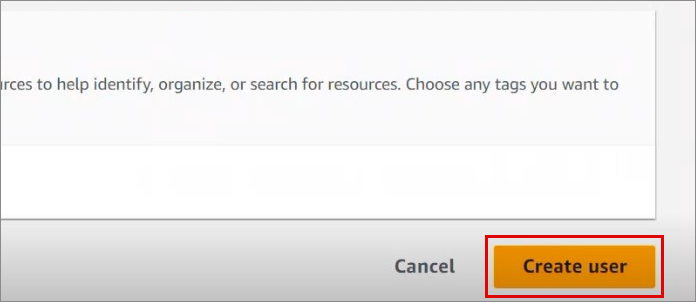
Click Create User to create an SMTP user and password.
-
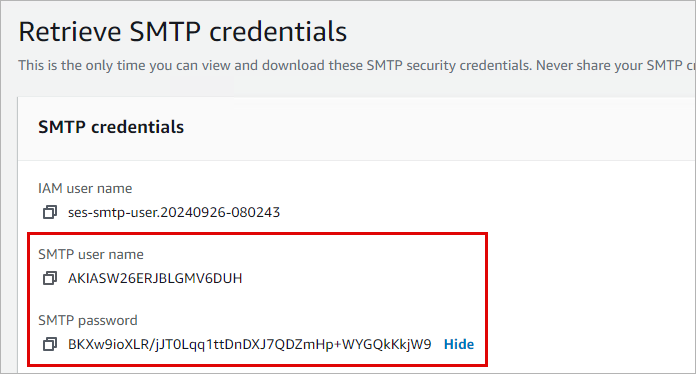
Copy the SMTP user name and SMTP password created for the new user. You will need to add them to the Mall in uStore.
-
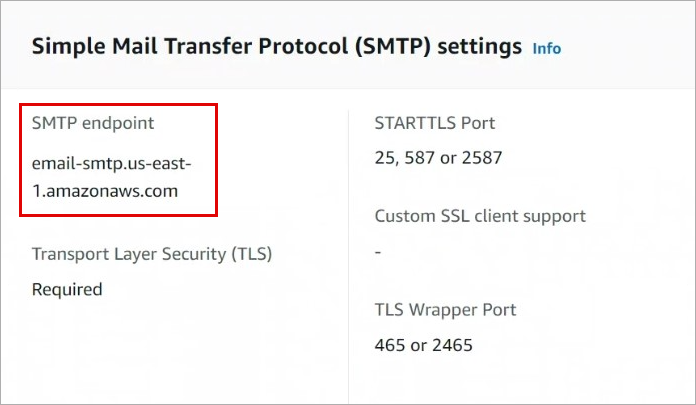
Copy the SMTP endpoint. You will need to add it to the Mall in uStore.
-
In uStore's Mall table, enter the following:
-
SMTP Server: Enter the SMTP Endpoint.
-
SMTP Port: Enter port 587.
-
SMTP User and SMTP Password: Enter the SMTP user name and password.
-
Select the SMTP Enable SSL checkbox.
-
