Setting a Destination for Output Files
uStore simplifies the retrieval of output files for hosted and StoreFlow Cloud customers by eliminating the need to manually access a file system or download files individually from the UI. This feature enhances the automation of printing workflows by allowing customers to set a specific destination where output files are automatically stored.
Currently, AWS S3 is the supported storage service for sending and storing data. Data is stored in S3 buckets, which are containers for objects in Amazon S3. When data is sent to an AWS S3 destination, it is stored in an S3 bucket. Files in AWS S3 can be downloaded using any S3 utility and transferred to the local network. Output files can include production files, prepress files (such as order JDF files), job tickets, and order XML files. This process ensures that printable files are efficiently delivered to the customer's local network for printing.
To set up this functionality, you first configure repository destinations where production/output files will be automatically copied. Then, you create a trigger that sends the files to the specified destination.
Notes:
-
You must prepare in advance a user in your S3 account and create a target folder for placing the files, and then configure the connection between uStore and the S3 bucket, as detailed below.
-
Prepress output files (available via the Post Prepress Files link and sent to S3) require the prepress provider to be configured to save its output to \uStoreShared\PrepressOutput\, with file names containing -<Encrypted order ID>-<order item ID>-. This folder is created during installation but is not populated automatically by uStore. Any prepress provider can be used; Manual Prepress does not write to this folder.
-
When using the Copy output files to destination action, the JDF will be created and will include a relative path to the output files.
Set up a destination
-
In Presets, select Output Destinations.
-
In the Output Destinations List page, select New Destination.
-
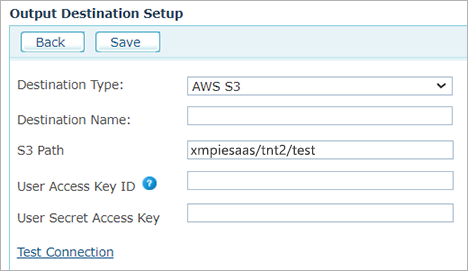
In the Output Destination Setup page, enter the required information.
Notes:
-
The predefined destination type is AWS S3.
-
The S3 Path indicates a path to a folder within a bucket in AWS. Enter the bucket name, and the path within the bucket (<bucketName>/<bucketFolder>).
-
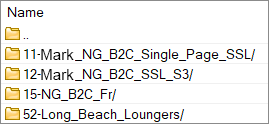
You can create a unique folder for each store by selecting the Use a unique folder per store checkbox.
-
If you're using your own account, the User Access key ID and User Secret Access Key are available with the user of the account. In case of hosted or StoreFlow Cloud customers, XMPie will provide you this information.
-
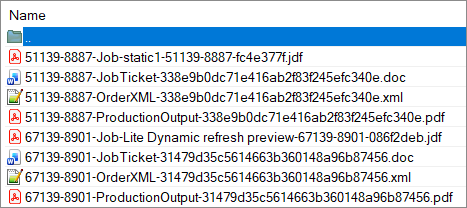
The naming convention for files in the S3 output folder depends on the file type:
-
Job Ticket: <Encrypted order ID>-<order item ID>-<order item nickname>-JobTicket-<order UID>.doc
-
Order XML: <Encrypted order ID>-<order item ID>-<order item nickname>-OrderXML-<order UID>.xml
-
Production Output: <Encrypted order ID>-<order item ID>-<order item nickname>-ProductionOutput-<order UID>.<extension>
-
Prepress Output: <Encrypted order ID>-<order item ID>-<order item nickname>-<original file name>
The order item nickname segment is omitted when the order item has no nickname.
Example (Prepress Output): 22341-129583-holidaycard-Job-Colouring Book -27604 -570 -cc42c069.jdf
-
-
-
Click Test Connection for the system to validate that the user's credentials are correct, and that the user can create folders and files under the specified path.
Set up a trigger
Create a rule that when triggered, the output files will be copied to the required destination.
-
In Presets, select Trigger Setup.
-
From the Trigger List page, select New to create a new trigger.
-
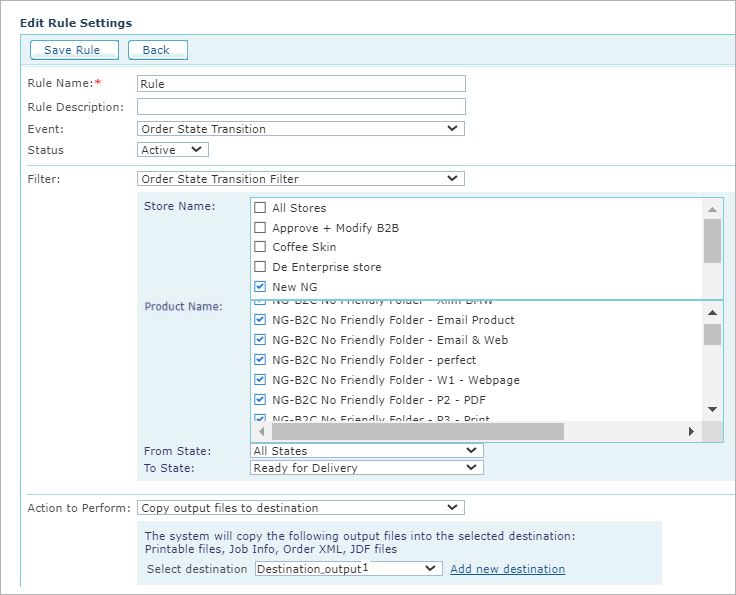
Give the rule a name and description, and select Order State Transition as the event.
-
In the Filter area, set the following:
-
Select Order State Transition Filter.
-
Store Name: Select the stores to which the action applies.
-
Product Name: Select the products to which the action applies.
-
Select the origin state (From State) and the target state (To State) that triggers the action.
For example, select From State: "All States" and To State: "Ready for Delivery", for the trigger to be fired when the order arrives in the "Ready for Delivery" queue. -
Action to Perform: Select Copy output files to destination as the action that will be executed in response to the occurring event, and then select from the dropdown the required destination to which the output files will be copied. You can also create a new destination using the Add new destination link.
-
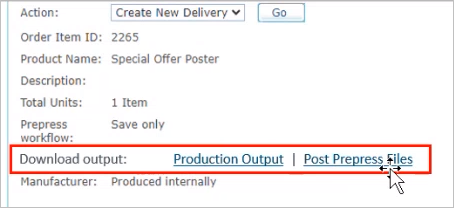
Output files can also be downloaded individually from the backoffice, from the Item Details page (when the order item is in the "Ready for Delivery" or "Ready for Prepress" queue). This is independent of the output destination configuration:
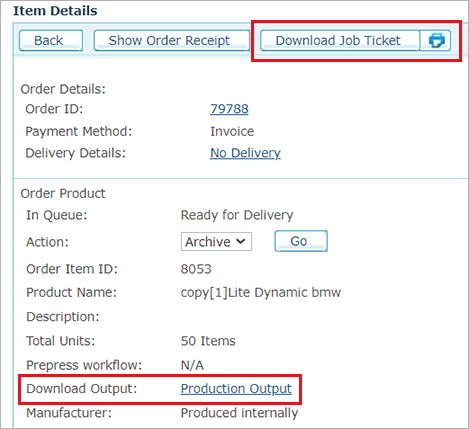
When prepress output files exist in the \uStoreShared\PrepressOutput\ folder, an additional Post Prepress Files link is displayed, allowing download of a zip containing the prepress output files. The Production Output link downloads the production output file (PDF, JPG, or ZIP):