Retrieving a Recipient List from a Database
Note: This option is not available for XM campaign products, and for StoreFlow Cloud customers.
Backoffice
You can configure uStore to pull recipient lists from tables of an existing SQL Server database, whether it is the database in which uStore resides or any other database.
To use a database as your source for recipient lists:
-
In the Product Setup page, click Recipients Setup.
The Recipients Setup page is displayed.
-
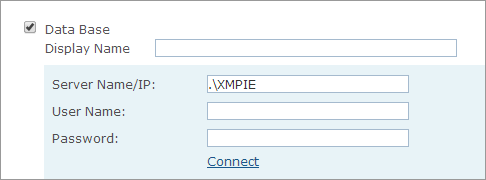
Select the Data Base option.
-
In the Display Name field, you can change the default text of this label.
-
Fill in the following fields:
-
Server Name/IP: Name of the server on which your database resides (followed by the Database Instance, if applicable)
-
User Name and Password: User Name and password that are used to access this server.
-
-
Click Connect to retrieve a list of the available databases in the selected server.
-
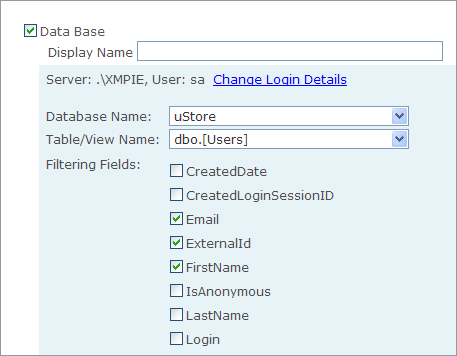
Select the database you want to use from the Database Name list.
-
Select a database table of the selected database from the Table/View Name list.
You are presented with all of the fields in the selected database. You can now select the fields that will later be visible to customers at the store and can be used as filters when selecting a database as the source for recipient list.
-
Select the fields you want to let the customer use for filtering the database in the storefront and, click Save.
Database tables are retrieved in full with all of their fields (that is, table columns). If you want to filter down the number of table fields visible to customers, you should create a database view and select it as your database table.
Storefront
At the store, customers are given the option to filter down their recipient list by selecting the filters that were defined by the store administrator in the uStore backoffice application. Each filter field shows all of the distinct values in this field.
To retrieve a recipient list from a database:
-
In the Recipients page of the store, select the Data Base option.
-
Select the required fields.
When selecting a field (for example, the field "Age"), a distinct value list appears next to the selected field, to enable customers to narrow down their selection by choosing only several values from the list. A customer can select a number of values by either dragging the mouse or using the <Shift> or the <Ctrl> keys.
The resulting recipient list appears in the recipient list editor that follows, which enables the customer to further edit the recipient list.