Connecting the Project to uProduce
The builder is responsible for connecting Circle to uProduce. uProduce is the engine responsible for executing the production of your project. Once the project is connected to uProduce, you can begin building the project.
Note: To enable you to access uProduce, the computer from which you are operating Circle must be located on the same LAN as the uProduce system.
Clicking the Build tab in the Circle workspace displays the Connect button that allows you to connect to uProduce. Once you are connected to the uProduce, the Library button is also displayed.

The uProduce system you select represents the connection from your Circle account to the Circle Agent on uProduce. A single connection is used to connect all projects in your Circle account to uProduce. When specifying your credentials, it is recommended that you grant access permissions to all relevant uProduce accounts.
Only those uProduce systems to which your Circle account has access permissions are available.
Note that the administrator is responsible for setting up the uProduce System by installing and setting up the Circle Agent. If you are unable to establish a connection to the uProduce system or the uProduce System dropdown box is empty, it could be because your Circle Agent was not configured to permit access from your specific Circle account, your Circle Agent version is out-of-date or has been installed or configured incorrectly.
An updated version of the Circle Agent can be downloaded from the uProduce Connection dialog box.
Connecting to uProduce
-
In the Build tab, click Connect.
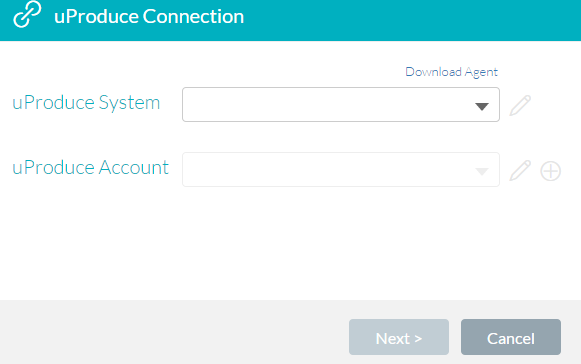
TheGet Started: Connect to uProduce dialog box is displayed.
-
Select a uProduce System from the uProduce System dropdown list.
-
Select an account from the uProduce Account dropdown list.
Available uProduce accounts are determined by your uProduce system credentials. Only those uProduce accounts accessible by the specified uProduce credentials are displayed in the list.
Clicking the Add icon allows you to create a new account. See Adding an account.
-
Click Next.
The system begins the connection process. A green icon indicates that the system was successfully connected.
The Get Started: Choose an Option window is displayed. See Getting started with your project.
Failure to establish a connection with the uProduce server could be due to the following reasons:
-
Agent Service is not currently running.
-
Selected Circle Account is no longer assigned to the Agent.
-
uProduce was not found at the specified location.
-
Unknown or deleted uProduce account.
-
Internal server error.
-
You are not authorized to work with the specified account.
-
Invalid user name and/or password.
Adding a uProduce account
When connecting to the uProduce system, you can select an existing uProduce account or add a new account.
To add an account:
-
In the uProduce Connection dialog box, click the Add icon in the uProduce Account field.
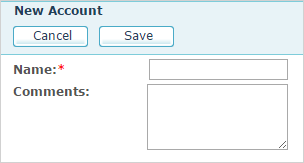
The New Account page is displayed.
-
In the New Account dialog box, type the name of the new uProduce account in the Name field.
-
Optionally add a comment in the Comments text box.
If the project for this account includes email touchpoints, see Defining email account settings for details on defining email settings.
-
Click Save.
The new account is displayed in the uProduce Account field in the uProduce Connection dialog box.
Editing account details
When connecting to the uProduce system, you can select an existing account and optionally change its name and add comments. Changing the account settings affects all projects which are associated with that uProduce account.
To edit an account:
-
In the uProduce Connection dialog box, select an account from the uProduce Account dropdown list.
The selected account is displayed in the uProduce Account field.
-
Click the Edit icon in the uProduce Account field.
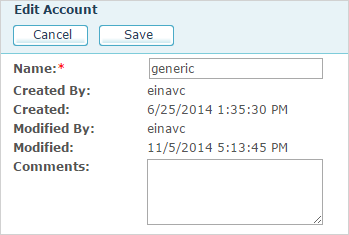
The Edit Account page is displayed.
-
In the Edit Account dialog box, optionally type a new name for the new account in the Name field.
-
Optionally add or edit the comment in the Comments text box.
If the project for this account includes email touchpoints, see Defining email account settings for details.
-
Click Save.
The edited account is displayed in the uProduce Account field in the uProduce Connection dialog box.