Uploading the data source with the wizard
The data source contains all the recipient tables in the selected database. Uploading the data source to uProduce enables the system to retrieve all recipient data, such as First Name, Last Name, Email, etc.
Every Circle project must include a single data source.
Using the wizard, you can upload only to a local database. For details on connecting to a remote data source, see Connecting to a remote data source in the library.
Uploading the data source automatically creates the plan file.
The plan file contains the schema, which describes the structure of a data source that can be used by the logic. You can use a basic plan file created by the data source or alternatively, you can modify an existing plan file or create a new plan file and add complex rules and database expressions using XMPie's uPlan Editor.
The plan file is uploaded to the library together with the data source that generated it. You can download the automatically created plan file and replace it with either a modified version or a different plan file. See Modifying the plan file.
Using the Getting Started wizard, you can upload a data source to the library in the uProduce system.
To upload the data source:
-
In the Get started: Choose an Option dialog box, click Upload the Data Source (easy start).
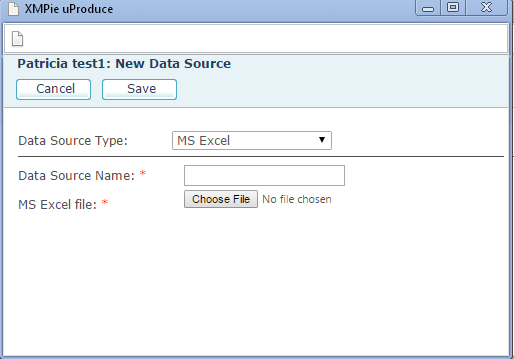
The <Project name> New Data Source dialog box is displayed.

-
From the Data Source Type dropdown list, select the database format you want to import.
Uploading the data source using the wizard enables you to select the following file formats: Excel (*.xlxs), Separated Values Text (*.csv) and Access.
-
Click Choose File, navigate to the file you want to upload and click Open.
You are returned to the <Project Name> New Data Source dialog box.
-
Click Save.
The Get Started: Identify the Recipients dialog box displays the data source name.
-
From the Recipient Table dropdown list, select the table that contains the records of the targeted recipients.
-
To define the XMPieRecipientKey logic, select of the following:
-
One Field: From the dropdown list, select the column header that uniquely represents the recipient, for example FirstName.
-
Two Fields: From the dropdown lists, select the column headers that uniquely represent the recipient, for example FirstName and LastName.
-
-
Click Next.
The system creates the plan file with the default name temp.plan. The file includes all content objects derived from the column headers of the uploaded data source.
Get Started: Summary is displayed. You can now view the data source and automatically created plan file in the library.
