Working with triggered email
Typically, at the launch of a project, you send a mass email to all or selected recipients. Unlike mass email, a triggered email is always sent to a single recipient.
A triggered email is sent in response to an event, usually an action, performed by a recipient on a XMPL webpage. For example, submitting a registration form triggers a "Thanks for Registering" email to the person who registered. For information on how to define the triggered email in the XMPL webpage, see Triggered emails.
An email touchpoint is a mass email by default. Circle allows you to switch from a mass email to a triggered email. When you switch from a mass email to a triggered email, all content associated with the mass email continues to be associated with the triggered email.
Alerts for triggered emails can be accessed from the triggered email touchpoint.
Configure a triggered email touchpoint
To configure a triggered email, you basically follow the same procedure as configuration of a mass email.
However, several options are not relevant for triggered emails:
-
List: The email is sent to a single specific recipient.
-
Schedule: The email is triggered by an action performed by the recipient in the webpage.
-
Send: The email is automatically sent when triggered by the action performed by the recipient in the webpage.
To create a triggered email touchpoint:
-
In the diagram, click the Production icon
 above the touchpoint to open the Production
dialog box.
above the touchpoint to open the Production
dialog box. -
In the top right corner, click the menu icon
 and select Triggered Email.
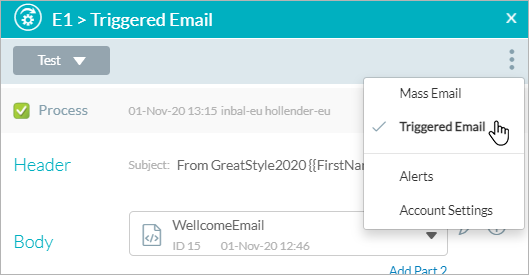
-
From the Body list, select an email document or create a new one.
-
Click the icon
 and
select Account Settings to define
account
settings.
and
select Account Settings to define
account
settings. -
Click Save.
This triggered email is now ready to be sent when the associated action occurs in the XMPL webpage.