Working with uImage
uImage® is an award-winning image personalization software solution from XMPie®, A Xerox Company. uImage is used to create unique, recipient-specific images for one-to-one marketing communications.
uImage allows you to create a template for generating personalized images. The template is created by designing a regular Adobe® Photoshop® file and then embedding it with uImage tags: placeholders for variable text, such as the recipient’s first name; variable images, such as the company logo; or both. At production time, the uImage tags are replaced with recipient-specific text and images, thereby personalizing the generated image for each recipient.
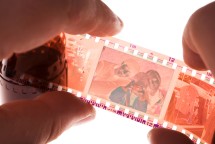
For example, the following figure shows the same base image, personalized for two recipients by embedding a text tag: the recipient's first name, Bo or Christiana.


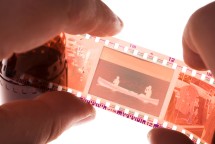
The figure below shows another base image, personalized for two recipients by embedding an image tag: a photo of a family or a photo of people in a boat.


For more detailed information on uImage functionality, see the uImage documentation.
uImage workflow in Circle
Pre-requisite: Data source, plan, assets, fonts are all uploaded to Circle.
Recommended flow (uCreate Print-Circle connectivity mode)
In Photoshop
-
Create your Photoshop document template with the desired personalization effect.
-
Save your template.
-
Export the uImage template, along with all components required to create the uImage effect, as an XMPie Document Package (*.dpkg file).
In uCreate Print
-
Using Circle connectivity, open a document located on Circle or create a new static document and upload it to Circle (for details on uCreate Print - Circle Connectivity, see the uCreate documentation).
-
Create a graphic content object that refers to the uImage function.
-
Upload the *.dpkg file referenced by uImage graphic content object to Circle.
-
Define the uImage content’s settings, such as output format (for example, JPG), output folder, output file name.
-
Click Save on XMPie Server to save and update the document and the plan on Circle.
In a document or webpage
-
If you wish to use the uImage graphic content object in additional documents or webpages, insert the uImage graphic content object into your print document, email document or a webpage.
In Circle
-
Run production for a touchpoint containing a document with uImage (Test or Print for print documents and Test or Send for email documents).
Advanced (using uPlan)
In Photoshop
-
Create your Photoshop document template with the desired personalization effect.
-
Save your template.
-
Export the uImage template, along with all components required to create the uImage effect, as an XMPie Document Package (*.dpkg file).
In uPlan
-
Download the plan file and the data source from Circle.
-
Open the plan file in uPlan and create a graphic content object using the uImage function.
-
Associate the uImage graphic content object with a dkpg file.
-
Define the uImage content object’s settings, such as output format (for example, JPG), output folder, output file name.
-
Generate a proof set.
-
Save the plan with the new graphic content object.
In Circle
-
Upload the project components: a plan, a data source, documents, etc.
-
Upload the uImage *.dpkg file. The uImage template (*.psd file) is added as a regular document to the library.
Any packaged uImage effect components (fonts, uImage assets, actions, brushes, styles and scripts) are placed in the proper locations.
In a document or webpage
-
Insert the uImage graphic content object into your print document, email document or a webpage.
In Circle
-
Run production for a touchpoint containing a document with uImage (test or print for print documents and test or send for email documents).
uImage On Demand
In cases when pre-processing of personalized images is not possible, the uImage On Demand feature allows you to optimize the load time of webpages containing personalized images created on demand.
Typically, it is recommended to pre-process personalized images that are going to be embedded in a webpage instead of generating them on demand. For more information on uImage pre-processing, see uImage dcumentation.
However, in some cases, pre-processing of personalized images is not possible, as in the case of a Self-Registration procedure, during which you wish to display a personalized image of a newly registered user. In such cases, you want be able to generate a personalized image on the fly and load it to a web page without affecting the loading time of the web page.
Adding a graphic content object in an on-demand workflow while using the regular content object tagging mechanism in an XMPL website might result in a slow loading time of personalized web pages, depending on the load of the site.
Therefore, in order to dissociate the personalized image
generation by uImage from the webpage load, it is recommended to use the
XMPL asynchronous loading methods of the XMPL language: xmp-asyncandmp-load-async-ador.
These methods help you control whether certain content objects are fetched asynchronously.
For more information, see the "Forced Async Loading" section of the XMPL SDK: https://github.com/XMPieLab/XMPL-SDK/wiki/Markup-Reference.
