Working with additional data sources
If your plan contains additional data sources in the schema, these data sources are displayed in the Data Source details pane in Circle. You are then able to select a data source file for each data source in the plan.
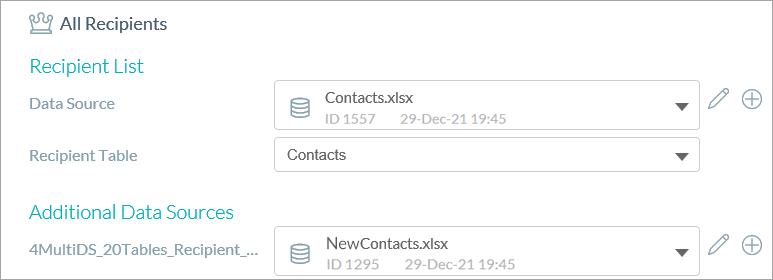
Note that using the data source ID helps you find the relevant data source when searching for it on the uProduce server.
Define an additional data source
-
In the library, in the Data Source pane > Additional Data Sources section, click the Add
 icon next to the data source name defined in the plan.
You can also use the recipient data source as an additional data source.
-
Select New Data Source from the menu.
The New Data Source dialog box is displayed.
-
From the Data Source Type dropdown list, select the data source type.
-
Click Choose File, navigate to the file and click Open.
You return to the to the Data Source pane in library.
-
Click Save.
The data source is saved to the system.
Download an additional local data source
The download option is only available for local data sources.
-
In the library, in the Data Source pane, click the Edit
 icon.
icon. -
Select Download Data Source from the menu.
-
In the Export Local Data Source dialog box, select the file type you want to export and click Export.
-
Navigate to where you want to save the file and click Save.
View details about an additional remote data source
The Tools option allowing to view data source details is only available for remote data sources.
-
In the library, in the Data Source pane, click the Edit
icon. -
Select Tools from the menu.
The Data Source details dialog box is displayed.
You can see there the data source server, database and user details.
More topics
Uploading a file-based data source to the library