Branding your projects
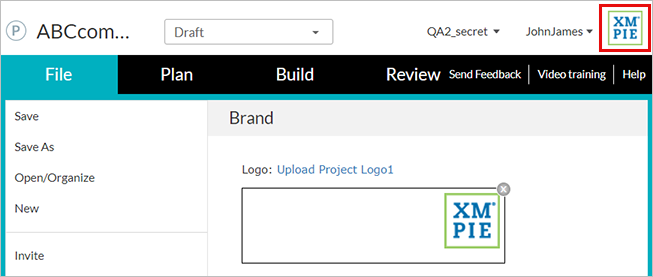
You can customize your project by adding the logo of your customer's company to the header of the Circle workspace in place of the Circle logo. The logo is applied to the current project only.
This is useful for customers who log into Circle and see the header area. For customers with whom you share the diagram, you can brand the diagram by uploading the company logo using an image node.
Brand a project
-
Open the project flow you want to brand.
-
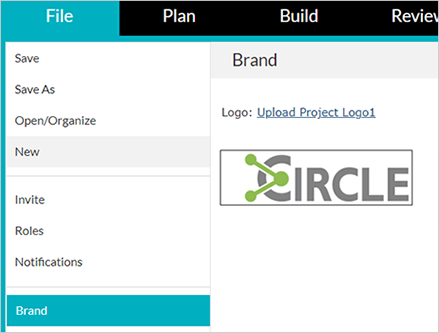
From the File menu, click Brand.
The Brand page is displayed.
-
Click Upload Project Logo and browse to the image you want to upload.
-
Select the file and click Open.
The selected logo replaces the Circle logo in the graphic field and is displayed in the header of the Circle workspace.
-
From the File menu, click Save.
Note: If you wish to revert to the Circle logo, click the x on the right side of the graphic field.
Brand the diagram
-
In the Plan tab, click the Orientation group on the left panel.
-
Drag the image node
 to the canvas.
 -
Click the Integration icon
 of the new node.
 -
In the Integration dialog, click Upload Image and browse to the image you want to upload.
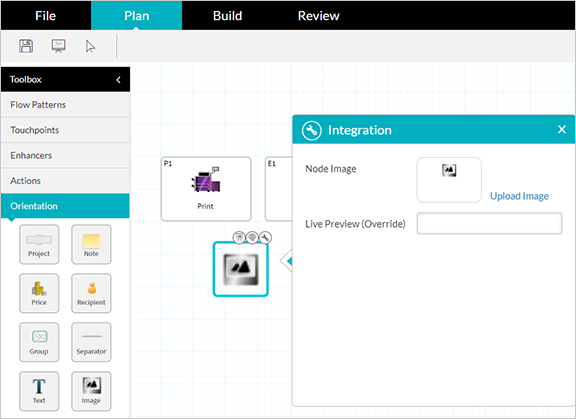
The image is added to the canvas. You can drag it to the required location on the canvas.