Global Settings
Note: This operation can be performed by the admin user only.
Email notifications for system alerts
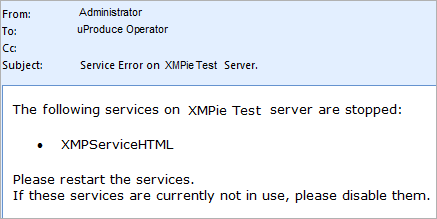
When one of the uProduce monitoring tools report a warning or an error, an email notification is sent to the administrator. For example, if the monitor tools notice a service that is not running, or one of the server’s hard disks is running low on available space.
The email notifications are triggered by the following events:
-
As soon as a monitoring tool reports an error or a warning for the first time.
-
If the reported status became more severe (for example, a warning became an error).
-
If the status has not changed for 3 days since the first email notification, another email is sent.
-
If the reported status changed to OK, no email notification is sent.
-
If a job completion email has been set.
To define email notification settings for system alerts:
-
Log in to uProduce as an administrator.
-
Click the Settings tab.
-
On the left, select Global Settings.
-
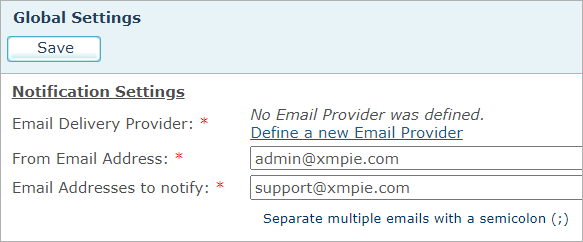
If no email provider is set up, click Define a new Email Provider.
The New Delivery Provider page is displayed. For instructions for defining an email delivery provider, see Defining a Delivery Provider.
If an email delivery provider is already defined in the system, from the Email Delivery Provider dropdown list select the one you wish to use for sending system alerts.
-
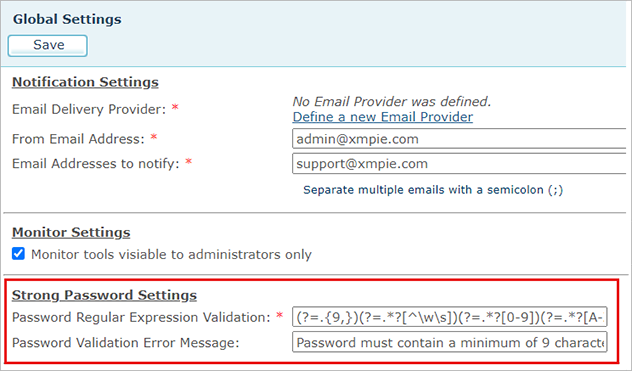
In the From Email Address, enter a sender’s email address. This field must contain a valid email address with an existing domain.
-
In the Email Addresses to notify text box, enter the email addresses of the system alerts recipients. Usually, this will be the address of the uProduce administrator.
-
Click Save.
Notification settings for the account and campaign (all users)
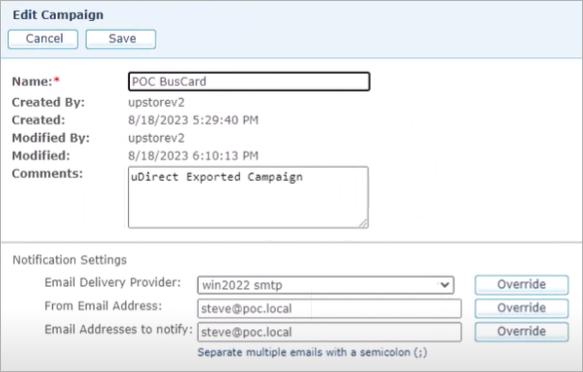
In the case of job completion emails, you can override these default settings and configure notification settings on each account and campaign. In this way you can control who gets the job notification email.
The job confirmation email first looks for the notification settings on the campaign that holds the document being processed. By default, it uses the same settings defined by the admin. You can enter a different email address and click to override this or any of the other settings.
If there is no change on the campaign, the job completion email will then check the account. You can change notification settings for the account and it will be used for all campaigns in that account, unless a campaign itself overrides the settings.
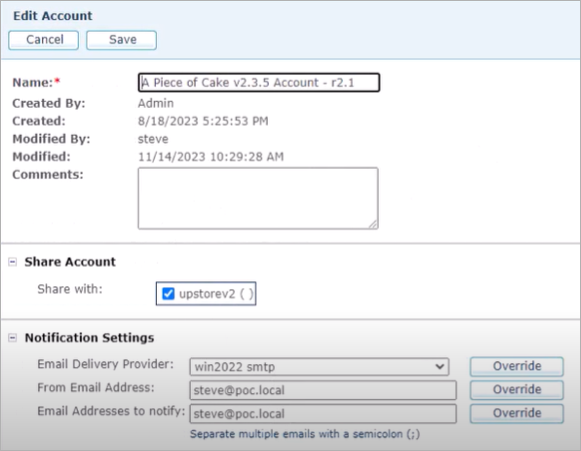
And, if the account does not override the notification, then the settings from the admin area will be used by default.
Monitoring tools
uProduce enables monitoring the status of your system. To view the status, a user must click the Monitoring button on the navigation bar. The Monitoring button can be visible to all users, or to admins only.
To enable monitoring tools:
-
Log in to uProduce as an administrator.
-
Click the Settings tab.
-
On the left, select Global Settings.

-
In the Monitor Settings area, select the checkbox if you wish to grant permissions to uProduce administrator only. If left cleared, all users will have permissions to view monitoring tools.
Password policy
In the "Setting the Password Policy" section, you can establish security guidelines for passwords created for new users. Simply define a set of rules to ensure strong password usage, strengthening the overall system security against potential threats.
To set the password policy:
-
Log in to uProduce as an administrator.
-
Click the Settings tab.
-
On the left, select Global Settings.
-
In the Strong Password Settings area, specify a regular expression pattern that passwords must adhere to.
By entering a suitable regular expression, you enforce specific criteria for password creation, such as minimum length, required characters, or other custom rules.You can also customize the error message displayed to the admin when creating a new user, if the password does not meet the criteria defined by the specified regular expression. Provide a clear and informative message that helps understand why the password was rejected.
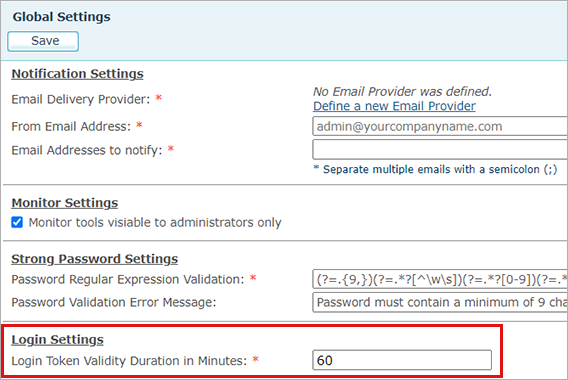
Duration of the login token
The "Login token validity duration in minutes" is a security feature that allows you to specify the duration for which a user's login token remains valid after they log into the system. This token serves as a digital key that authenticates the user during their session.
By setting a specific duration, you control the time frame in which the user's token is considered valid. Once this duration elapses, the system automatically logs the user out. The user will then need to log in again.
To set the login settings:
-
Log in to uProduce as an administrator.
-
Click the Settings tab.
-
On the left, select Global Settings.
-
In the Login Settings area, enter the required duration for the validity of the login token. This value determines how long the user can stay logged in before the system automatically logs him/her out for security reasons.