Bleed and Marks
Bleed
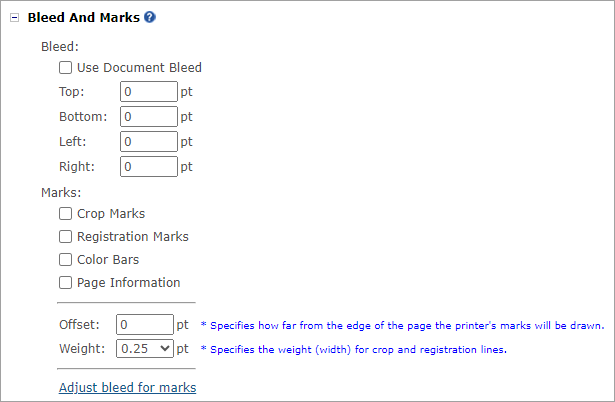
Bleed refers to the area of a design that extends beyond the intended trim edges of the final printed piece. This ensures that when the paper is trimmed, the design reaches the edge without leaving any unwanted white borders. Bleeds usually require an additional margin beyond the trim line.
By default, the Use document Bleed checkbox is selected to indicate that the bleed settings used in the document design in Adobe InDesign will be applied for the print output.
You can clear this checkbox and set up different bleed settings by entering inset values in the Top, Bottom, Left and Right fields. If the document has facing pages, the bleed settings should be entered in the Top, Bottom, Inside and Outside fields. The inset value is measured from the edge of the document size.
Once the production bleed settings have been set, they will be used for future jobs.
Note that if you have printer marks displayed, the bleed must be greater than 0 in order for the marks to fit in.
Marks
Print marks are symbols or guides included on a printed document to assist in the production process. They ensure accurate cutting, alignment, and color consistency. These marks are usually positioned in the bleed area, outside the final print area, and are removed during trimming. Common print marks include:
-
Crop Marks: Adds fine (hairline) horizontal and vertical rules that define where the page should be trimmed. Crop marks can also help register (align) one color separation to another.
-
Registration Marks: Adds small "targets" outside the page area for aligning the different separations in a color document.
-
Color Bars: Adds small squares of color representing the CMYK inks and tints of gray (in 10% increments). Your service provider uses these marks to adjust ink density on the printing press.
-
Page Information: Prints the filename, page number, current date and time, and color separation name in 6-point Helvetica in the lower-left corner of each sheet of paper or film. The Page Information option requires 0.5 inches (13mm) along the horizontal edge.
Offset: Specifies how far from the edge of the page (not the bleed) the printer’s marks will be drawn. To avoid drawing printer’s marks on a bleed, be sure to enter an offset value greater than the bleed value.
Weight: Displays possible weights for crop and registration lines.
The units displayed are points by default, but can be changed to different measurement units in User Preferences.
You can use the Adjust Bleed for Marks link to set correct bleed values based on the selected print marks, offset and weight options.