Adding a Job Ticket/Output File (PDF)/Clearing Information to a Message Template
It is possible to add to the email template the relevant
-
Job ticket
-
Output file (PDF)
-
Clearing information, in case an offline billing clearing model is used. Clearing information is provided in the following form:
Card Type: VISA, Card Number: XXXXXXXXXXXX1111, Expiration Date: 01/2018
For the job ticket and output file, you must add code in both the Message Template and the Message Template SQL tables.
To add a job ticket/output file to a message template:
-
On the toolbar click Presets, and then select System Setup.
-
In the System Setup list, click Message Template.
-
Click the Edit
 icon of
the message template you wish to edit and then click Edit
Localized Text.
icon of
the message template you wish to edit and then click Edit
Localized Text. -
on the Message Template Localization page, click the Edit
icon of the required language. -
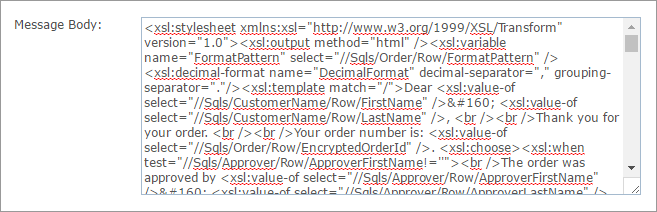
Enlarge the Message Body text box to easily view the XSL code, or copy it into a text editor.
-
In the required location, use the following link for downloading:
-
Production PDF:
http://www.myDomain.com/uStore/Controls/SDK/OrderOutputProxy.ashx?token=<xsl:value-of select="//Sqls/OrderProduct/Row/OutputToken" /> -
Job Ticket:
http://www.myDomain.com/uStore/Controls/SDK/
                     JobTicketProxy.ashx?token=<xsl:value-of select="//Sqls/OrderProduct/Row/OutputToken"
                     />&cultureID=1
Note:
&cultureID=1is optional. You can get the job ticket in any culture. 1 is for en-US, 2 is for fr-FR, and so on. If you want to use the job ticket in the same culture as the email's culture, use&cultureID=<xsl:value-of select="//Parameters/CultureId"/>
-
-
Take note of the Message Template ID you are editing.
-
Return to Presets > System Setup, and select Message Template SQL.
-
Enter the relevant message template ID in the filter box and select Equal to to select all message template SQLs used by that template.

-
Click the Edit
icon next to the OrderProduct SQL (continue to step 12 if your template
does not use an SQL named OrderProduct). -
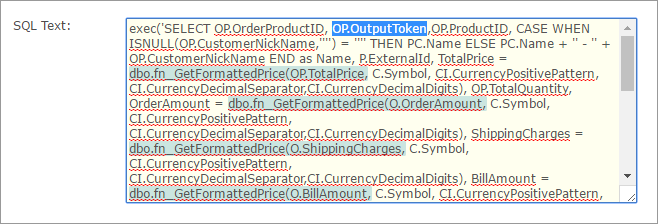
In the SQL Text text box, after OP.OrderProductID add OP.OutputToken, as can be seen in the following example:
-
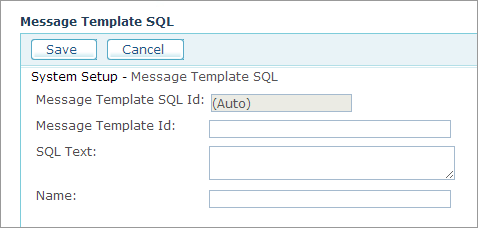
If your template does not have an OrderProduct SQL, click Add New and enter the following information to create a new Message Template SQL:
-
Fill in the following fields:
-
Message Template Id: ID number of the message template associated with this SQL.
-
SQL Text: SQL statement. The SQL may use parameters as specified in SQL Examples.
-
Name: Node name in the XML file that will be generated. The node name must be unique per message template.
-
-
Click Save.
To display clearing information in a message template:
-
On the toolbar click Presets, and then select System Setup.
-
In the System Setup list, click Message Template.
-
Click the Edit
icon of the message template you wish to edit and then click Edit
Localized Text. -
on the Message Template Localization page, click the Edit
icon of the required language.
-
Enlarge the Message Body text box to easily view the XSL code, or copy it into a text editor.
-
In the required location, enter the following string:
<xsl:value-of select="//Parameters/EncryptedClearingData"
                     />