Creating an Ingenico Clearing Model
Note: This clearing method is now deprecated.
Ingenico is a payment gateway which collects money from your customers and uses an acquirer (for example, a bank) to verify the payment details.
In order to work with Ingenico, you have to open an account with Ingenico and with acquirers that support this type of payment in your country. After opening an account, you can configure Ingenico in uStore.
Set up an Ingenico test account
-
In the Ingenico website, register as a new merchant.
-
Fill in the registration form with your details.
Notes:
-
You may set the Status of VAT Number to On hold.
-
Remember the PSPID (login name).
-
-
Click Register.
You'll receive a message confirming your registration. You must now wait for an email to be sent to you with your password. Remember it!
-
Log on to Ingenico’s administration site (or click the Test Login button in your email) with your PSPID and password. Upon the first login, you will be required to change your password.
The home page of the administration site now displays which parts of the account must be set up.
-
Click the Your invoicing information link, and enter the required details.
-
Return to the home page, and select Your payment methods.
-
In the Payment methods > Choose new payment methods tab, select the payment methods you require for your website. uStore supports all the credit cards, Direct Debits AT – ELV, Direct Debits DE – ELV, giropay and iDEAL.
Do not activate any of the other payment methods.
For any of the credit cards, when clicking Add, you can select I have not yet signed a contract for distance selling with an acquiring bank, but I would like to activate this payment method now in test with a test affiliation number.
For the other payment methods, you will have to ask Ingenico support to activate it for test purposes
Once you have added all the payment methods, return to the homepage.
-
In the homepage, click Your technical settings, and fill in the required tabs.
-
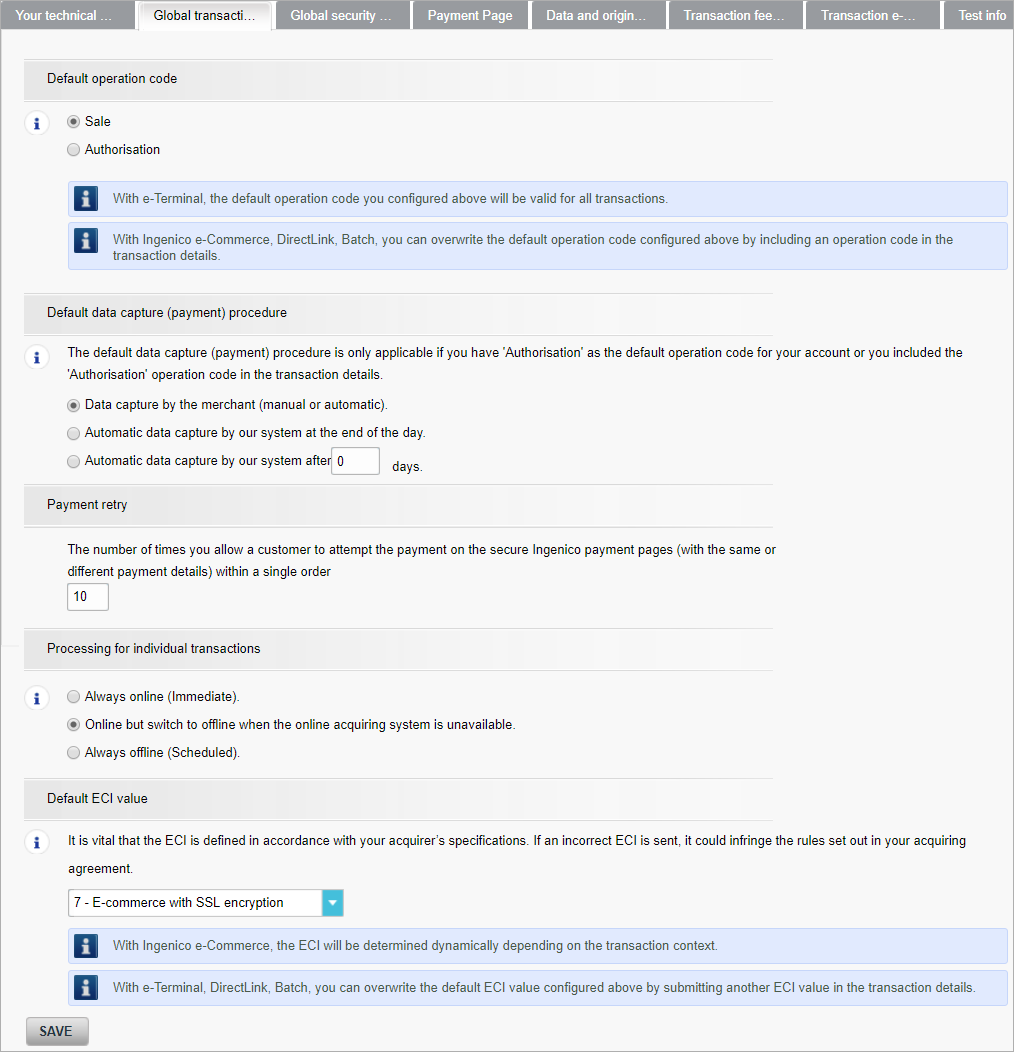
 Global transaction parameters
Set the global transaction parameters as follows:
-
Global
security parameters
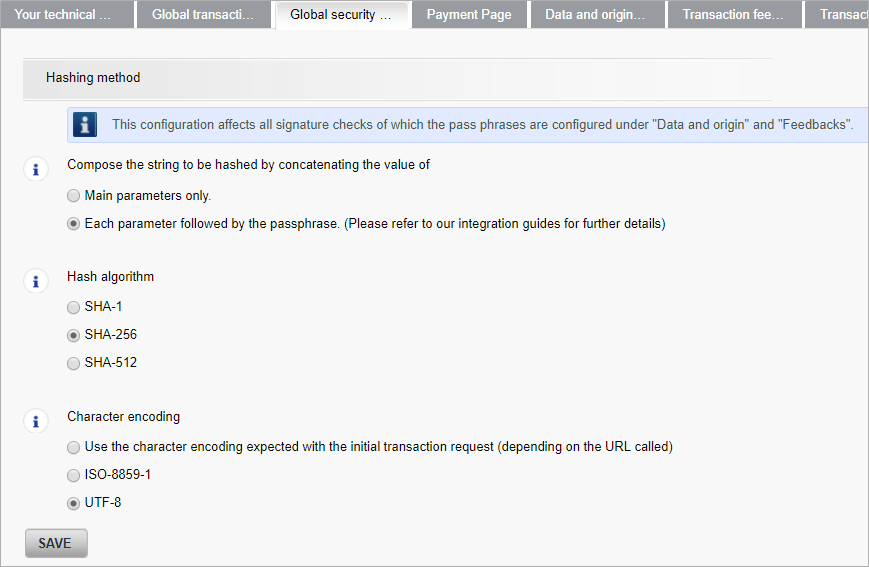
Note: The option compose the string to be hashed by concatenating the value of is visible only if you have an existing Ingenico account. Set this option to Each parameter followed by the pass phrase.
-
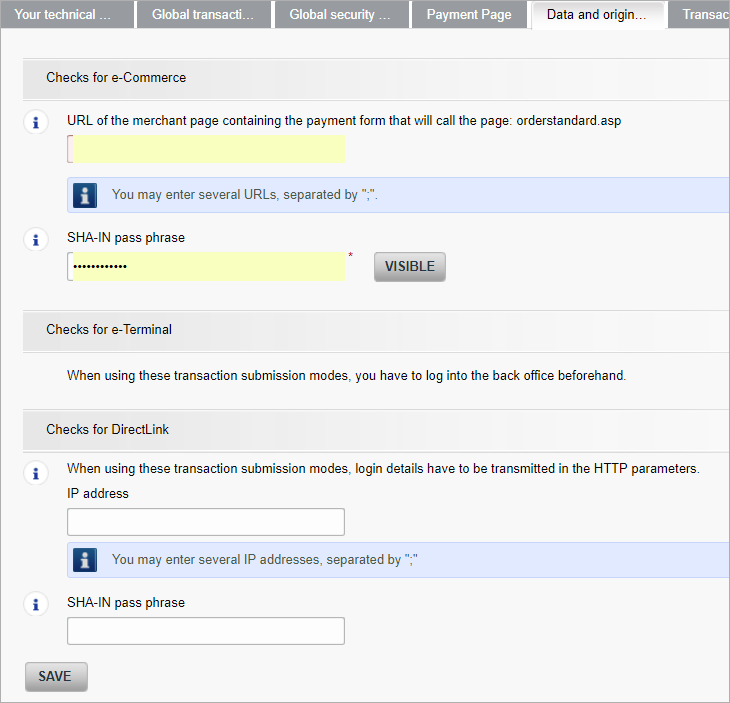
Data
and origin verification
Fill in a SHA-IN pass phrase and remember it.
-
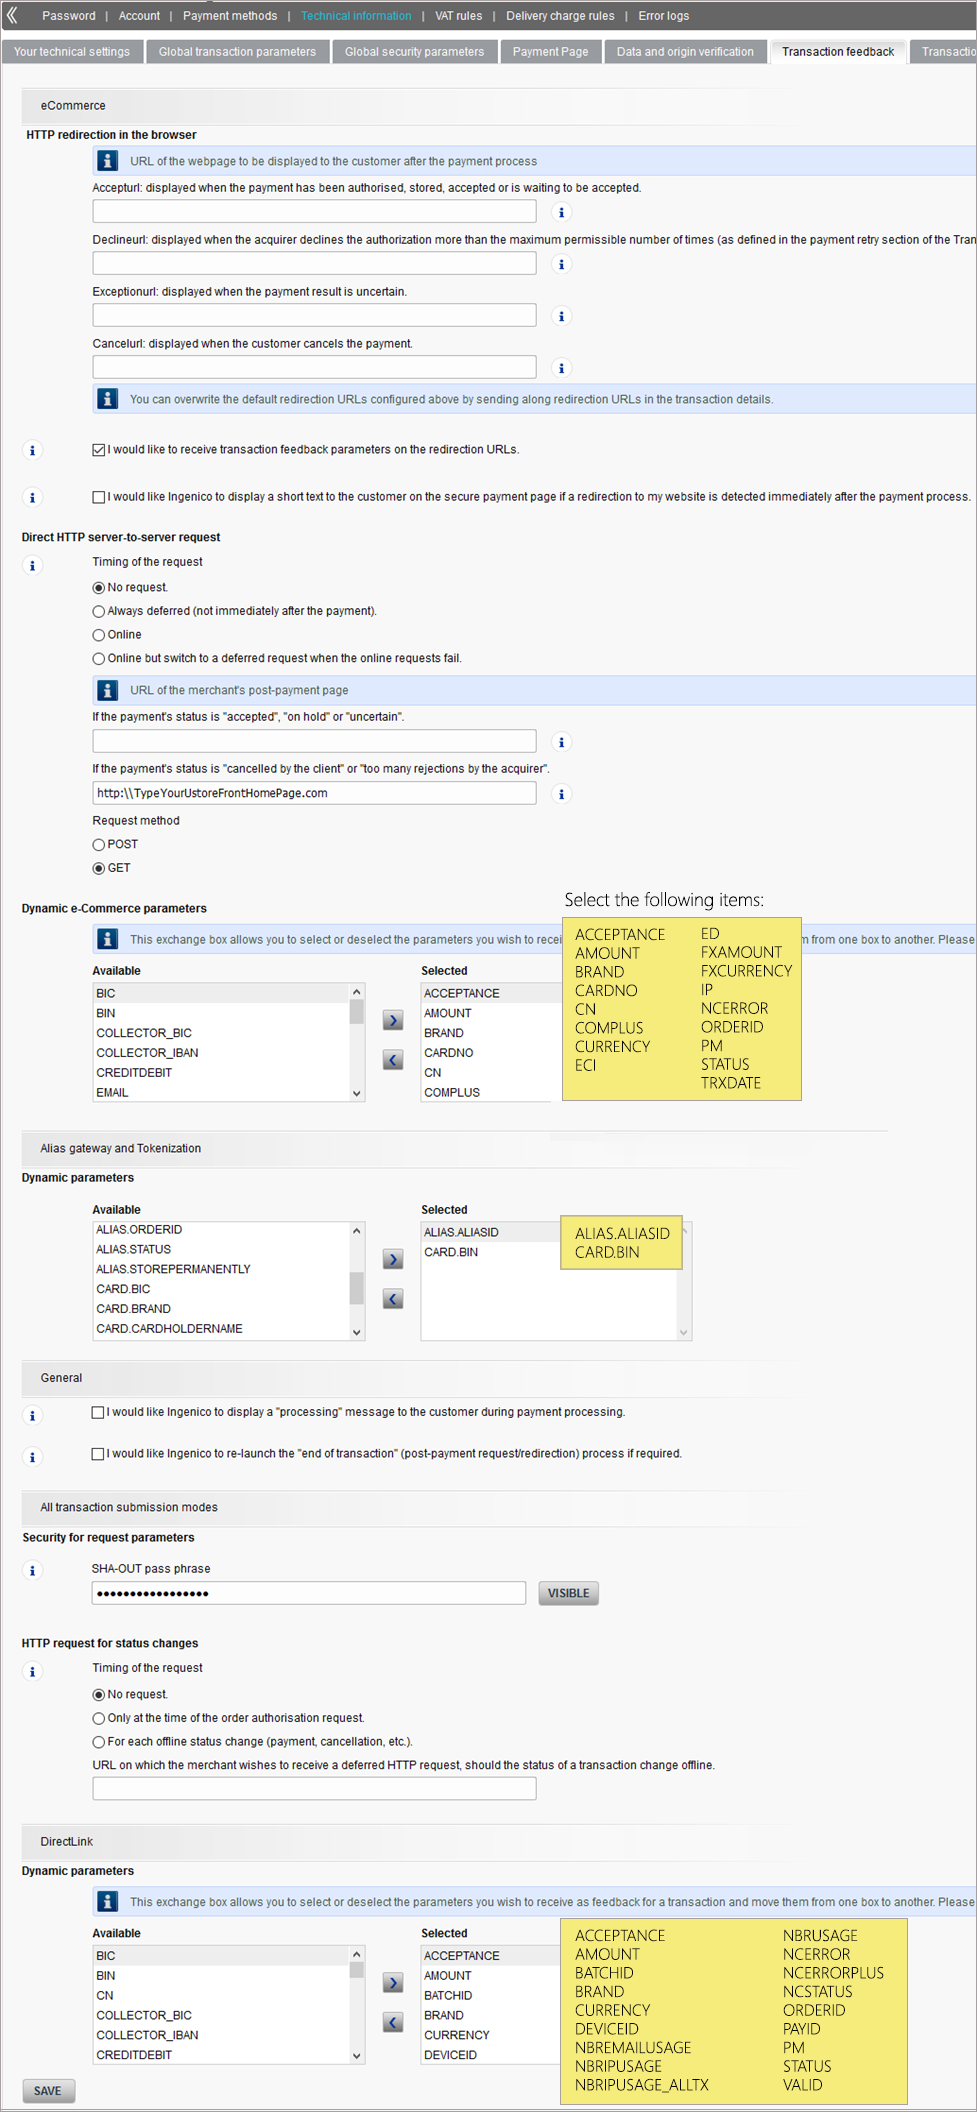
Transaction
feedback
Note: uStore does not support the BIN and SUBBRAND parameters.
Remember the SHA-OUT pass phrase.
-
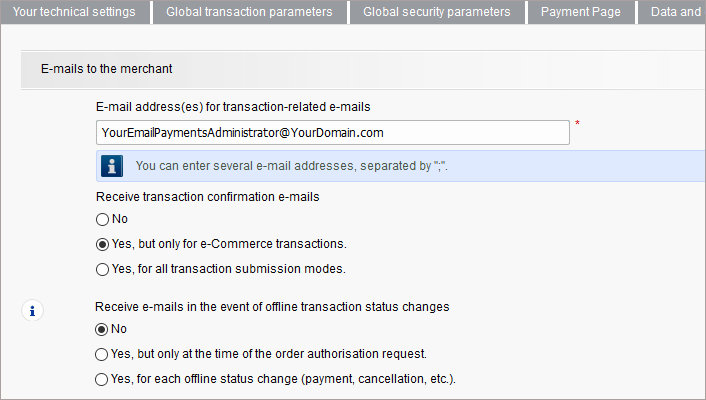
Transaction
e-mails
Configure your email address for email notifications.
-
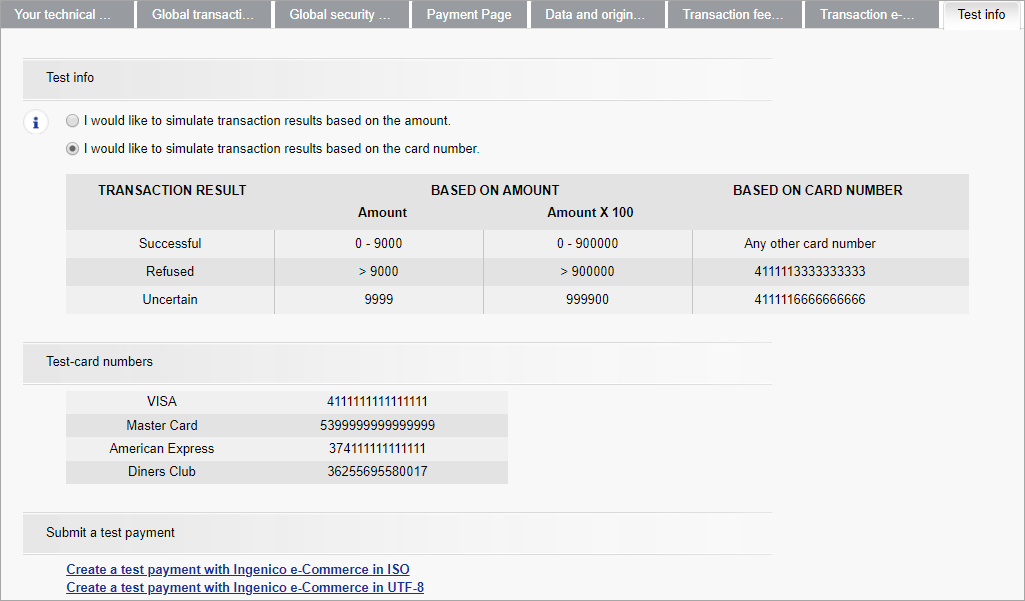
Test
info
Remember the test credit card numbers that may be used for testing uStore with Ingenico.
-
-
Return to the homepage and click Activate your account and then I accept the general conditions.
-
Log out and log back in (to allow the User management to be activated).
-
Click Configuration >Users.
-
In the Users Management page click New User to create a user for the Ingenico API.
-
Fill in the User's Data form.
-
Click Create.
You will now get the password of the user you created. Remember this information. You will use it to fill in the API User Name and API password fields in Ingenico Clearing configuration in uStore (see Configuring Ogone in uStore).
-
Click Configuration >Account > Languages, and select all languages that you use in the uStore storefront.
-
Click the Currencytab, and select all the currencies which are used in the uStore Storefront.
Your Ingenico test account is now set to work with uStore. You can now configure uStore to work with the Ingenico account.
Configure Ingenico in uStore
Prior to configuring the clearing model, make sure you have an active Ingenico account.
|
Field |
Description |
|
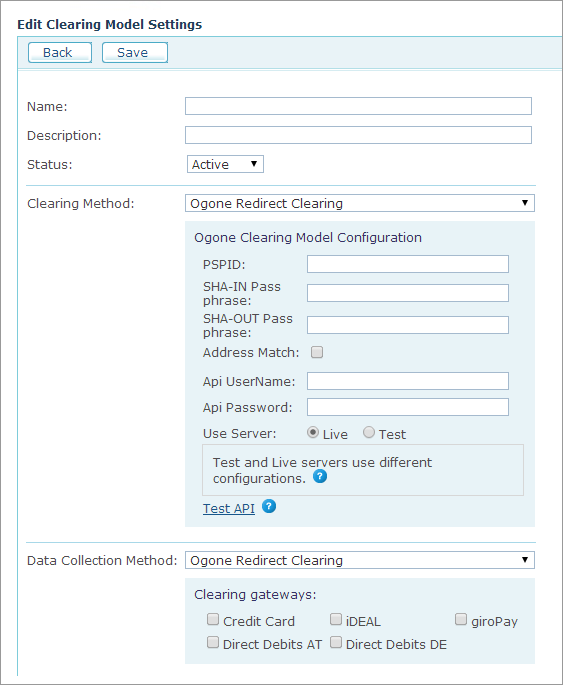
Name, Description |
Enter a name and a description for the clearing model. |
|
Status |
Select Active to make the clearing model available for the stores or Inactive to hide it. |
|
Clearing Method |
Select Ogone Redirect Clearing. You will be prompted to fill in information in the Ogone Clearing Model Configuration section (which is exclusive to Ogone). |
|
PSPID |
Login name as defined in the New merchant registration (Test) page of the Ogone account setup. |
|
SHA-IN Pass phrase |
The password entered in the SHA-IN Pass phrase field in the Data and origin verification page of the Ingenico account setup (see "Data and Origin Verification" in Configuring Ogone in uStore). |
|
SHA-OUT Pass phrase |
The password entered in the SHA-OUT Pass phrase field in the Transaction feedback page of the Ingenico account setup (see "Transaction feedback" in Configuring Ogone in uStore). |
|
Address Match |
Select this checkbox to let Ingenico check the validity of the billing address entered in the Storefront Checkout page. |
|
API User Name |
API User name that you receive after having created a user account (see "User Management: in Configuring Ogone in uStore). |
|
API Password |
API password that you receive after having created a user account (see "User Management" Configuring Ogone in uStore). |
|
Use Server |
Select Live to use the production server. Select Test to use the test server. |
|
Data Collection Method |
Ogone Redirect Clearing option is automatically selected. Select one of the following Clearing gateways:
|