Setting Up the Customization Wizard
Note: This topic is relevant for dynamic, email, kit and XM campaign products.
This optional step, enables administrators to create a Customization Wizard. The wizard is used to guide customers who order this product through a customization process in which they can specify values for a selection of dynamic objects included in the product.
In case of kits, the Kit includes dynamic products option must be selected in Product Setup > Campaign area.
Dynamic objects that can be customized in uStore are known as dials. There are two types of dials: ADOR Objects, which are directly included in the document (for example, a text or a picture); and Variables, which are not directly included in the document, but involve an operation (for example, a calculation) whose result is shown the document (for example, a discount percentage). Each document includes a predefined list of available dials and the administrator selects the dials to be included in the wizard.
All dials have default values (which may be “null”), defined in the Plan file. Dials that are not included in the wizard automatically use their default values during proofing or Production.
For the customer’s convenience, the administrator can divide the Customization Wizard into several logical steps. For example, you may create a wizard that consists of two steps: a "Personal Details" step, followed by a "Picture Selection" step.
Note: The customization wizard enables you to use a single dynamic document to create several products, which vary in terms of their customization-level and address different types of customers (for example, novices vs. advanced users).
To set up the customization wizard:
-
In the Product Setup page, click Customization Wizard Setup.
The Customization Wizard page is displayed.
By default, each new product includes a single step, Step 1, with no linked dials.
-
To give the default step a meaningful name (for example, "Contact Details"), click Edit Step.
The Step Details page is displayed.
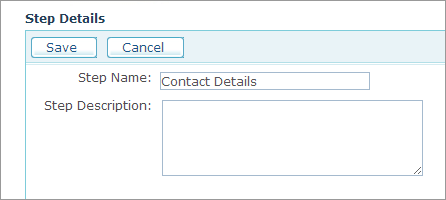
-
Edit the Step Name, provide a Step Description (optional) and click Save.
-
On the Customization Wizard page, specify which dials should be linked to this step:
-
From the Available Dials list, choose the type of dials you want to display: ADOR Objects (for example, text or graphic objects) or Variables (for example, calculations).
-
Once the desired type of dial is displayed, move each relevant dial from the Available Dials list to the Dials Linked to Step list, by clicking the arrow
 icon.
icon.
To disconnect and remove a dial from the step, click the icon.
icon. -
You can change the display order of dials in the Dials linked to Step list by clicking the up and down
 arrows.
 -
Move additional dials from the Available Dials list to the Dials Linked to Step list as needed.
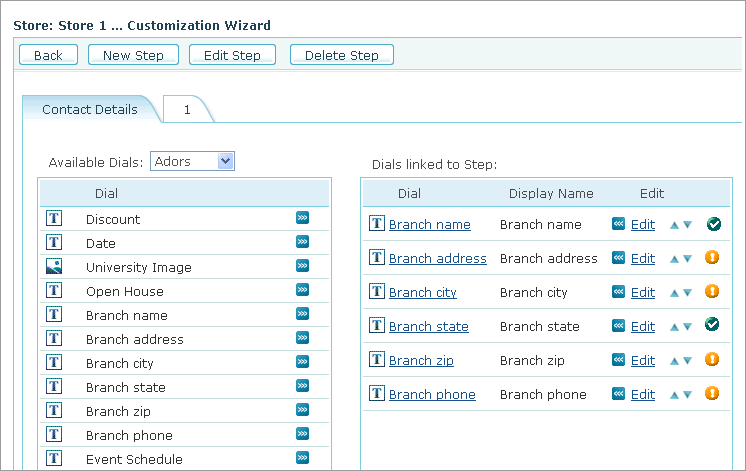
The linked dial’s icon indicates its editing status as follows:
 Edited dial
 Unedited dial, whose default
settings are currently used
Unedited dial, whose default
settings are currently used  Dial
that must be edited
Dial
that must be edited
-
-
To edit a linked dial, click its name or click Edit.
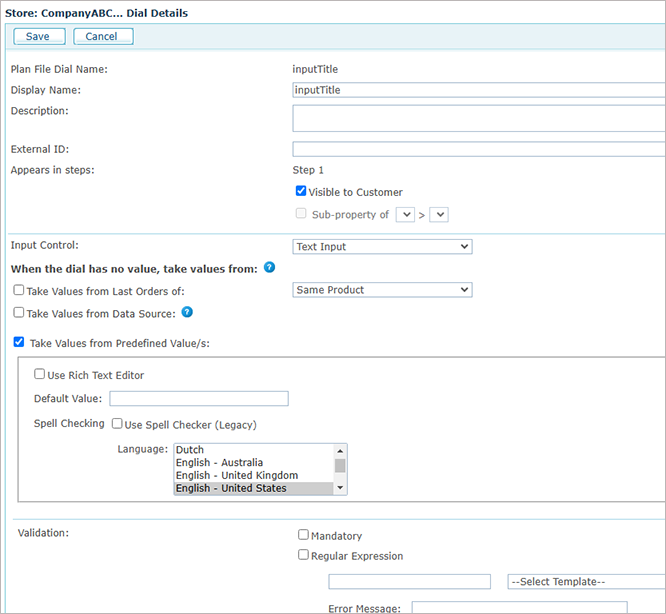
The Dial Details page is displayed.
-
Configure the desired definitions of each dial. The customizable definitions are divided into three sections:
-
Click Save.
General dial information
Edit the general customizable properties:
-
In the Display Name box, enter the name to be displayed to customers (as opposed to the dial name in the plan file).
Note: When using the Excel pricing model, you cannot use parentheses or other special characters to name customization dials.
-
In the Description box, enter a brief description of this dial.
-
In the External ID box, distinguish the dial by providing it an identification number. This is useful when creating custom made plugins for uStore.
-
The Appears in steps field displays the Customization Wizard step in which this dial appears.
-
When the Visible to Customers check box is selected, this dial is displayed as part of the product customization process at the store.
A possible use of this feature would be to create several products using a single design. For example, you can create a design with several layers where each layer has a different layout and assign a different dial to each layer (for example, by using a visibility dial). Then, you can create several products using that same document and the dials you have created by exposing the layer you want to make visible to customers. Customers will see only the resulting design as they cannot customize the dials you omitted from the product customization stage.
-
Sub-property of: If one of the dials in a particular step has a gallery list/grid view input control, you can create a dependency between it and any of the other dials in the same step. Select the dial on which the new dial is dependent from the dropdown list and then select its value from the list of available options.
Validation options
The available validation options vary according to the selected input control.
The following validation options are provided:
-
Mandatory (available for all input controls except checkbox): uStore must confirm that a value is provided by the customer.
-
Regular Expression (available for text input, multiline text input and HTML generic input controls): uStore supports industry-standard regular expressions, which can be used to validate the user input in different ways, from simple rules to highly sophisticated validation logic.
You can choose a regular expression template to validate the value provided by the customer. The Select Template list provides common examples of regular expressions (such as a Positive Integer, US Phone Number, etc.). You can adapt this list to your needs by configuring it in the database.
For information on working with regular expressions
-
Range (available for text input, multiline text input and HTML generic input controls): specify the minimum and maximum values allowed for the value provided by the customer.
-
Width, Height and Ratio (for graphic files): If the selected input control is either an Image Selector or a Popup Image Selector, specify the allowed width, height and ratio ranges for an uploaded graphic file.
-
Max size of uploaded document (in MB) (available for file attachment input control): specify the maximum size of uploaded documents (in MB) from both local drives or external repositories. First select the checkbox, and then enter the required number.
-
Max no. of uploaded documents (available for file attachment input control): Specify a limit on the number of documents that can be uploaded. If you do not specify a limit, customers will be able to upload an unlimited number of documents. First select the checkbox, and then enter the required number.
Dial input controls
The input control section is where you select the type of input required from the customer and specify the values for the selected input control. For detailed information, see Setting Up Dial Input Controls.