Creating Product Profiles
Overview
To simplify product management, uStore offers product profiles - a set of reusable product properties you can apply to multiple products in different stores. This allows you to make global updates easily, without editing each product individually. Changes made to a product profile automatically apply to all linked products.
When to use product profiles
Product profiles are ideal if you frequently update product properties or manage groups of products with shared attributes.
Let’s say that your store sells brochures, calendars and business cards. All your brochures have similar paper stock options and price structure. In such a case, you do not need to open every brochure product and set up its paper stock and pricing parameters separately. You can create a product profile called Brochures and link each brochure to this profile. After you link the brochure to the product profile, you can update or modify the settings in the profile and all brochures that are linked to this profile will be automatically updated.
Best practices
-
Set up product profiles before configuring individual products.
-
Use product profiles to manage shared properties while defining unique attributes directly within each product.
Flexibility
Using product profiles is optional. You can set up products individually without relying on profiles.
Profiles you create are not limited to a single store - they can be applied across multiple stores, making product management more efficient and consistent.
Create a product profile
To create a product profile:
-
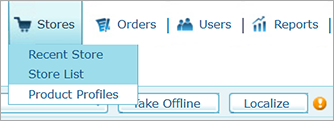
On the toolbar click Stores > Product Profiles.

-
In the Product Profile List page, click New Product Profile.

-
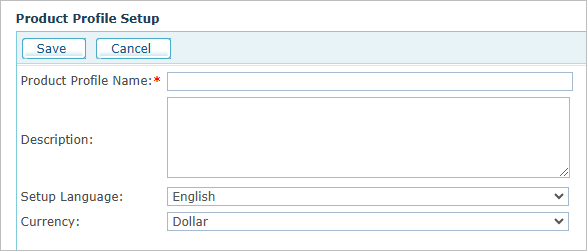
In the Product Profile Name box, enter a name for your profile. For example, if you are creating this profile to be used for printing business cards, you can call it Business Card profile.
-
In the Descriptions box, enter a significative description for the product profile.
-
In the Setup Language list, select a language.
This product profile will be available for products in stores that use the same language as the language that you select here.
-
In the Currency list, select the currency that will be used for the products linked to this profile.
Note: This product profile will be available for products in stores that use the same language and main currency that you select here. After setup, you cannot change the language of a product profile, but you can change its currency, as long as the product profile is not linked to a product. After the product profile is linked to a product, you can no longer change its currency.
-
Click Save.
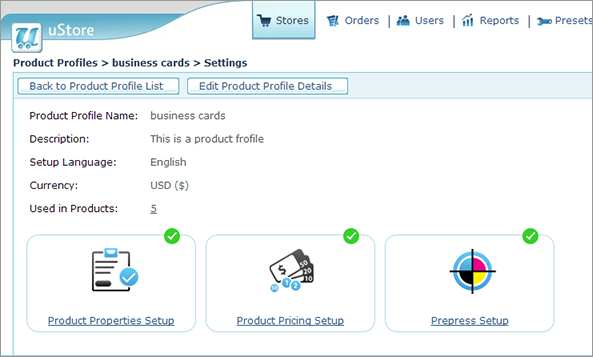
The Settings page of the product profile opens.

You can now proceed to set the following parameters:
-
Product Properties: Define product properties such as binding, color and paper stock.
-
Product pricing parameters: Configure the product price and cost as well as price and cost steps.
-
Prepress workflows: Select the workflow required for printing the product.
Additional settings, such as delivery and customization, cannot be defined in the profile and must be defined at the product level.
-
