Storefront Login Management
When you set up a business-to-business store, uStore provides you two registration methods:
-
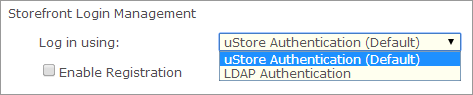
uStore Authentication (Default): Select this option to require customers to register to your store before they can view it.
-
LDAP Authentication: Select this option if you want to enable the store customers to log in to the store using their LDAP (Lightweight Directory Access Protocol) credentials.
uStore authentication
Store administrators can set a store to support user registration for unregistered customers. For example, this can be used for public stores that are not restricted to registered users. Users that log in to uStore using public registration will be directed to create a private account. Once an account has been set up at a store, customers can use their accounts to navigate through the store and make purchases.
If the Public Store (B2C) option is selected in the Store Type field, the Enable Registration checkbox is selected by default and disabled because registration is mandatory in public stores in order to be able to check out orders.
You can use the default uStore registration page. However, the registration page can be replaced with a custom page. Administrators can create a registration page that suites their specific needs and use it instead of the default one. For example, this feature can be used to include personal information fields that are not included in the default registration page.
To select the registration page:
-
Go to Store Setting > Set up Store, and click the General tab
-
Under Storefront Login Management, in the Log in using list, select uStore Authentication (Default).
-
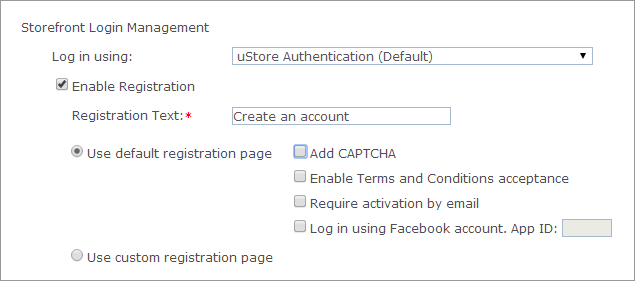
Select the Enable Registration checkbox.
-
If you want to use uStore's default registration page, select Use default registration page and then continue with the following:
-
Add CAPTCHA: You can add CAPTCHA to increase the level of security in your store. This checkbox is empty by default.
-
Enable Terms and Conditions acceptance: Select this checkbox to add the Terms and Conditions checkbox to the storefront Registration page, and thus require customers to accept the uStore terms and conditions during the registration process. In the storefront application, accepting the terms and conditions of the store during the registration process is mandatory.
Terms & Conditions HTML file: once the Enable Terms and Conditions acceptance checkbox is selected, you can upload an HTML file containing your legal Terms and Conditions document. Make sure your file is in HTML format. If you have a Word document, save it as HTML prior to uploading it to uStore.
To start the upload, click the Upload button, and in the Upload a Terms and Conditions HTML window browse to locate the file and then click Upload.
The uploaded file will appear as a link in the Store Setup page. You can click this link to open the HTML file in a separate browser window or click Replace to replace the uploaded file with a new one.
-
Require activation by email: Select this checkbox if you want to enable registration activation for this store. In this case, customers registering to the store will receive a registration activation email with the activation link. The activation must be performed no later than 48 hours from the registration time. If a customer did not activate the registration during this time, the registration will be cancelled.
-
Log in using Facebook account: Select this option if you want to enable store visitors to log in using their Facebook credentials. In the App ID box, enter the App ID that you received when you created the Facebook app.
After you set up the Facebook login feature in your store, store visitors will be able to sign in to the store using their Facebook credentials instead of their uStore credentials.
To be able to use this feature, you first need to create an application on Facebook.
-
-
If you want to use a custom registration page, select Use custom registration page, and enter the URL of the page in the Page URL field.
Note that these registration options are not available when you set up a store that uses LDAP authentication.
LDAP authentication
LDAP (Lightweight Directory Access Protocol) authentication enables customers to log in to the store with their organization’s login credentials without the need to create a new account.
LDAP and Secure LDAP (LDAPS) are the connection protocol used between the application and the network directory or domain controller within the infrastructure. LDAP transmits communications in Clear Text, and LDAPS communication is encrypted and secure. uStore supports both LDAP and LDAPS.
When a user logs in, uStore tries to match the LDAP domain-controller groups to existing groups in uStore. Group names that are found on both uStore and the domain controller are associated with the logged in user.
For example, if the user is member of Group1, Group2 and Group3 and uStore has a group named Group1, the user will be associated with Group1.
When you use LDAP Authentication, you need to perform the following steps.
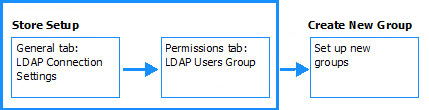
On the General tab, you configure the LDAP connection settings. In this step, you connect to the LDAP provider server to retrieve the required user information. Then you make sure that the user’s first name and email labels in the uStore system are mapped to the appropriate LDAP property (attribute). Different organizations may use a different property names to define users names.
For example, the first name property may be mapped to the following properties: CN, givenName, givenName and SN (last name). If you do not know how your active directory is structured, consult your System Administrator.
-
On the General tab, you also define a Group Name Prefix to be used to distinguish domain controller groups from other uStore groups.
-
On the Permissions tab, you select the group that will be used as the default group for users who log in with their LDAP credentials. If you do not want to associate all LDAP users to the same default group, you can select None and create new groups with specific permissions.
-
On the User Group Setup page, you need to create new user groups with the required permissions for the LDAP users. When you create the user groups on uStore, you must follow this naming convention: [Group Name Prefix].[domain controller group name].
For example, if you set the prefix to Acme and the user in the domain controller is a member of Group1, uStore associates the user with the uStore group named Acme.Group1.
To learn more about how to create user groups, see Adding a New User Group
To configure LDAP authentication:
-
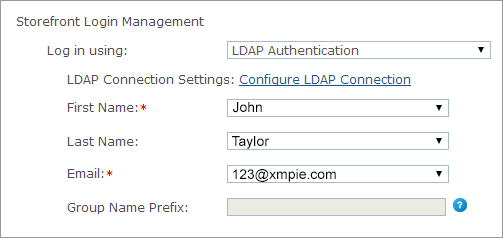
Under Storefront Login Management, in the Log in using list, select LDAP Authentication.
-
Click the Configure LDAP Connection link.
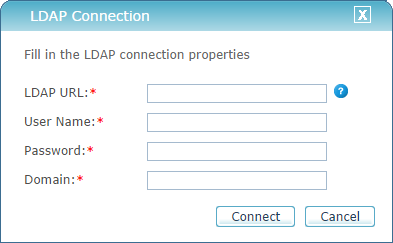
The LDAP Connection dialog box opens.
-
Fill in the following information (you may need your system administrator’s help to fill in the required LDAP information):
-
LDAP URL: The LDAP URL indicates the location of the Active Directory server.
The LDAP connection string is made up of the server's name, followed by the path of the container object where the user is located. Examples of LDAP URL strings:
LDAP://servername.domain/DC=domain,DC=com
LDAP://myDomainController.myDomain.com/CN=Users,DC=charrandev,DC=comIn case of secure LDAP, type LDAPS, followed by the connection string.
For more information, see:
http://stackoverflow.com/questions/11458291/how-do-i-build-this-ldap-connection-string
http://serverfault.com/questions/130543/how-can-i-figure-out-my-ldap-connection-string
-
User Name: Your LDAP server user name.
-
Password: Your LDAP server password.
-
Domain: Your organization’s domain server name.
-
-
Click Connect.
uStore connects to the LDAP server.
-
After a successful connection, make sure that the appropriate property names are selected in the following fields:
-
First Name: Select the name of the property used for users’ first names. This property name can be givenName or CN, but some directories may use a different property name as well.
Note: Consult with your system administrator to make sure that you map the property names correctly.
-
Last Name: The property name commonly used for last names is SN. This property is not mandatory. If you do not select the property used for last name, select the option None.
-
Email: Select the name of the property used for users’ email. This property name is usually mail.
It is important that you select the correct email property name. uStore uses the email address to send out several types of notifications.
-
Group Name Prefix: Fill in a name that will be used as the prefix of the uStore user group. The Group Name Prefix is used to distinguish LDAP domain controller groups from uStore groups.
-
-
On the Permissions tab, under Automatic Assignment to LDAP Users Group, select a group from the list.
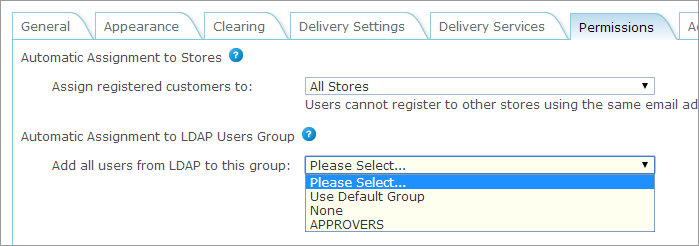
All users that log in using LDAP authentication are added to this group. The group that you select here does not replace any other group that LDAP users may belong to.
To make sure that the LDAP users are provided the required permissions, it is recommended that you create a new user group for each LDAP group and assign each group with the relevant permissions.
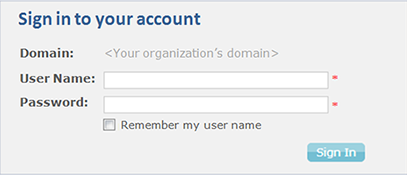
After you set up your store with LDAP authentication, users will be able to log in to the store with the same credentials used in their organization and won’t need to create a new user for uStore.
Create a Facebook app
The Facebook App option saves users the process of registration. For example, instead of the user having to register to a store, the user can use the login with Facebook option, and then all of the user’s registration details are retrieved from Facebook. This eliminates the sometimes lengthy process of registration, which can cause the user to leave the page.
To be able to implement Facebook login on your store, you first need to create an application in Facebook. When you set up the Facebook login on uStore, you will need the application ID provided by Facebook.
Prerequisites
-
Before you create a Facebook app, make sure that you have an account on Facebook.
-
If you haven’t registered as a Facebook developer, you will be requested to do so once you start creating the app.
To create a new app on Facebook:
-
Log on to Facebook and go to https://developers.facebook.com
-
On the toolbar at the top of the page, click Apps and then Add a New App.
-
Click WWW, enter the name of the app, and then click Create New Facebook App ID.
-
From the Category list choose Apps for Pages, and then click Create App ID.
-
In the Tell us about your website section, enter your site’s (store’s) URL and/or mobile site URL. Make sure that you add https:// to the URL address.
-
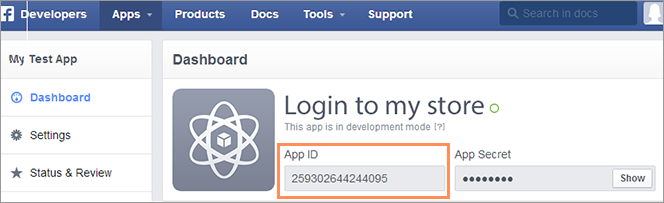
On the toolbar click Apps and select your app name.
The Dashboard opens. Notice that the App ID appears here. Make a copy of this number for later use.