Creating a New User Group
User groups can be created in one of the following ways:
-
Automatic user group creation upon new store creation: each time a new store is being set up, the system automatically creates new customer and administrator groups based on the default customer and administrator permissions groups.
-
Manual user group creation, as described below.
To create a new user group from the user groups window:
-
On the menu bar, click Users and then select Create New Group.
The User Group Setup page is displayed.
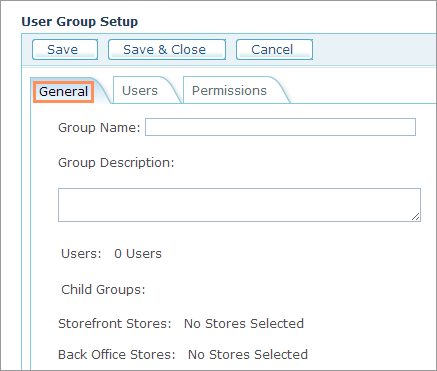
The User Group Setup page contains three tabs: General, Users and Permissions.
-
In the General tab, fill in the Group Name and the Group Description fields.
Note: When you create user groups for LDAP users, you must follow this naming convention: [Group Name Prefix].[domain controller group name]. To learn more, see Creating User Groups that Match LDAP Groups.
In addition, the User Group Setup page displays the following information (in case a new group is created, this information is missing):
-
Users: The number of users assigned to the group ("0 Users" in case a new group is created). When a new user group is created, it does not include any of the existing users. You must first save the group and then import a Users list or add the relevant existing users and assign them to the new user group.
-
Child Groups: Lists the groups that inherit permissions from the current group.
-
Storefront Stores: The storefront stores to which the current group is granted access permissions ("No Stores Selected" in case a new group is created).
-
Backoffice Stores: The backoffice stores to which the current group is granted access permissions ("No Stores Selected" in case a new group is created).
-
-
Click Save.
You can now proceed to assign users and permissions to the user group.