Testing and sending an SMS touchpoint
After you have configured your SMS touchpoint, you can test it.
You can send a test SMS to yourself or to a recipient that is not defined in the list. No tracking is activated when testing.
Once you have finished testing, you can proceed to actually sending the SMS.
Test an SMS touchpoint
-
In the diagram, click the Production icon
 above the touchpoint to open the Production
dialog box.
above the touchpoint to open the Production
dialog box.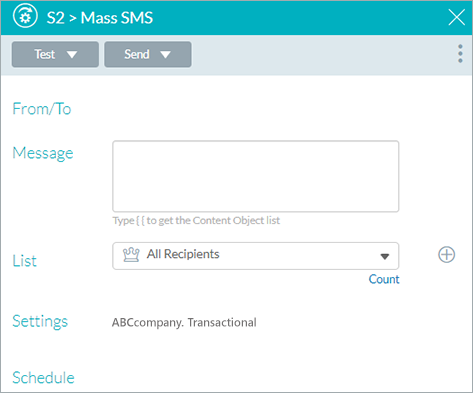
-
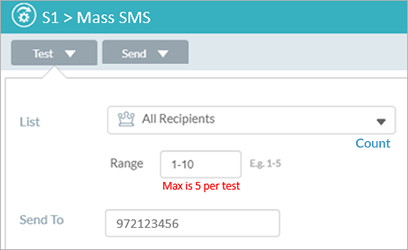
Click Test.
-
From the List dropdown list, select the filtered list for which you wish to execute a test. To create a new filtered list, click the Add icon
 . See Adding
a list.
. See Adding
a list. -
Select a range of recipients. By default the range of 1-5 is selected. Initial testing is usually performed for a few records at a time in order not to waste time on testing the entire list.
-
In the Send to field, enter the phone number of the test recipient. Note that only a single Sent To number is supported. The default number is the telephone specified in the profile of the current user.
-
Click Test.
The test is performed. Tracking is not recorded.
The last run details are displayed in the Production dialog box.
Test runs are shown in the Run Center.
Send mass SMS
-
In the diagram, click the Production icon
above the touchpoint to open the Production
dialog box.
-
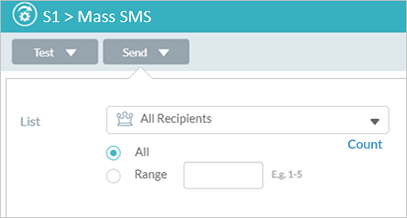
Click Send.
The Send dialog box is displayed.
-
In the List dropdown list, make sure that the selected list is correct. You can select a different list to run production for a subset of recipients (for example, those recipients that were skipped in the previous run). To create a new filtered list, click the Add icon
. See Adding
a list. -
Select a range of recipients. By default All is selected. To define a specific range, select the Range radio button and enter the range of recipients. Changing the range is useful to send SMSs in batches to avoid website overload.
-
Click Send.
The last run details are displayed in the Production dialog box. Send runs are shown in the Run Center.