Creating an Audience
Creating an audience involves breaking down your target market into segments, and then applying rules to each. Each segment is defined by a set of parameters. For example, a Single Males segment includes all males that have no spouse.
To create an audience:
-
On the Audiences panel, click the Option
 button and from the menu select New Audience.
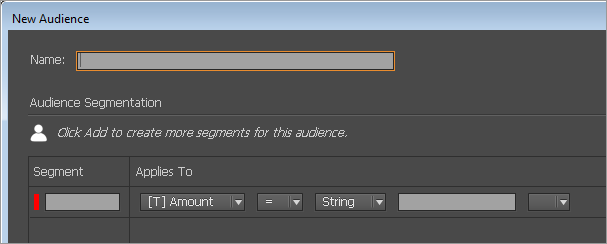
-
In the Name text box, enter the name of the audience.
-
Under Audience Segmentation, in the Segment column, enter the name of the first segment.
-
Select the parameters that define the segment. For example, the Single Males segment consists of men who have no spouse, and can be defined as follows:

-
Click Add to add additional segments. Notice that the segments are color coded, meaning that each segment is associated with a different color.
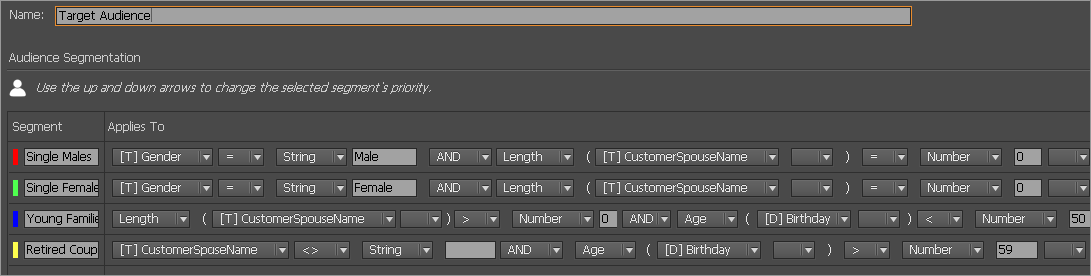
Note that an audience must include at least one segment.
-
Use the up and down arrows located at the bottom right corner of the dialog box to rearrange the order of the segments, if needed. For more details, see Position of Segments in the Segment List below.
-
After you click OK, the dialog box closes and the Audiences panel is populated with the new audience and its segments.
To the right of each segment appear the number of records included in the segment.
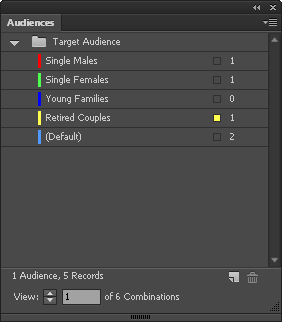
The segment which the currently displayed recipient belongs to is marked with a square, matching the color of the segment. In the following example, recipient number 2 belongs to the Retired Couples segment.
Position of segments in the segment list
The position of the segment in the segment list is important. At the bottom right corner of the New/Edit Audience dialog box you can see up and down arrows. These allow you to rearrange the order of the segments according to relevance. The highest segment in the list takes precedence over those below it. This means that the system will check if the recipient record meets the criteria of the first segment in the list. If not, it will check the second segment, and so on.
If you are familiar with programming, this is similar to Switch/Case statements.
Define values for each segment
After creating your audience, you can go on to define the content object values for each segment.
For detailed instructions on how to manage and work with content objects and variables, refer to Managing Content Objects and Variables.
To define segment values:
-
In the DynamicContent panel, right-click the required content object and then select Edit Rule.
The Edit Content Object dialog box of the content object opens. At the top appear the content object name and type.
-
Select the Audience option, and then, if more than one audience has been defined, select the required audience from the list.
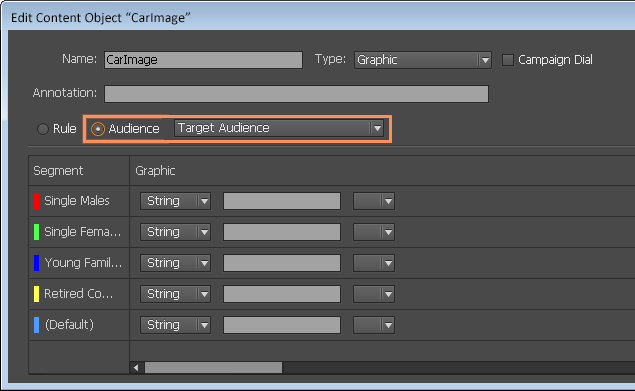
-
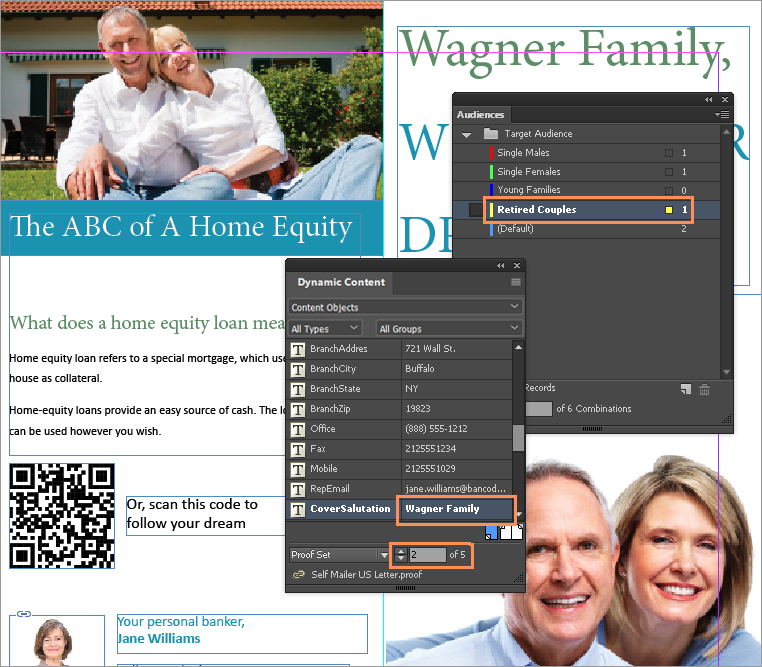
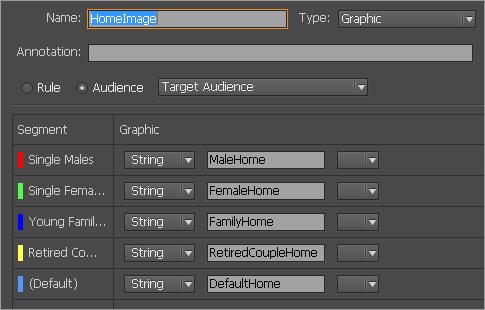
Define the content object value for each of the segments. In the following example, each segment is assigned a specific HomeImage image, which is the top graphic in the document.
Note that the Default segment is created by the system and handles all cases which did not meet the criteria of any of the segments. It always appears last in the list.
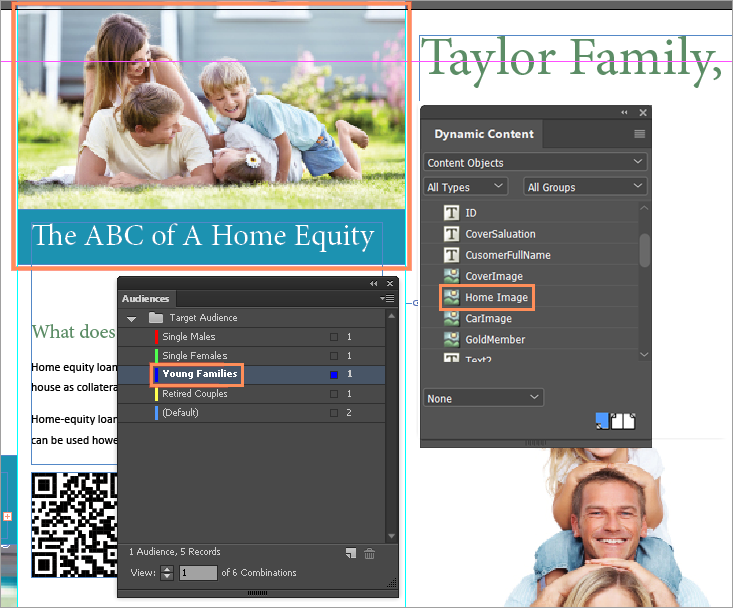
The result for the Young Families segment looks as follows:
Note that when an audience is linked to a content object, the icon of the content object in the Dynamic Content panel changes to
 .
. -
Continue to define additional content object values for the audience.
Note: Similarly to content objects, you can also link variables to an audience.
Add an additional segment at a later stage
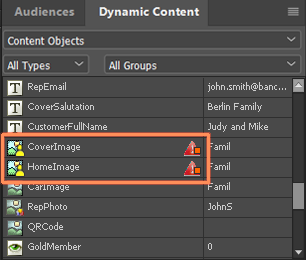
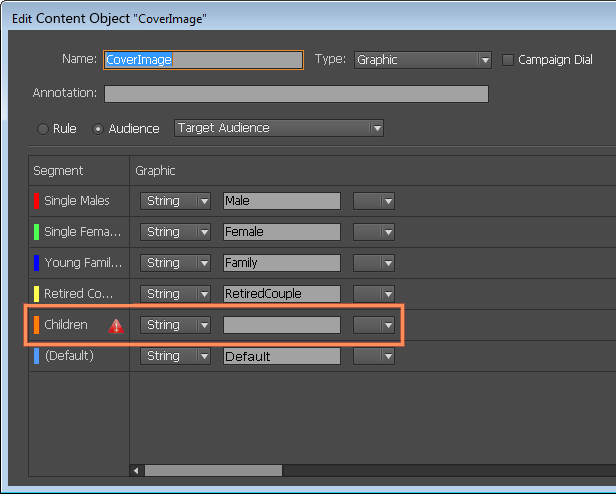
If you add a new segment to an audience after content objects have already been linked to the audience, a warning icon will appear besides the new segment, indicating that the new segment is not defined for one or more content objects/variables.
In the following example, the Children segment was added to the audience.

Notice that on the Audience panel, all content objects that are linked to this audience are also marked with a warning icon (that shares the same color as the new segment), indicating that they have undefined values for the new segment.
You must return to the Dynamic Content panel, to the Edit Content Object dialog box of each content object, and define content object values for this segment as follows:
After editing all content objects that are linked to this audience, the warning icons are removed.