Linking a Document to a Plan
To obtain the content objects defined in your campaign logic, you must first link your document to a plan file. The Plan represents the campaign’s logic component and is defined with the uPlan application.
uCreate allows to link to a plan file (instead of linking directly to a data source), in order to use a uPlan workflow. uPlan allows you to work with both simple and complex ODBC-compliant data sources, including Text, CSV, Microsoft Excel, Microsoft Access, FoxPro, DBF, SQL Server and Oracle.
When working with a 2G technology without connectivity to Circle, you need first to download the plan from Circle and then link the document to this downloaded plan.
To link a document to a plan:
-
Open your document, and from the Dynamic Content menu, select Set Input Data.
-
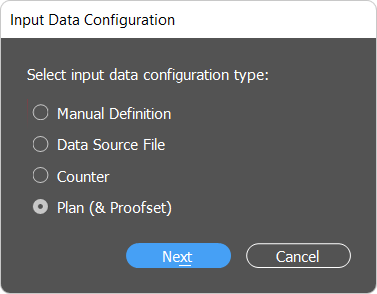
In the Input Data Configuration dialog box, select Plan (& Proofset).
-
Browse and locate the plan file.
The Dynamic Content panel automatically lists all content objects in the plan file.
You can relink to a different plan at any later time by selecting Relink Plan from the Dynamic Content menu.
Edit a plan
When a plan is linked to a document, you can open and edit the plan in the uPlan application while you are working with InDesign. This option is only available if you have the uPlan module installed on your computer.
In addition to editing a plan in uPlan, it is also possible to edit content objects and variables using the uCreate Print rule editor (see Managing Content Objects and Variables).
To edit a plan:
-
From the Dynamic Content menu, select Advanced > Edit Rules in uPlan.
The uPlan application opens and displays the linked plan.
-
Edit the plan and save the changes.
-
Close uPlan and return to InDesign.
A message is displayed, prompting you to reload the plan file.
-
Click Yes to reload the plan.
Reloading the plan will ensure that you are working with the most up-to-date copy of the plan.
If any of the changes you made to the plan affect the content objects currently used in your document, the plan will no longer be compatible with your document. A dialog will appear, describing the cause of the incompatibility.
-
Choose one of the following:
-
Ignore: ignores the inconsistencies and allows you to continue working with the currently linked Plan.
-
Cancel: cancels reloading.
-
If you use a plan that is incompatible with the
dynamic document, it will result in unsuccessful print production.
If you choose to ignore, this message will reappear
the next time you open the document (after saving). To avoid this message,
edit the document to accommodate the changes described in the message,
or update the plan to reflect the current design.
Link a document to a proof set
Linking to a proof set is only available if a document is linked to a plan.
In order to link your document to a proof set, first create the proof set in uPlan or uProduce.
To link your document to a proof set:
-
From the Dynamic Content menu, select Advanced > Link to Proof Set.
-
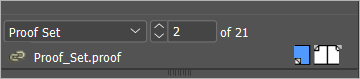
In the Select a Proof Set File dialog, locate and select the proof set file (*.proof; or proof set package, *.ppkg) that corresponds to the content objects currently defined in your document.
-
In the Dynamic Content panel, use the arrows at the bottom to choose the record you want to preview in the design. The dynamic objects in the design are replaced with the values from the proof set.
While linked to a proof set, if you create new content objects, delete content objects, or change the type of content objects, your proof set will be incompatible with these changes. To avoid inconsistencies, you will be unlinked from the proof set.
More topics
Converting Content Object Rules to a Plan File