The Gallery List/Grid View Input Control enables the customer to choose a value from predefined options. The options are displayed as a list/grid of icons, with names and descriptions.
Similarly to the Dropdown and the Radio Button lists, when you select Gallery List/Grid List, you can also define the JDF node for each value.
Each property option of a Gallery control may include the following icons.
· Property option’s icon: Displayed near the description.

· Property option overlay image: A graphic display of the property that overlays the document thumbnail for a more reliable product preview.
To upload icons, go to the Property Options Icon Management window.
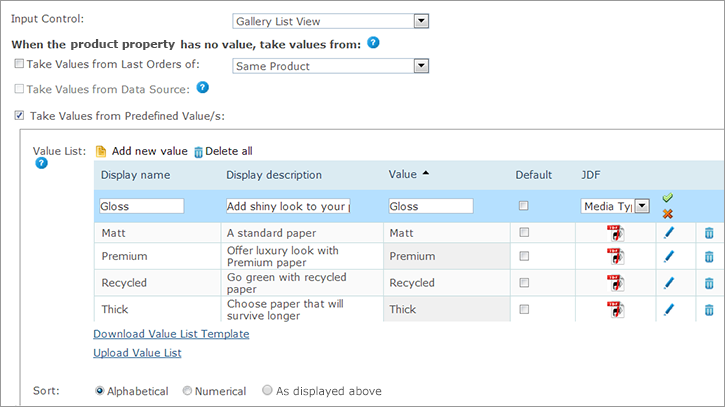
To set the predefined values for the Gallery List/Grid View input control:
1. Click the Add new value link and enter a value and
a display name to be presented in the selected control in the Value and
Display name fields respectively.
The name is displayed to the customer and the value is sent to uProduce
as the product value.
2. To add a JDF node to the value, in the JDF node set list select the equivalent option.
 The list of JDF nodes includes the nodes set in Presets
> System Setup > JDF
Node Set. For more information, see Setting
Up JDF Nodes.
The list of JDF nodes includes the nodes set in Presets
> System Setup > JDF
Node Set. For more information, see Setting
Up JDF Nodes.
3. Click ![]() to
add the value to the list.
to
add the value to the list.
4. Repeat steps 1 - 3 to add more values to the Value List.
5. After you add all the required values, set one of the values as the default value by selecting the required checkbox in the Default column. Note that a default value must be selected.
6. To edit a value
in the Value
List, click the Edit ![]() icon next to the value you want to edit.
icon next to the value you want to edit.
7. In the Sort field, you can define how the list of values will be sorted in the Storefront: alphabetically (select Alphabetical), numerically (select Numerical) or chronologically (select As displayed above) according to the time they were created.
8. You can download
a Value List Excel template by clicking the Download
Value List Template link. Once it is fully prepared you can
upload it again by clicking the Upload Value
List link.
The Value List will be automatically
populated with the values you defined in the Excel spreadsheet.
You will be notified if errors exist in your spreadsheet. For example:
– If an existing value in the Value List has been defined in the spreadsheet.
– If an existing value text in the Value List has been defined in the spreadsheet.
– If the Value List template is missing a value or a value display text.
– If the Value List Template includes duplicates of values or values’ text