Note: This is not available for StoreFlow Cloud customers.
When you set up a product profile or a specific product, you can associate the profile with one or several prepress workflows. Prepress workflows determine how the product will be printed after it is ordered by a Storefront customer.
uStore provides two types of prepress workflows:
· Seamless integration with Xerox FreeFlow automation module: You can define multi-step workflows that automate imposition, the addition of crop marks, color bars, watermarks, page rotation, page insertions on your FreeFlow Core application and these workflows will be available on uStore’s Back Office.
FreeFlow Core is an optional module that you can purchase with uStore.
· Manual workflows: You can create hot folders for sending purchased products to production on 3rd-party print servers.
Before you set up prepress workflows, you need to create workflow providers and select the available workflows in the Presets > System Setup page.
1. First, create your workflow providers. For details, see Setting Up Prepress Workflow Providers.
2. Then set up prepress workflows. For details, see Setting Up Prepress Workflows.
After you set up the prepress workflows that will be available for your uStore account, you can associate a prepress workflow to a product profile or to a specific product.
To add a new prepress workflow:
1. In the Stores view, select Product Profiles.
2. In the Product Profile List page, select the required Product Profile.
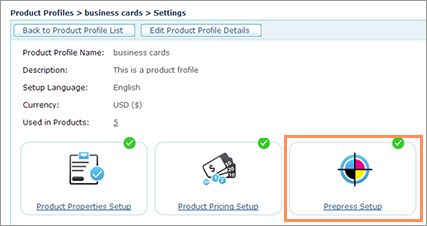
3. In the Settings page, click Prepress Setup.
4. In the
Prepress Setup page,
click the Add
workflows
button.
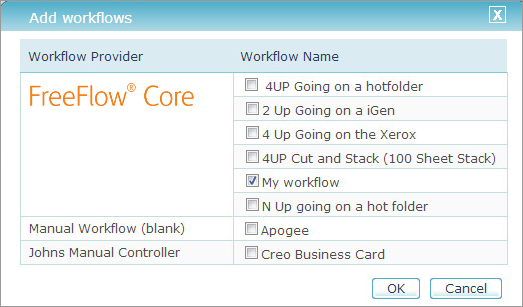
The Add workflows dialog
box is displayed. The dialog box lists all the workflow providers and
their respective workflows.

5. Select the workflows that you want to make available for the product profile. You can select several workflows.
6. Click
OK.
The selected workflows are added to the Prepress
Setup page.
Note that uStore references the flow by its name. Changing the flow name in FreeFlow Core will prevent uStore from using this flow. If you still wish to change the name, repeat steps 4-6 above and select the new name.
7. To define which of the workflows in the list is the default workflow, select the Default checkbox.
8. If the
list includes only one workflow, you can select Auto-run
to prepress production.
This feature automatizes the job’s production and sends it directly to
production. When you select this option, when ordered, the job skips the
Ready for Prepress queue and
goes directly to the Prepress in Progress
queue.
Learn more about FreeFlow
Core ![]()