
 View what's in this topic
Generating Proof Sets
Before processing the document, you can generate proof sets in either uPlan or in uProduce. This procedure assigns actual values to the ADOR objects defined in your plan. Once you have generated a proof set, you can use it to preview the way the document instances will appear for a specific set of recipients.
Before generating a proof set, you must first create and upload the campaign data source and plan file. You can generate a proof set based on a number of records, or by defining a query. The resulting *.ppkg file can then be saved to the preferred location and opened using the Link to proof set option in the uCreate Print panel.
If your plan includes graphic or text file ADOR objects, uProduce will search for the assets files in your campaign asset sources. For more information on asset searches, see How uProduce Searches for assets.
To create a proof set:
-
Upload a data file and a plan file.
-
On the toolbar, click Campaign, and in the campaign tree select Plan to display the plan page.
-
Click the Generate button.
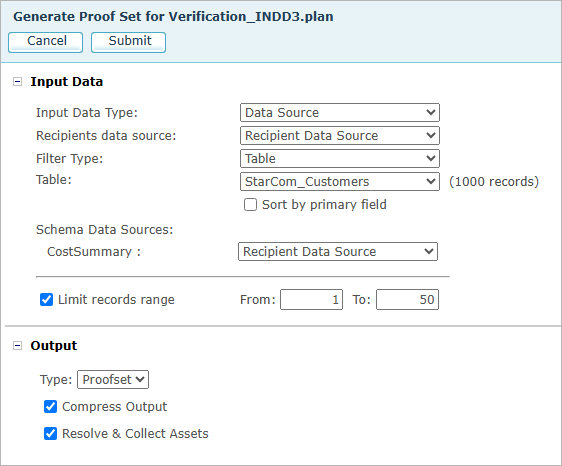
The Generate Proof Set page is displayed.
-
Select the required options in the Generate Proof Set page:
Option
Description
Input Data
See Input Data.
Limit records range
Select the checkbox to enter a range of recipients to be included in the proof set.
Clear the checkbox to include all recipients in the proof set.
Output
-
Type: Select the type of proofset output (proofset file or CSVX). In case of CSVX, you can select the delimiter (comma, tab, semicolon, etc.) of the file.
-
Compression Output: Compression allows you to compress the resulting output.
-
Assets: Select Resolve & Collect to resolve the assets and add them to the output.
-
-
Click the Submit button.
-
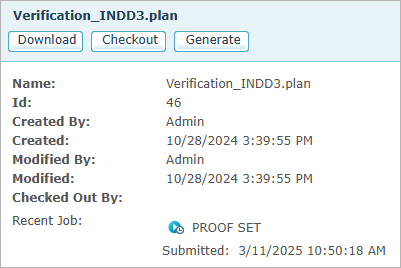
A
 sign next to the Recent Job field
indicates that messages have been produced relating to the job. Click
this sign to view the messages.
-
If the process of preparing the proof set is successful, the
 icon is displayed next to
the Recent Job field in this page and in the
Job Center.
-
-
To save the resulting proof set file, click the
icon
to the left of the proof set job listing here or in the Job Center page.