Creating a Campaign from a VPC Package
It is possible to create a new campaign by uploading a VPC package.
To upload a VPC package file:
-
In the Accounts page, click the account name.
A list of all previously defined campaigns for this account is displayed.
-
Click the Upload button.
The Upload Campaign dialog is displayed.
-
In New Campaign Name, enter the name of the campaign you wish to create. You can leave the campaign name field empty for auto filling, as described in the next step.
-
In Package File, enter the path of the VPC package (*.vpc) file, or click the Browse button to locate the file. If you left the New Campaign Name field empty and you are using the Browse option, the campaign name will automatically be filled according to the name of the *.vpc file.
-
Click Upload to upload the package.
-
If needed, adapt the campaign for the web. For details, see Adapting Campaigns for the Web.
At the end of the process, the newly uploaded campaign appears in the campaign list. It is now hosted on uProduce. The Description column details whether it is an editable VPC campaign or a non-editable one.

Editable VPC campaigns
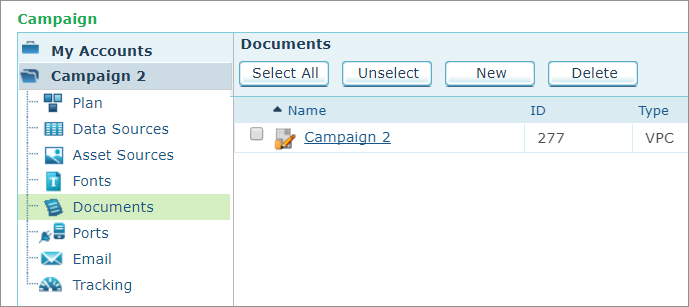
Looking at the editable campaigns (in the above example, Campaign 2), you will see that the various components in the package are placed at their correct locations on the campaign tree: the VPC document resides in the documents folder, the data source resides in the data sources folder.
In addition, a trivial plan, containing the data source fields, has been created and placed in the plan folder. Each field in the data source becomes a Text ADOR.

At this point, you can run production of this VPC campaign using XMPie’s advanced options, such as splitting the job, creating PDF or PDF/VT output and setting the job priority. For an explanation of the production process, see Producing Print Output Files. Note that not all production options are available for VPC production.
Now that you have a plan and a data source, you can easily integrate with other XMPie products to enhance your campaign. For example, you can
-
Create new email documents which will include the data source information. For details, see Working with uProduce Email.
-
Download the plan in uProduce and link it to a document in uCreate Print, then export it as an INDD or XLIM package (dpkg), and upload it to your VPC campaign.
-
Check out the plan file and modify it. For example, if the intention was to use formatted numbers, you can manually modify the trivial ADOR to FormatNumber(<field>, <the desired format>).
Be cautious not to remove ADORs.
Non-editable VPC campaigns
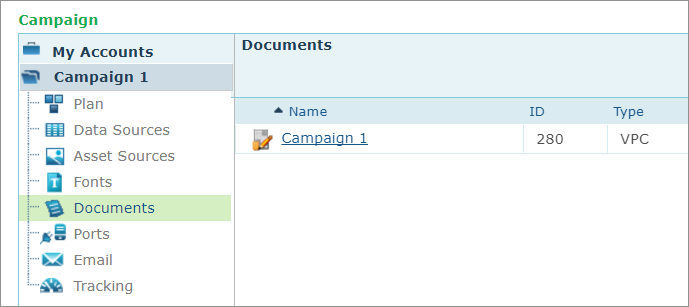
Looking at the non-editable campaigns (in the above example, Campaign 1), you will see that the campaign’s components are disabled, except for the documents folder. You can run production of this VPC campaign, however, you will not be able to edit any of its’ components. Editing is possible only in VPC campaigns that include CSV data sources.
In addition, you cannot download the entire campaign, only the VPC file.
For an explanation of the production process, see Producing Print Output Files. Note that not all production options are available for VPC production.

