Planning a flow in the canvas
The Plan tab is the place where you draw your flow diagram. Here you can brainstorm and layout your initial ideas and then refine the diagram until it represents your project plan.
The main area of the Circle workspace is the canvas where you plan your project.
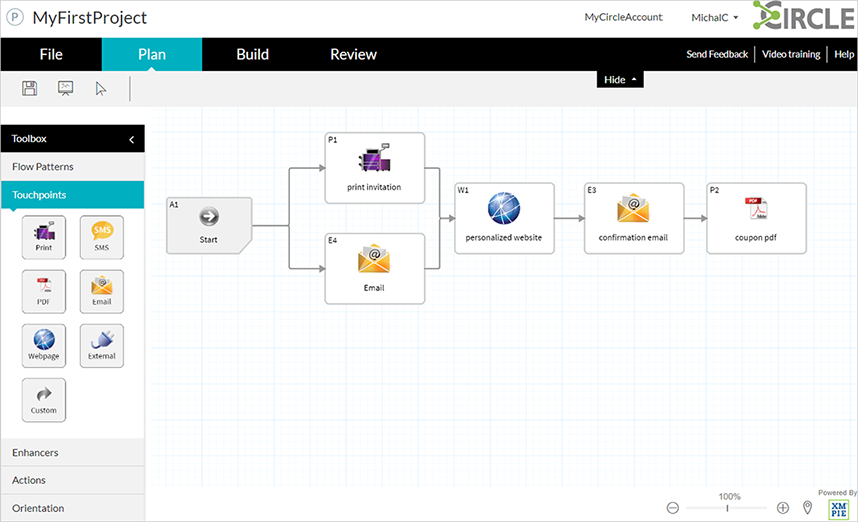
You design a flow by dragging and dropping nodes from the toolbar to the canvas. The diagram represents your project which you can brand with your customer's logo, and then share an image of the diagram or a link to the project with your customer.
The toolbox on the left provides access to a variety of visually-rich nodes that can be used in your flow to plan the project:
-
Touchpoints: Represent an interaction with the target audience. Touchpoint interaction can be implemented through different media and channels, for example, a print touchpoint, an email touchpoint, and SMS touchpoint or a webpage touchpoint.
-
Enhancers: Can be added to the touchpoints to enhance the customer experience, for example, a QR code.
-
Actions: Can be added to the touchpoints to generate a specific action, for example, a report on whether the recipient visited the URL provided in the email.
-
Orientation: Can be added to the touchpoints to make the project clearer, for example, a separator to divide the flow into sections.
-
Flow Patterns: Allows you to incorporate previously defined flows into the new flow.
For more information, see Working with the plan toolbox.
Sample flow
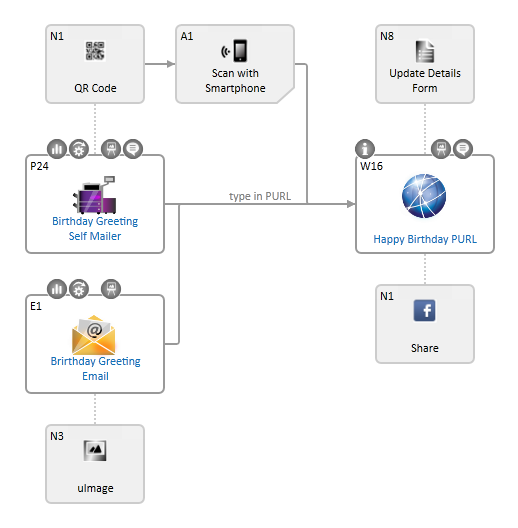
This sample demonstrates a birthday greetings project.
Based on recipient communication preference, birthday greetings can be sent in the following ways:
-
Print (Birthday Greeting Self Mailer): Sent to a recipient whose birthday is the following month.
-
Email (Birthday Greeting Email): Sent every day, early in the morning, to all recipients whose birthday is on that day.
The printed greeting contains a QR code leading to a webpage containing a personalized video.
The email greeting contains a link leading to a webpage containing a personalized video.
Recipients can share the experience with their friends through Facebook and email.
Navigate the diagram with the Minimap
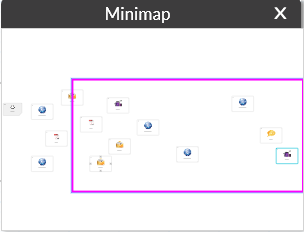
A diagram may be too large to fit the screen. In this case, you can use the Minimap view to allow you to navigate to a hidden part of the diagram.
As opposed to zooming out which makes large diagrams too small to be able to work with, Minimap allows you to view the diagram in full size by restricting the view to the desired area.
For large diagrams, the Minimap is very useful since it gives you a quick bird's eye view of the entire diagram and an efficient way to navigate to a hidden part of the diagram.
To navigate the diagram using Minimap:
-
Click the Minimap icon
 at the bottom of the screen.
The Minimap window opens, displaying the entire diagram.
-
Drag the rectangle to navigate to the desired portion of the diagram.
The area included in the rectangle is displayed on the screen.
-
Close the Minimap window by clicking X or by clicking the Minimap icon again.
More topics
These additional topics will help you design your flow diagram: